Neste artigo: Vamos orientá-lo nas etapas para instalar uma unidade de cabeça dupla din em um Mercedes CLK 320 de 2002 a 2005 com uma revisão da unidade de cabeça que usamos. - Instalação em 2002 – 2005 Mercedes Benz CLK320
- Peças necessárias para a instalação
- Etapa 1:desconecte sua bateria
- Etapa 2:remover o corte de traço
- Etapa 3:desparafuse e remova a unidade principal do OEM
- Etapa 4:prepare o chicote de fios e a unidade principal
- Etapa 5:Acessórios de fiação:antenas, USB e microfone
- Etapa 6:instalando sua nova unidade principal
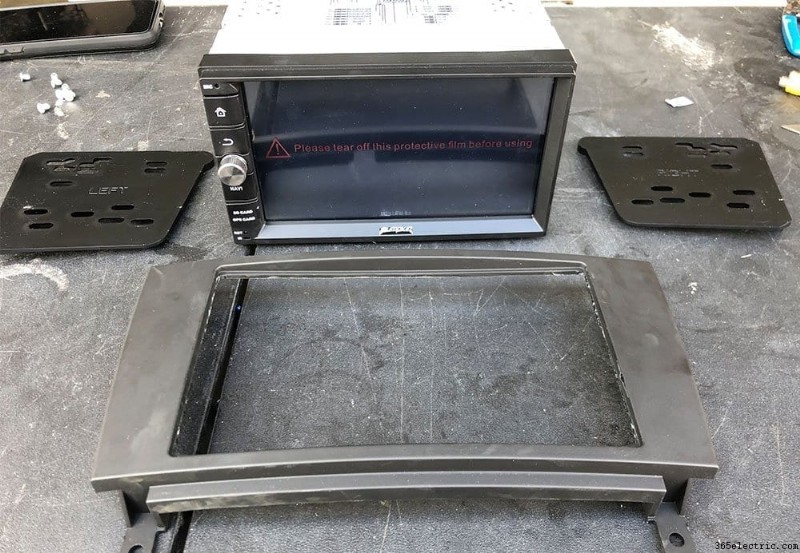
- A Unidade Principal – Revisão do PUMPKIN Android 9.0 Double Din
- Sobre ABÓBORA
- Pronto para uso
Visão geral da instalação: - Veículo:Mercedes Benz CLK 320 2005
- Unidade principal:unidade principal Pumpkin Android 9.0 Double Din
- Dificuldade:Média
- Tempo:3-5 horas
Vamos ser sinceros, a maioria dos veículos na era dos anos 2000 tem unidades de cabeça, ou apenas tecnologia de som automotivo em geral, que está desatualizada. O Bluetooth estava apenas pegando (embora as entradas auxiliares fossem a coisa), a navegação GPS era um luxo e as unidades de tela sensível ao toque eram poucas e distantes entre si da fábrica. Na época, o 05 CLK 320 era um carro ótimo, elegante e luxuoso, mas para trazê-lo para a era moderna, ele precisa de um upgrade.
Procuramos uma unidade de cabeça econômica, mas poderosa, para atualizar o estéreo do nosso CLK 320 de 2005 e atualizá-lo com algumas das tecnologias mais recentes para torná-lo um viajante decente. Ficamos emocionados quando o PUMPKIN nos procurou com uma unidade que poderíamos testar para eles.
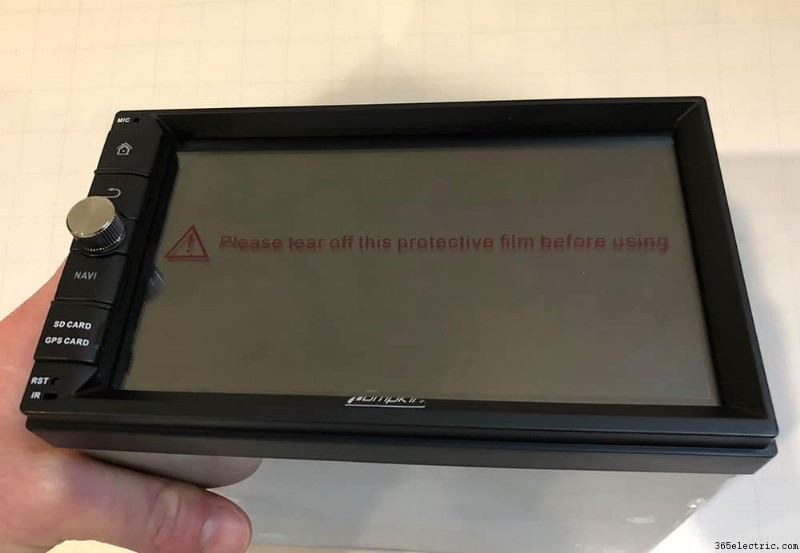
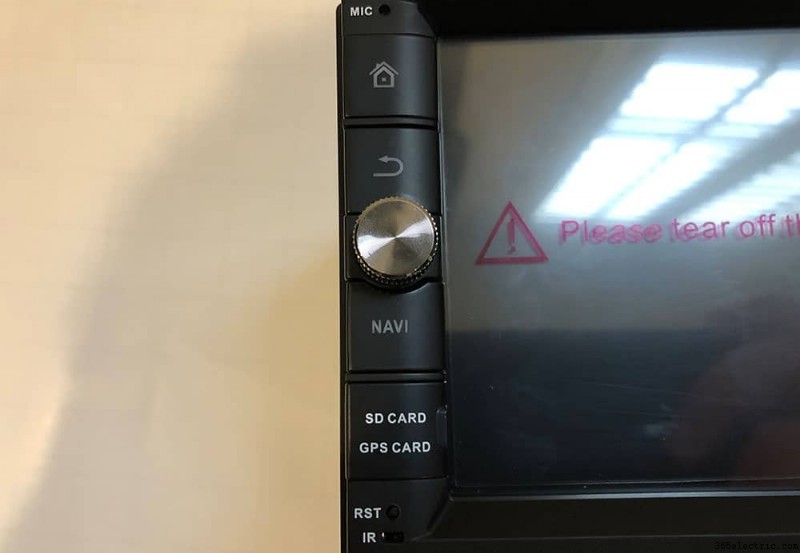
A Unidade Principal – PUMPKIN Android 9.0 Double Din
Esta instalação se aplicará a quase todas as unidades de cabeçote com tela de toque duplo din, Apple CarPlay e Android Auto, ou unidades de cabeçote multimídia duplo din, independentemente da unidade que escolhemos instalar. Se você deseja combinar com o produto que usamos nesta instalação, a unidade principal que escolhemos foi o Android 9.0 Double Din da PUMPKIN, modelo AA0495B. Você pode encontrá-lo na Amazon e diretamente no site da Pumpkin aqui.
Sobre ABÓBORA
A PUMPKIN é um fabricante com sede na China que foi fundado em 2014. Eles estão focados principalmente no mercado europeu, mas também estão presentes nos EUA. Seus produtos básicos incluem unidades de cabeça de reposição OEM, unidades de cabeça de din duplo e simples, leitores de DVD de tela junto com monitores de apoio de cabeça. A maioria de seus produtos são sistemas Android, incluindo o que instalamos em nosso CLK 320.
Pronto para uso
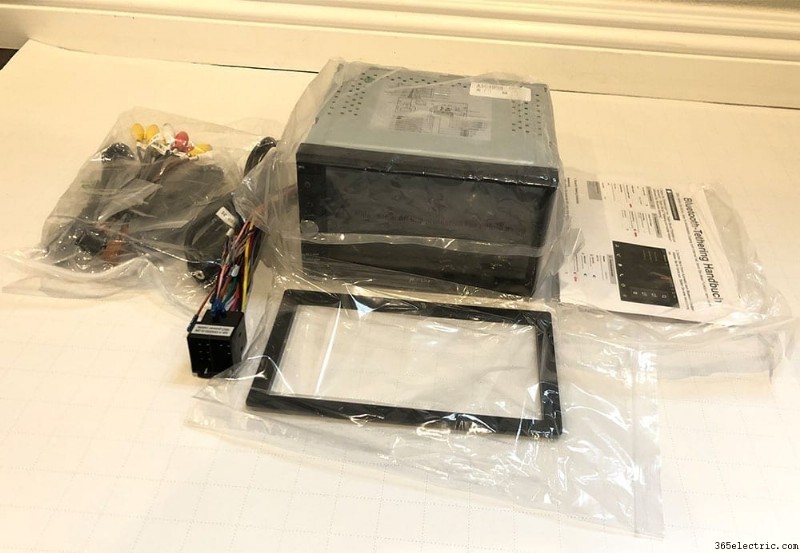
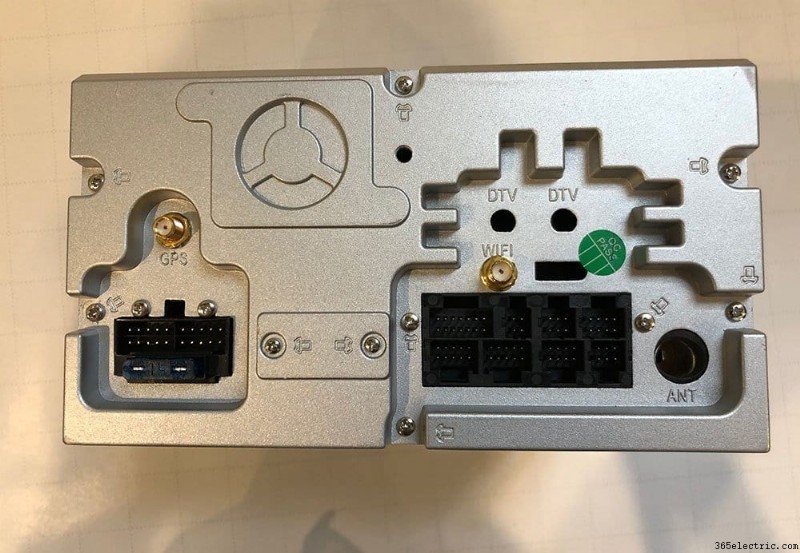
Na caixa, a unidade principal PUMPKIN vem com:
- 1x unidade principal Android
- 1 x cabo ISO
- 1x microfone externo
- 1x cabo de microfone USB+
- 1x cabo de saída de áudio
- 1x antena wifi (4,9 pés)
- 1x antena GPS
- 1x cabo de entrada AUX
- 1x cabo Cam-in
- 1x acessórios de instalação (chicotes de fios)
- 1x manual do usuário

Instalação em 2002 – 2005 Mercedes CLK320
Observe que as instruções e peças abaixo são para um CLK320 SEM Harman Kardon. Se você deseja instalar uma unidade principal em um CLK320 com Harman Kardon/estéreo amplificado, precisará de um chicote especial. É tudo-em-um, então a única coisa que você precisa fazer é substituir este chicote pelos chicotes Axxess que mostramos abaixo.
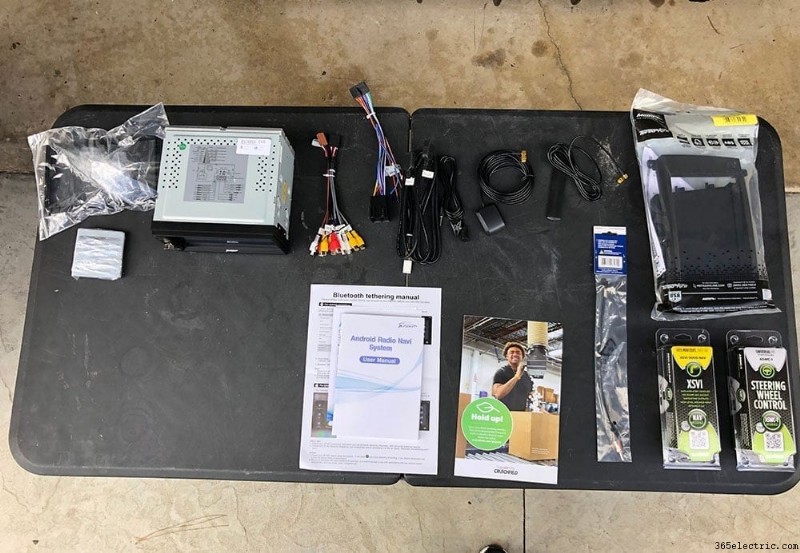
Peças necessárias para a instalação:
- Unidade principal (é claro) – Usamos nossa unidade principal PUMPKIN de din duplo
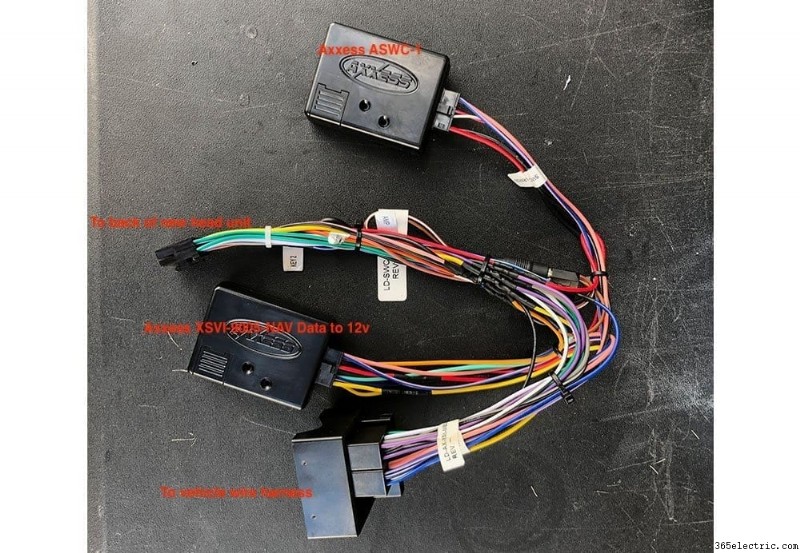
- Axxess XSVI-9005-Nav chicote – adapta os fios da unidade principal da Mercedes OEM à unidade principal do mercado de reposição. Também cria um acessório de alimentação de 12v. Sem este chicote e adaptador, você terá que encontrar outra fonte para conectar a alimentação de seu acessório. Este chicote também se conecta diretamente ao ASWC-1 abaixo.
- Axxess ASWC-1 – Interface de controle do volante. Opcional se você quiser manter os controles do volante.
- Metra 40-EU10 – Adapta o plugue da antena de rádio OEM a um plugue de reposição.
- Metra 99-874B – Kit de painel que adapta o duplo din ao recorte de painel de fábrica.
Aqui está um rápido passo a passo dos produtos que escolhemos para fazer a instalação.
Etapa 1:desconecte sua bateria
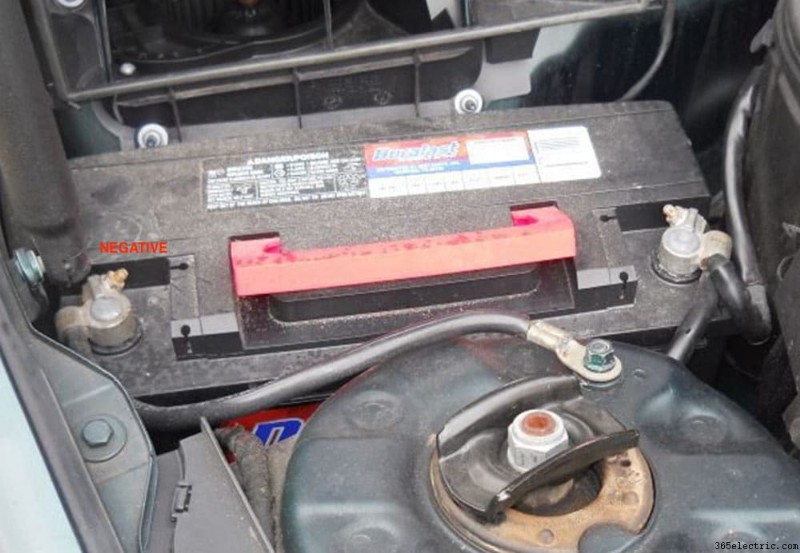
Primeiro de tudo - você precisará desconectar a bateria para não queimar nenhum fusível durante a instalação. A bateria do CLK 320 está localizada no lado do passageiro do carro, sob o capô, bem em frente ao firewall. Remova o terminal negativo do lado esquerdo da bateria (de frente para ele).
Etapa 2:remover o corte de traço
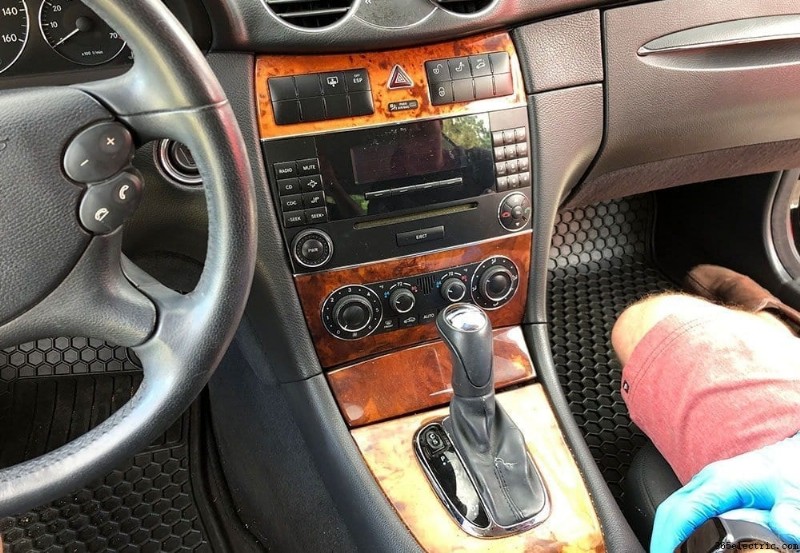
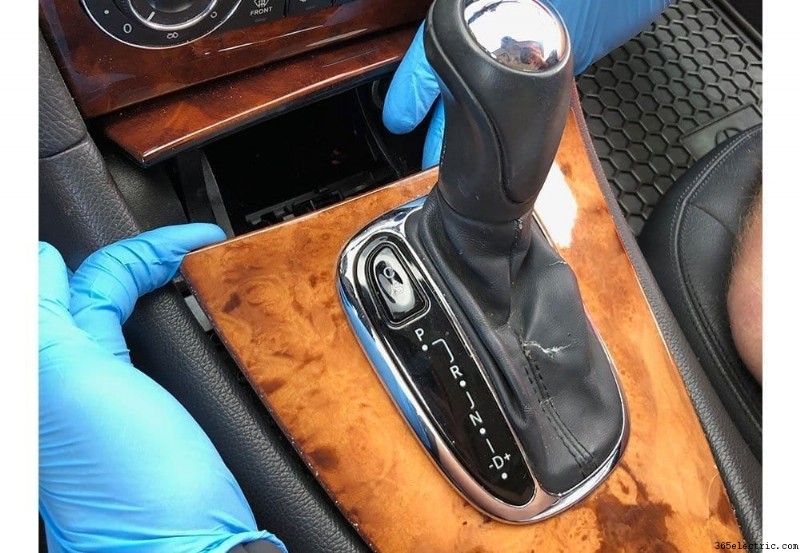
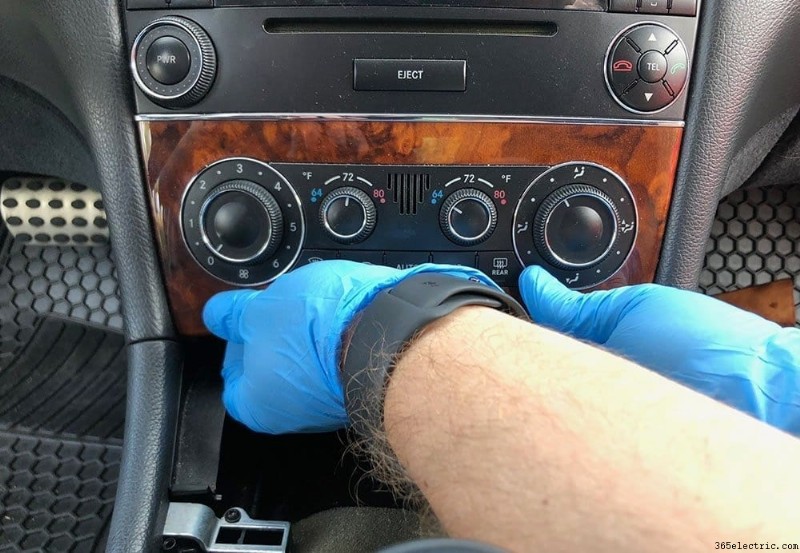
Comece com a peça de acabamento do console que envolve a bota de mudança. Abra o cinzeiro e puxe para cima começando pela frente, seguindo para trás. Em seguida, levante suavemente a parte de trás da guarnição da bota de mudança para cima e vá para a frente. Uma vez que o acabamento do porta-malas tenha sido removido, você pode então passar este acabamento pelo orifício no acabamento do console e remover totalmente o acabamento do console.
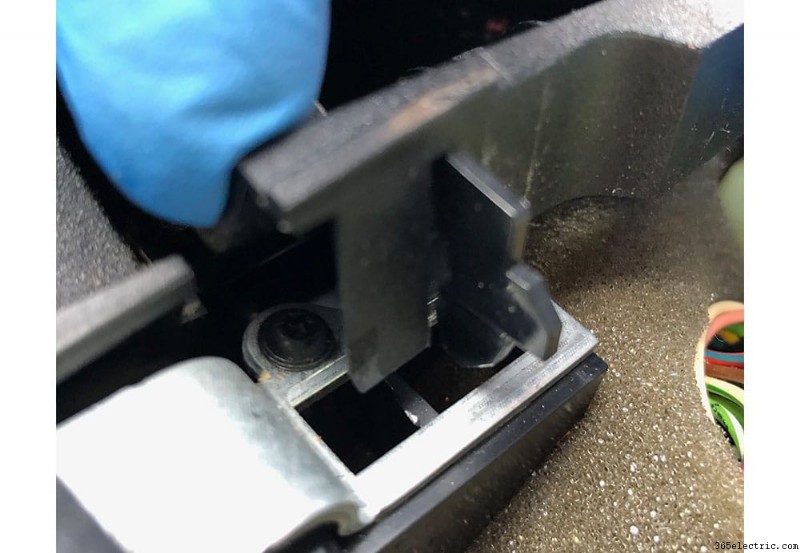
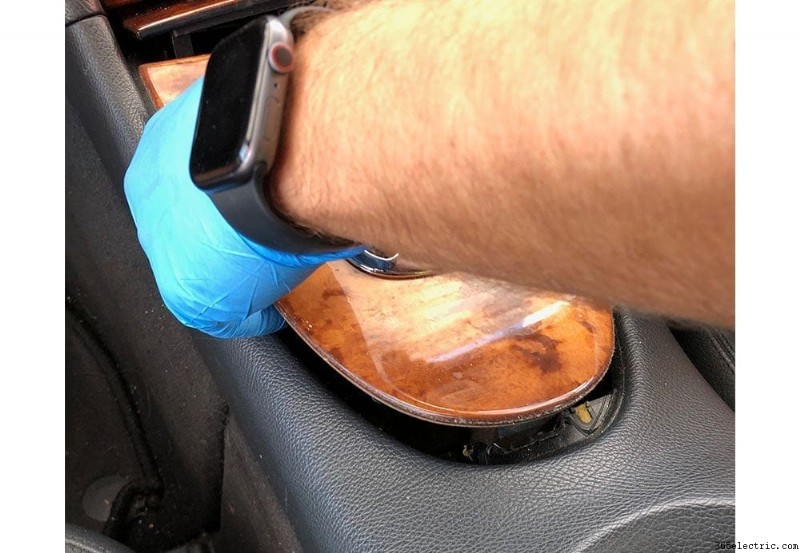
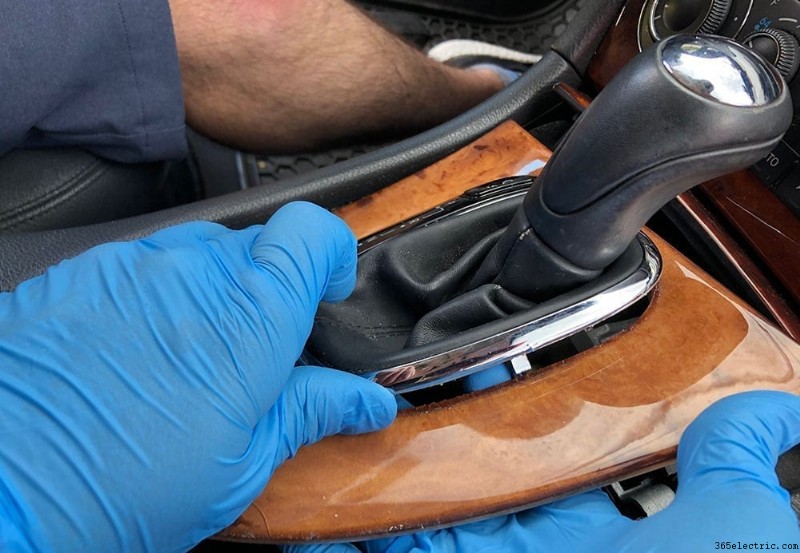
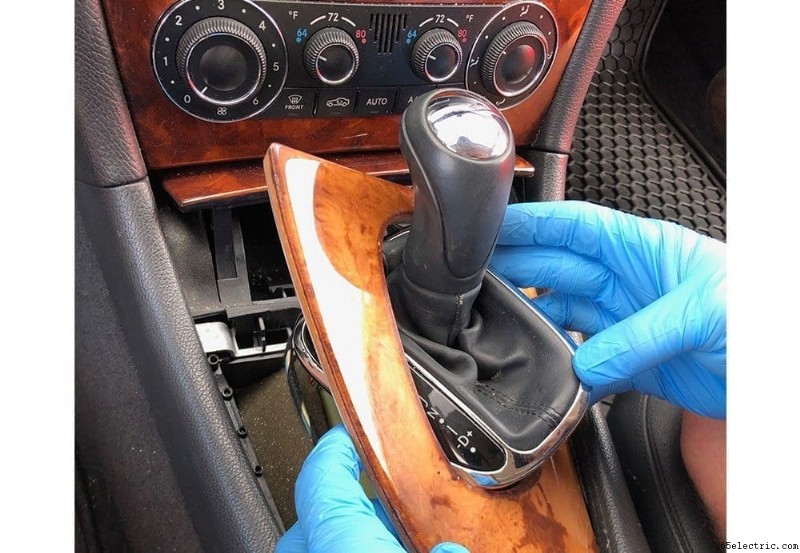
Em seguida, você removerá o cinzeiro puxando os dois clipes com pontas na parte inferior em sua direção e levantando-o para fora do painel.
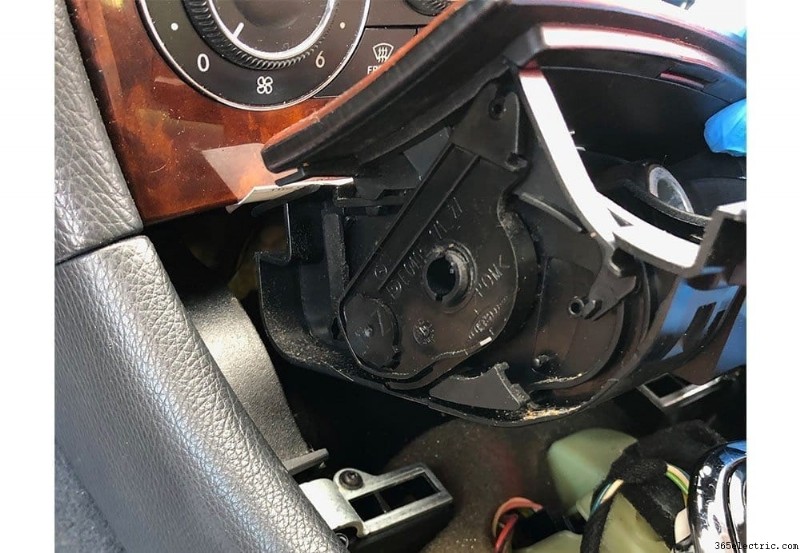
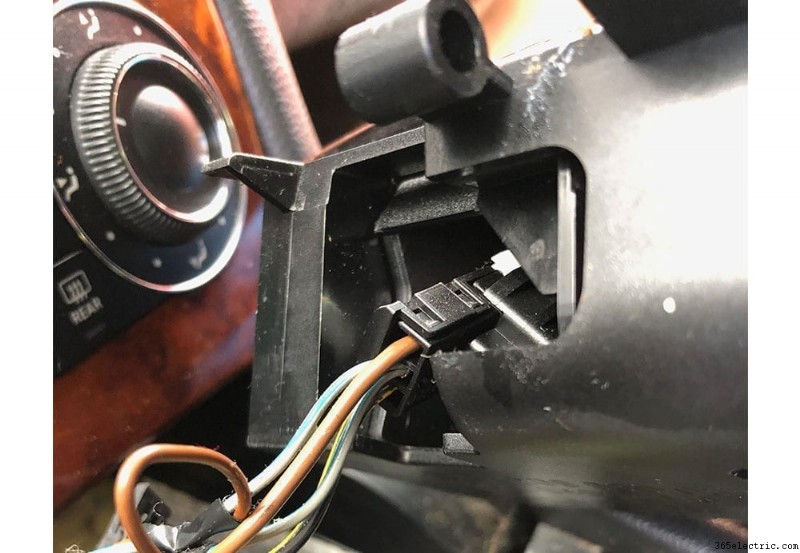
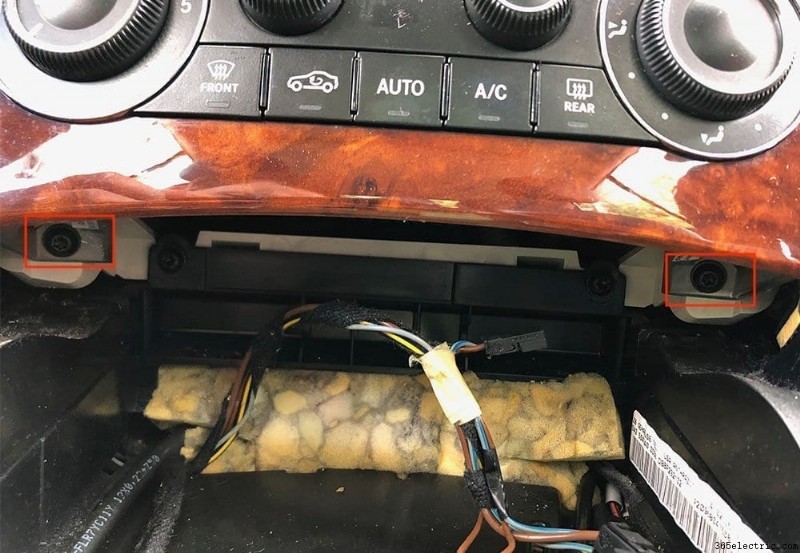
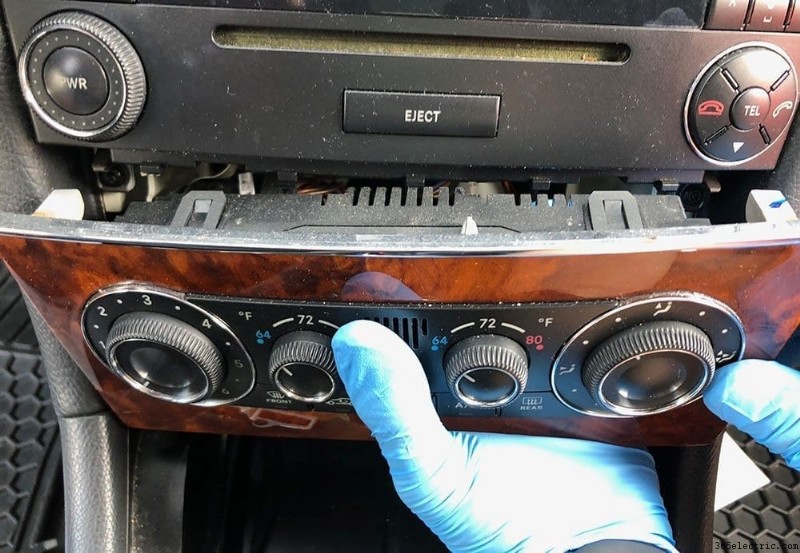
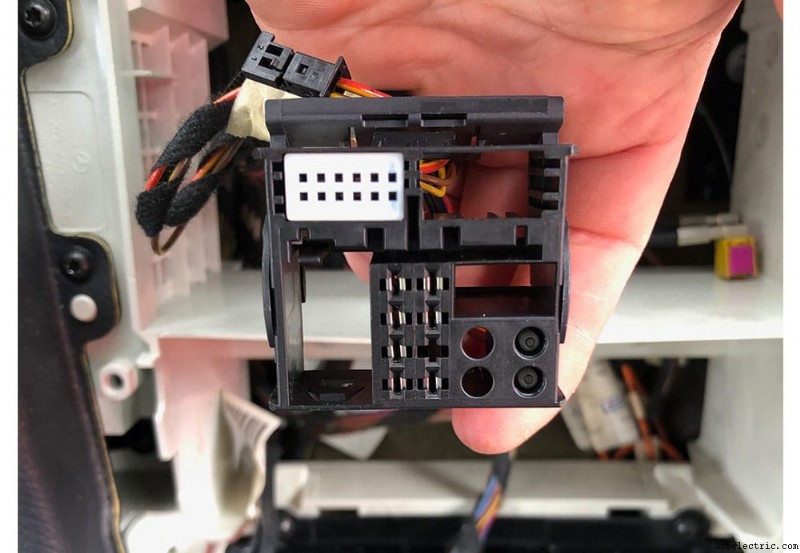
Agora que o cinzeiro está fora do carro, você terá acesso a dois parafusos torx abaixo da unidade de controle climático. Remova esses dois parafusos e puxe a unidade de controle climático para fora. Observe que há dois clipes nos cantos superiores que o prendem e que “saltam” à medida que você o puxa. Depois que a unidade for removida, você puxará os fios conectados - há dois para remover. Remova esses dois fios e remova a unidade do painel.
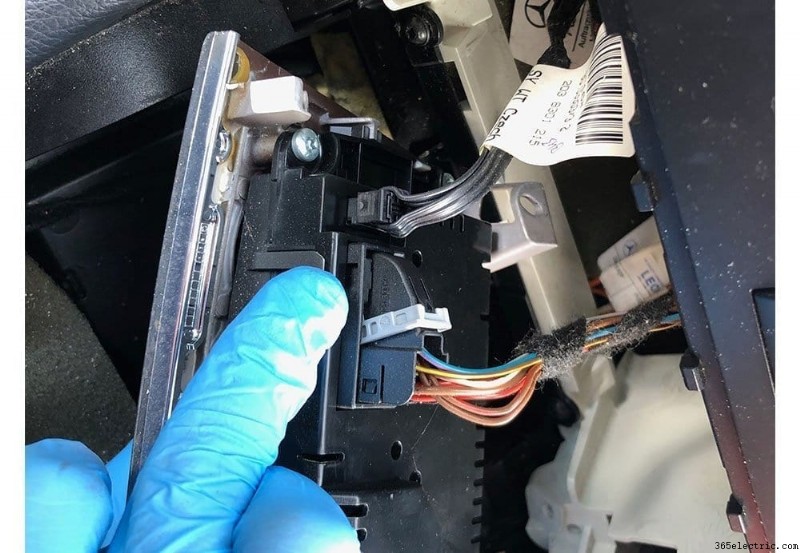
Com o controle climático removido, agora você terá acesso aos dois parafusos inferiores que prendem a unidade principal. No entanto, também existem dois acima da unidade, portanto, antes de removê-los, você precisará puxar o painel de acabamento e os botões que estão acima da unidade principal. Para fazer isso, pressione o porta-copos para estender o porta-copos para fora. Usando os dedos, puxe o canto interno direito do painel para soltar o canto e, em seguida, vá para a esquerda. Com a peça de acabamento removida, solte o chicote de fios da parte traseira da unidade para removê-lo totalmente.
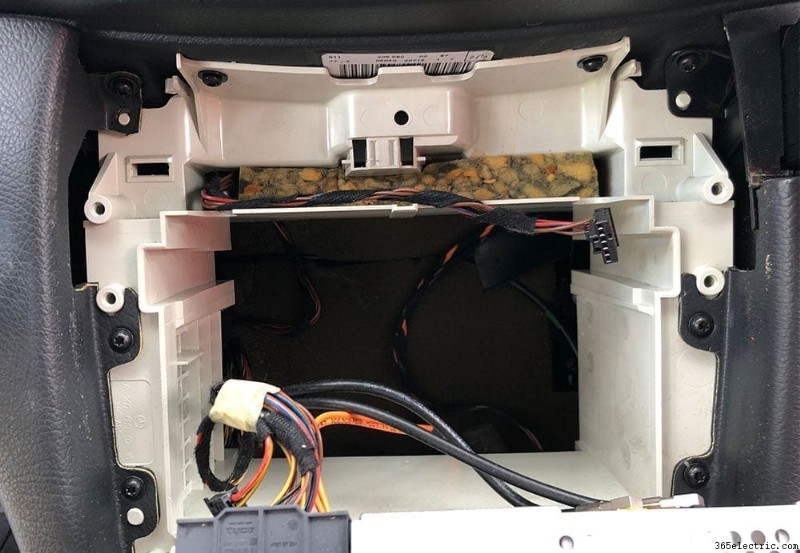
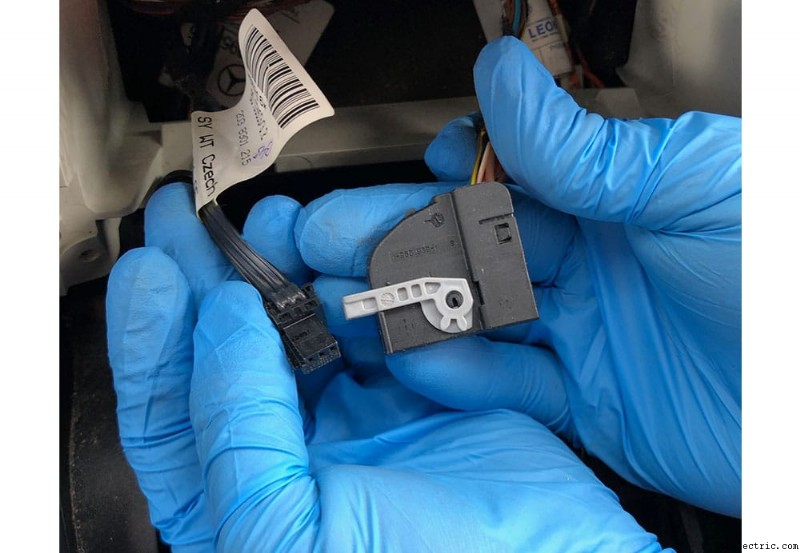
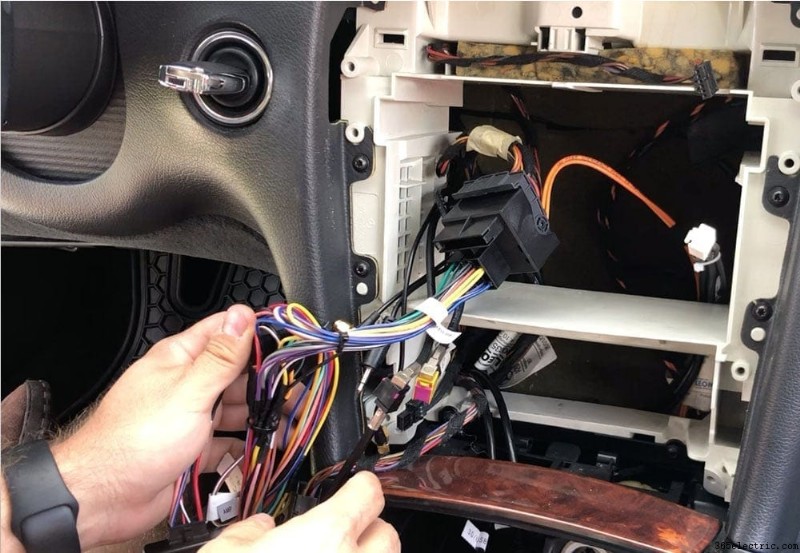
Etapa 4:prepare o chicote elétrico e a unidade principal
Com sua unidade principal OEM e seu painel pronto para sua nova unidade principal, o próximo passo é preparar seu adaptador de chicote de fios e sua unidade principal para instalação no carro. No nosso caso, a adaptação Axxess XSVI-9005-Nav e ASWC-1 se conectaram, mas precisávamos adaptar o chicote de fios da unidade principal de reposição aos chicotes de acesso de adaptação do veículo. Para fazer isso, soldamos cada um dos fios de um chicote ao fio correspondente do outro. Normalmente, todas as cores combinam, mas, por precaução, temos uma lista de todas as cores de fios do mercado de reposição para ajudar a orientá-lo.
Algumas coisas a serem observadas:
- Brake wire – we typically just combine this with the main ground wire so that any features that are restricted by movement will be unlocked. Note that some units are smarter and use GPS to sense motion but this will typically open up any video or other features that are locked when your vehicle isn't in park.
- Steering wheel control – the ASWC-1 comes with a 3.5mm plug that will adapt to most head units by plugging into the rear of the unit. However, in some cases it needs to be further adapted into two wires:Key 1 and Key 2. These two wires will need to be connected to the corresponding Key 1 and Key 2 wires from the aftermarket head unit harness.
You can either solder each of the wires like we did, or use crimps and a crimping tool. Here's what the resulting wire harness looked like:
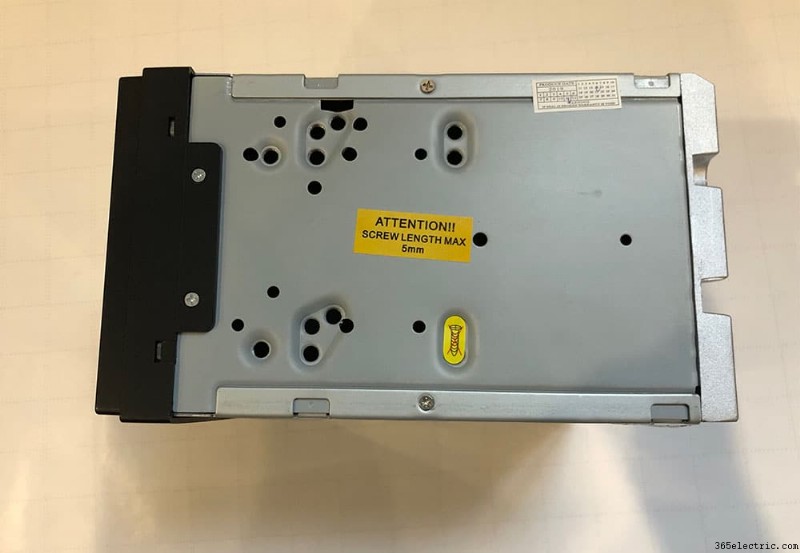
To prepare your head unit to be mounted into the dash, you'll need to mount your new aftermarket head unit to the Metra 99-874B dash kit. Do this by mounting the two left and right mounting plates to the head unit losely. Once they're mounted, place the adapting dash trim over the face of the head unit to check your mounting point and that the unit sticks out as far as you would like it. If your satisfied, tighten the side plates and mount the trim piece to the side plates.
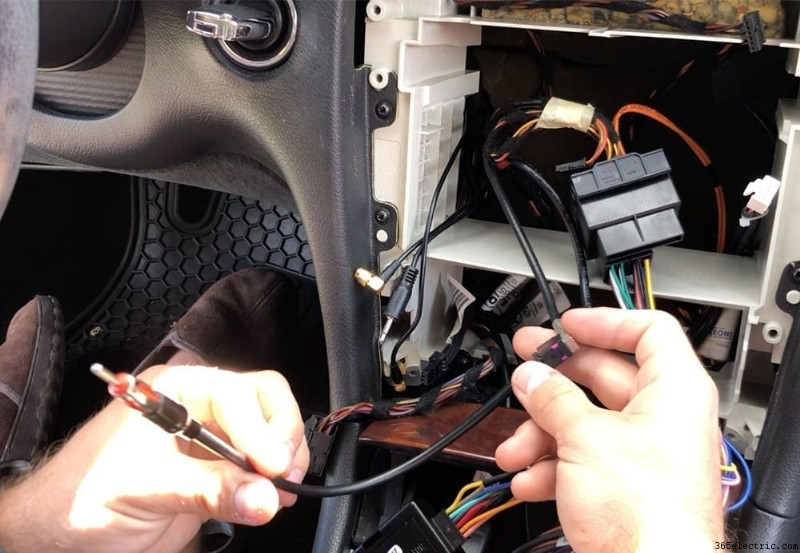
Step 5:Wiring Accessories – Antennas, USB &Microphone
Before you mount your new head unit in the dash, you need to make sure that all the wiring that plugs into the back of the head unit are wired into the back of the dash. This includes things like:
- USB chords
- GPS and WiFi Antennas
- Microphone
The PUMPKIN head unit that we chose had all of the above so we wired up all three to the back of the dash before we re-installed our new head unit.
USB Chords
Our head unit came with two usb inputs that are wired up to the back of the head unit, so we had to choose a spot for the new USB chords to go and then wire them. In our CLK 320, we decide to utilize the ash tray below the head unit. No need to cut holes, simply pull the removable ash tray component out of the ash tray cubby and feed the wires into the ash tray cubby.
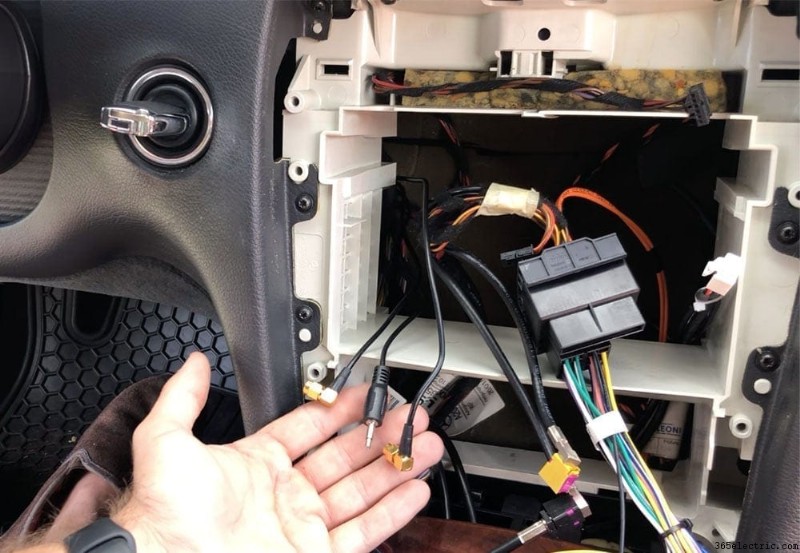
GPS &WiFi Antennas, Microphone
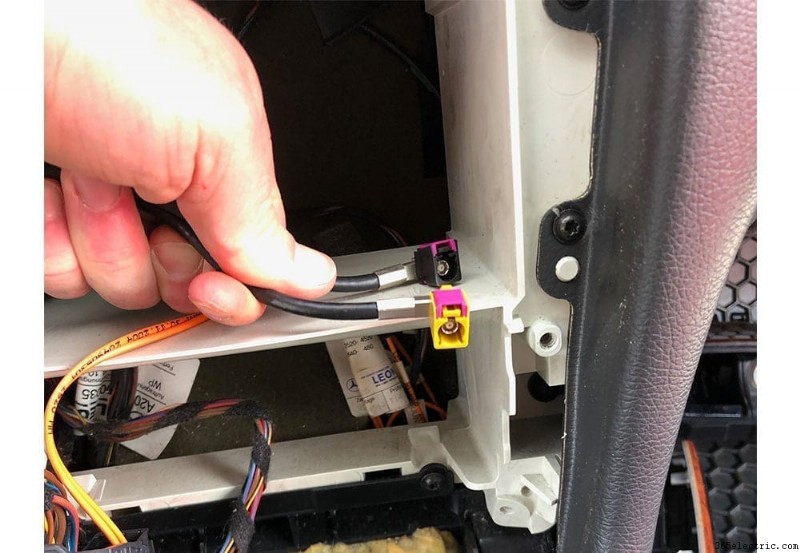
For all three of these components, we fed the wire from the dash area, underneath the steering wheel and to the far left side of the dash. To do this, there's a panel above your feet that has two torx screws. Remove the torx screws and pull the panel to gain access to behind the dash under your steering wheel. Then, remove the panel on the left hand side of the dash that faces the door (when closed). Feed the wires from the central dash area through to the left side of the dash. We used zip tie to fasten the wire under the dash.
Once your GPS, WiFi and microphone (or any combination of the three) are through the dash and out of the side panel of the dash, we mounted the WiFi antenna straight to the dash right next to the fuse box. Continue to feed your GPS and Microphone up through the pillar by placing the wire in between the pillar panel and the rubber seal. Tuck your wires behind the pillar panel.
At the top of the pillar, feed your wires across and to the window. We typically mount our microphones in the top left hand side of the windshield and clip it in between the head liner and the windshield. For the GPS, continue to tuck the wire behind the head liner through to the left hand side of the rear view mirror. This is where we mounted our GPS unit.
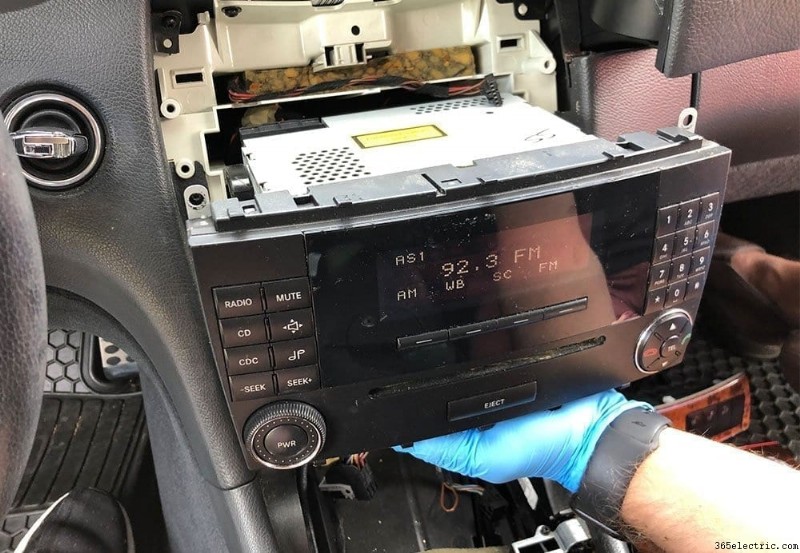
Step 6:Installing Your New Head Unit
Finally, you're ready to re-install your head unit and connect all of the wires. One last step before you place start connecting your head unit and screwing it in – use the Metra 40-EU10 to connect to the black antenna wire that was connected to the back of your OEM head unit (there was a black and a yellow/tan one – use the black). Plug the antenna wire into the back of the unit.
Now, move on to the microphone, GPS and WiFi connections (if your head unit has them). Connect these to the back of the unit. Finally, connect your new adapting harness with the Axxess modules connected and tuck the modules behind where the climate control would go. You'll need to make as much room behind the head unit so that it will have enough depth to mount. If you don't tuck your wires and modules neatly out of the way of the back of the head unit it will not have enough room to mount flush.
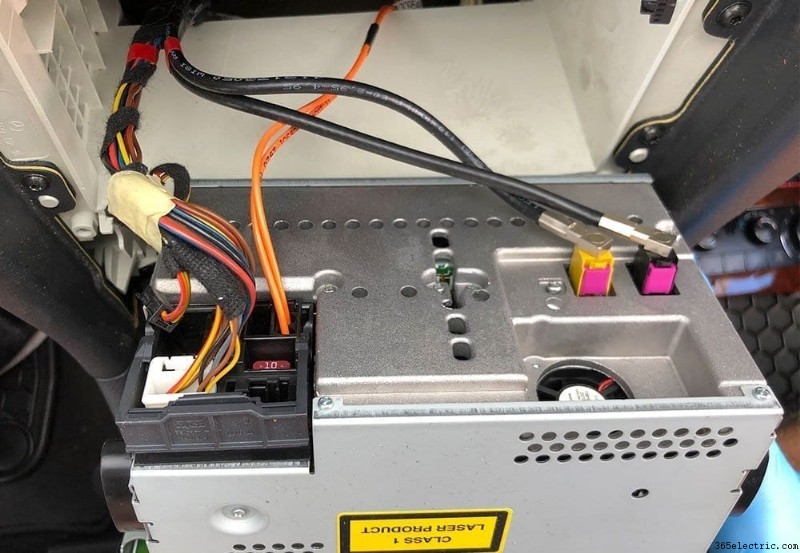
At this point, you should have all of your wires connected and the head unit should not be fully mounted yet. Re-connect your vehicle's battery and test out your unit. You'll want to check:
- Power – obviously this is the most important first-check
- Radio – check sound and that the radio has reception
- GPS – If your unit has GPS ensure that it has signal
- Bluetooth call – make sure that your new microphone works
- USB – check that your USB connection works
- WiFi – in our case we had a WiFi antenna, check that you have signal and that you can connect to a WiFi network
- Test general features – Roam around the features of your new head unit. Make sure that nothing is defective before you permanently re-install it!
Once you've checked your unit and everything is confirmed working, you can begin mounting it back. Mount the unit by screwing the four torx screws.*Note – the climate control has clips that you'll need to remove from the old head unit. Take these clips and place them on the back side of the screw holes on your new unit BEFORE you screw it in.
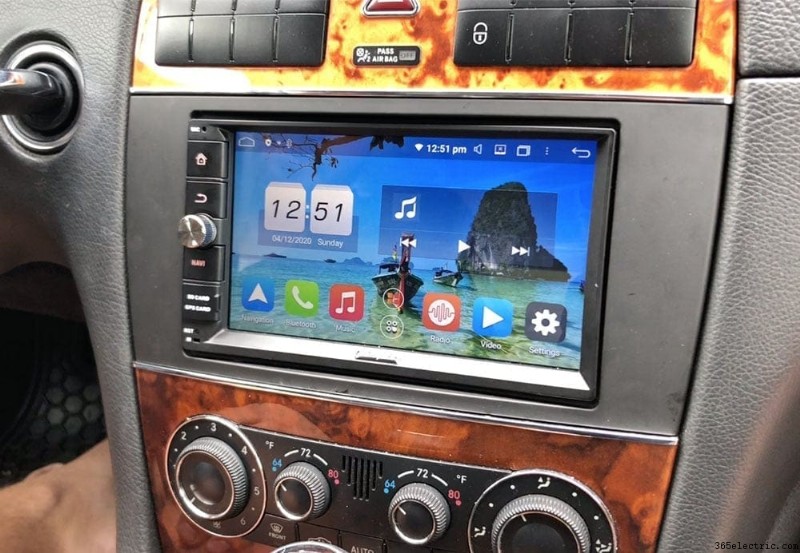
Move on to the trim pieces, reversing the process that you took to remove them. And your finished product: