Atualização do sistema estéreo Honda Accord 2008-2012
Eu não acho que alguém consideraria dirigir um Honda Accord mais antigo uma emoção de forma alguma. Você provavelmente dirige um porque é um carro muito caro, confiável e geralmente de boa aparência. Mas também não acho que alguém argumentaria que a oitava geração do Honda Accord é um carro abaixo da média. É elegante (relativamente) e dirige muito bem. É confiável – o meu tem 125k e a única coisa que troquei é a bomba de direção porque senti que estava fazendo muito barulho. É um carro seguro e tem altos índices de colisão. E para a época o estéreo era decente, embora eu não o considerasse de alta tecnologia.
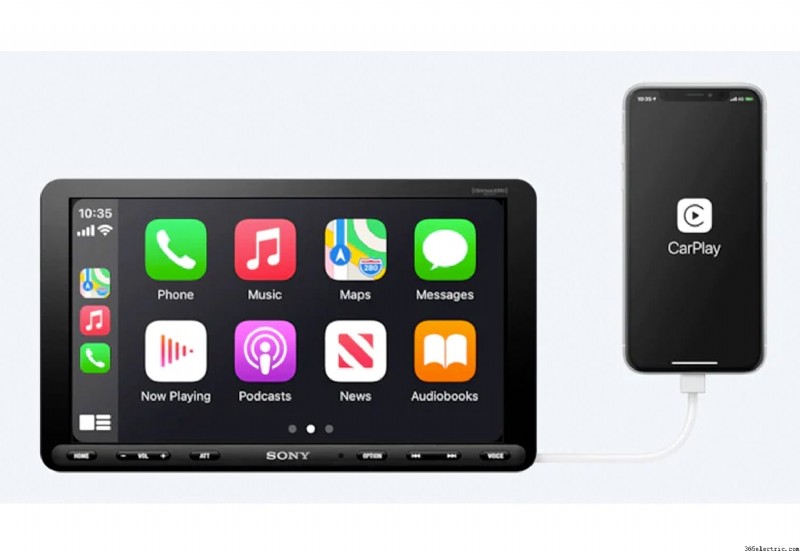
Os aparelhos de som do Accord também são como o resto do carro – se você não martelar o dia todo, eles vão durar. Mas mesmo as novas versões do Accord podem usar uma atualização com uma das unidades principais mais recentes do mercado. Desde 2012, muita coisa mudou nas unidades principais, apenas o Apple CarPlay e o Android Auto estão mudando o jogo em termos de como integramos nossos dispositivos móveis à tecnologia do nosso veículo enquanto estamos na estrada. A instalação de um novo aparelho de som de reposição tornará seu trajeto ou dirigir mais agradável e o deixará atualizado com a tecnologia e os recursos recentes.
Neste artigo, vou orientá-lo no processo de remoção da unidade principal do Accord antigo, preparação da nova unidade principal de reposição, instalação da nova unidade principal de reposição e instalação de uma nova câmera de backup.
Sobre a instalação
- Tempo total de instalação:4-5 horas
- Custo total para esta instalação:US$ 740
- Dificuldade:fácil (faça você mesmo no fim de semana)
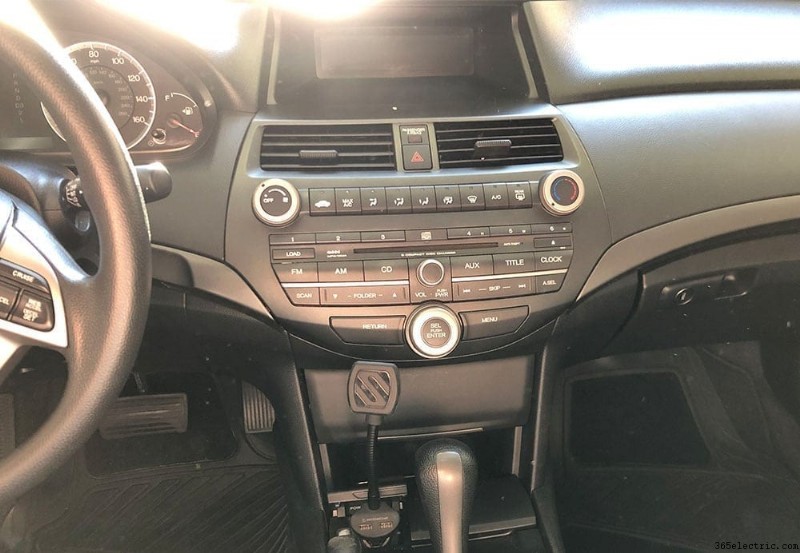
- Veículo:Honda Accord LX-S Coupe 2009 (sem navegação)
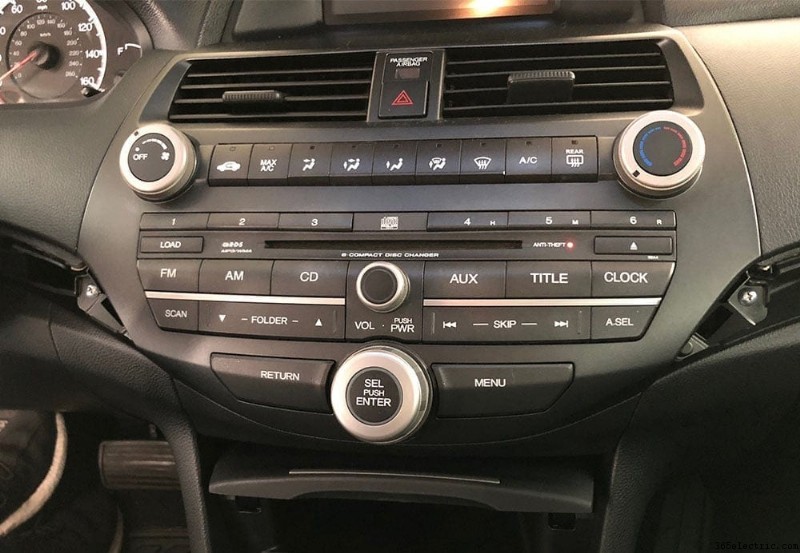
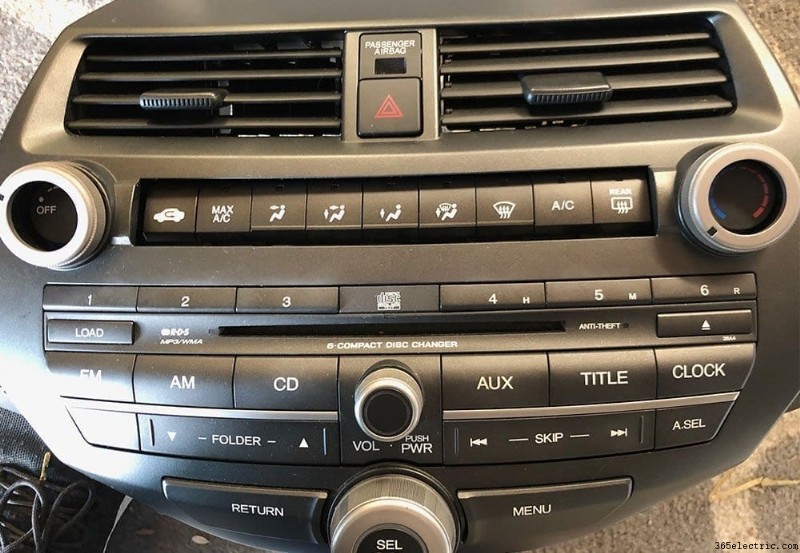
Recentemente, assumi o Accord 2009 da minha esposa como meu motorista diário. Ele tinha cerca de 110 mil km nele. Eu viajo cerca de 60-65 milhas por dia, valeu a pena .. Fazia sentido. É um cupê 09 LX-S com o CD player multidisco. Ele não tem navegação GPS, nem bluetooth – apenas uma entrada auxiliar que está no console central para eu conectar meu iPhone. OS TEMPOS MUDARAM.
Embora não houvesse realmente nada de errado com o estéreo OEM, levou apenas algumas semanas de condução para me convencer de que precisava de uma atualização. Em termos de alto-falante, o sistema de 6 alto-falantes (incluindo tweeters) ainda parecia ótimo, então eu não os atualizei com um dos nossos alto-falantes 6.5 recomendados (ainda) e senti que os subwoofers de pós-venda seriam um exagero para o propósito geral que eu uso o carro para . Então decidi atualizar a unidade principal e adicionar uma câmera de backup para trazê-la para a década de 2020.
Deixe-me listar as ferramentas que eu recomendaria para o trabalho, juntamente com todas as peças reais que usei na atualização do estéreo do meu Honda.
Ferramentas:
- Chaves de fenda de cabeça chata e Phillips – US$ 10
- Puxadores de painel de porta – US$ 10
- Conectores de vedação de solda de fio (recomendado) – US$ 20 OU crimpagem de fio tradicional – US$ 13
- Pistola de calor (somente se você obtiver os conectores de vedação de solda) – US$ 16
- Descascadores de fios – US$ 13
Peças:
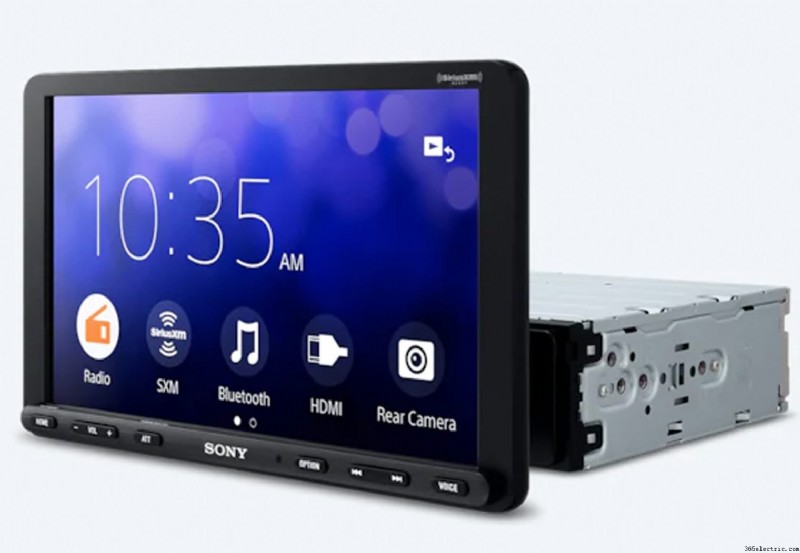
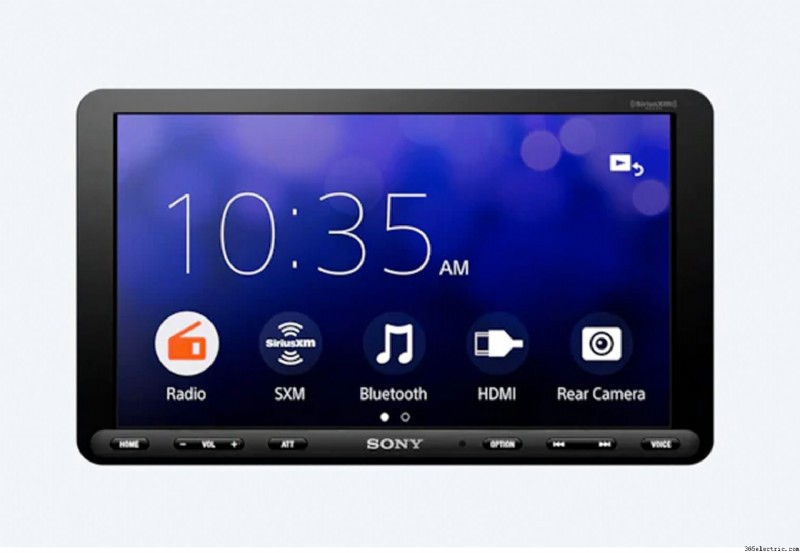
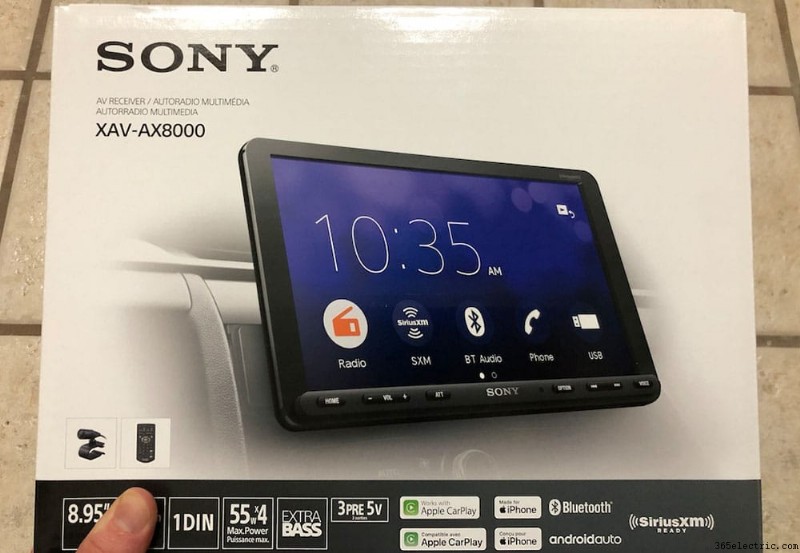
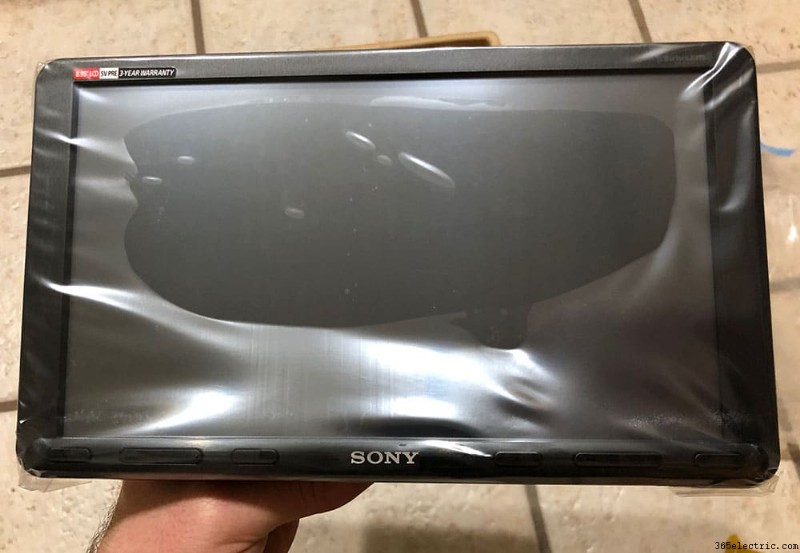
- Unidade principal:Sony XAV-AX8000 – $600. Veja nossa Redação completa e revisão desta unidade principal e seus recursos.
- Kit de painel duplo DIN/Single DIN sem A/C duplo:Metra 99-7874 – US$ 40
- Controle de volante e adaptador de antena elétrica:Crux SWRHN-62L – US$ 52
- Câmera de backup:AUTO-VOX Cam 6 – US$ 20
- Clips do console central e do painel (apenas por precaução):clipes de retenção do console central Rexka e do painel do painel do rádio (30) – US$ 12
Etapa 1 – Preparando seu novo rádio de reposição
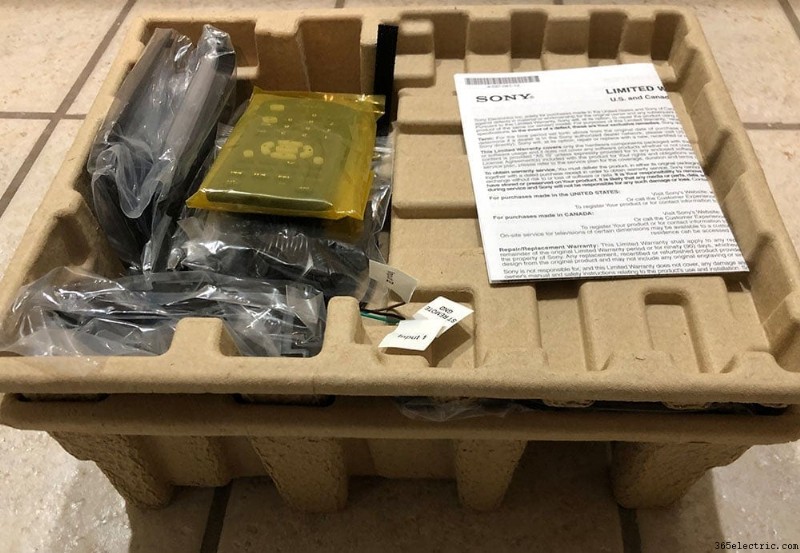
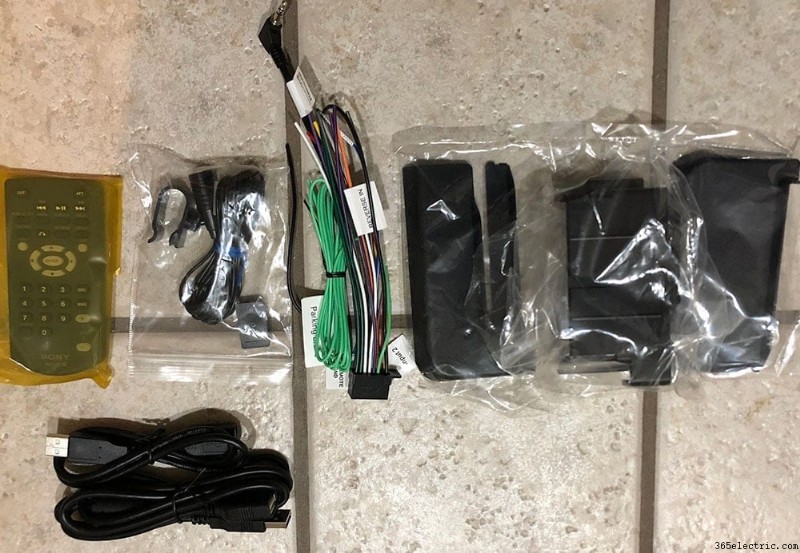
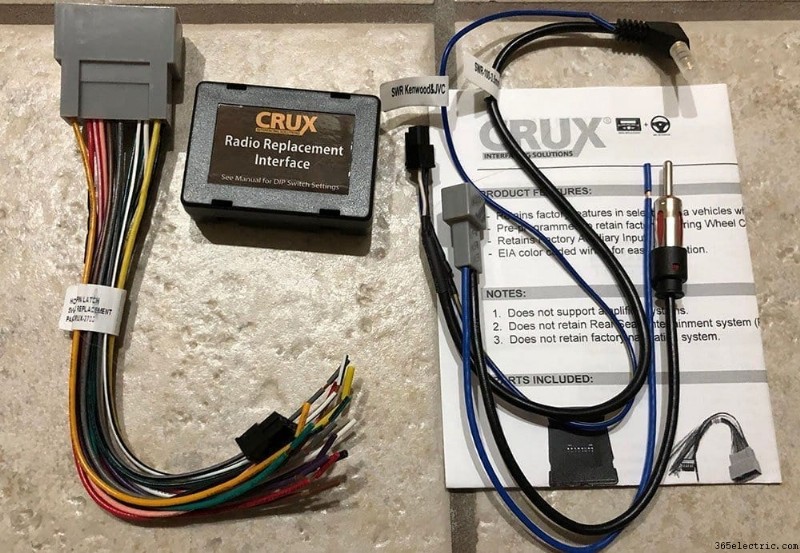
Vamos cavar direto nele. O primeiro passo antes mesmo de começar a tocar em seu rádio OEM é desembalar seu novo rádio de reposição. Inspecione-o quanto a falhas e certifique-se de que todas as peças necessárias estejam incluídas. A parte principal para esta etapa que você utilizará é o chicote de fios do fabricante, que você unirá ao chicote CRUX SWRHN-62L específico do seu veículo.
Alguns instaladores preparam seus novos rádios de reposição depois de retirarem sua unidade OEM. Isso normalmente é para inspecionar o chicote de fios e garantir que as peças que você comprou se encaixem no veículo. No entanto, neste caso sabia as peças que eu tinha combinado com o veículo. Eu normalmente gosto de preparar todos os novos componentes antes de começar a puxar as peças OEM para que eu possa avançar imediatamente com a instalação assim que minhas peças OEM forem retiradas. Também é uma boa maneira de dividir o tempo de instalação. Fiz toda a minha preparação dentro de casa na noite anterior à instalação da unidade principal e outras peças.
Conectando seus chicotes
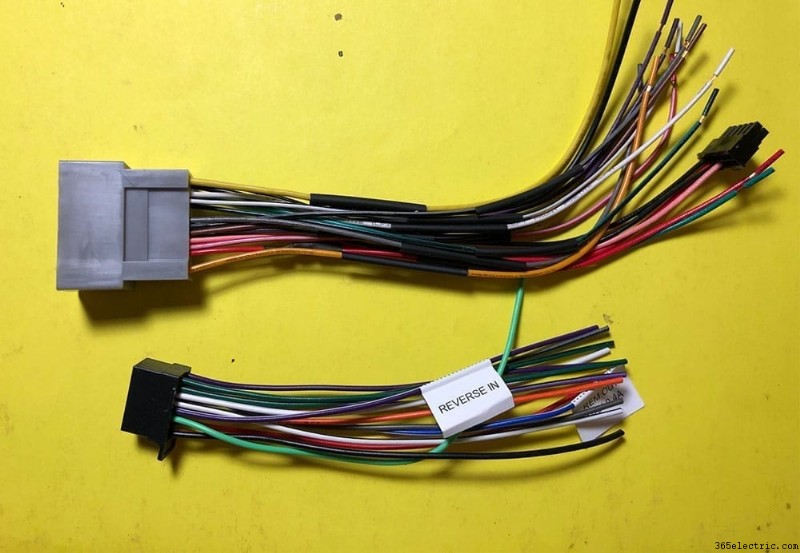
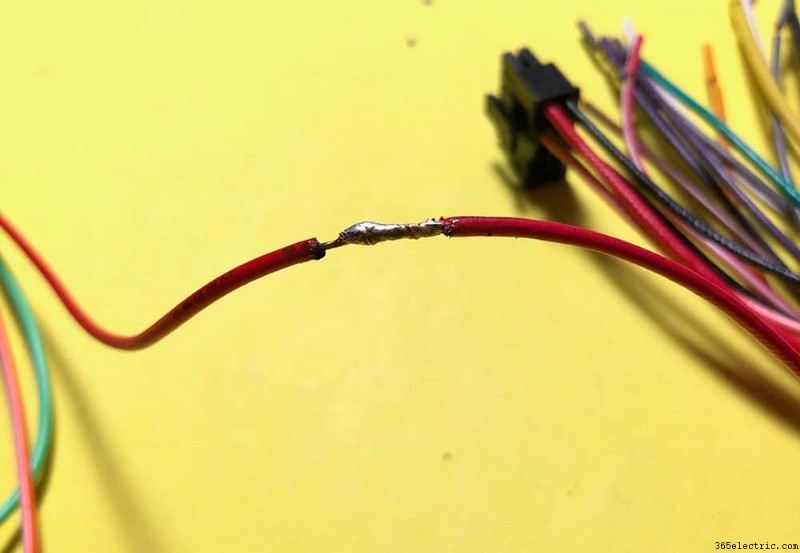
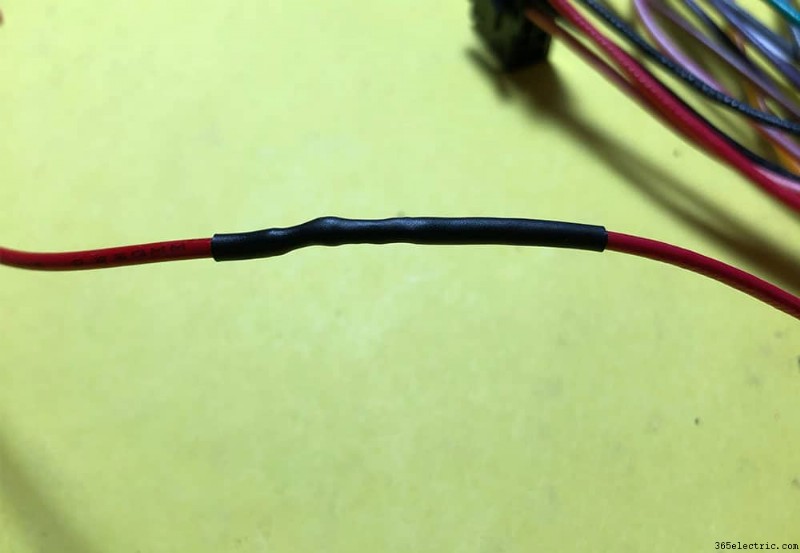
Depois de terminar de inspecionar suas peças novas, retire o chicote de fios que veio com a unidade principal e o chicote que você comprou para o seu Honda. Há muitas maneiras de prender os dois chicotes juntos. Minha abordagem preferida sempre foi soldar cada um junto, seguido de envoltório retrátil. E nas imagens que vou mostrar vocês verão isso. No entanto, você também pode usar os grampos de fio tradicionais que exigem apenas uma ferramenta de crimpagem e um descascador de fios ou você pode usar os conectores de vedação de solda de fio que são meu próximo método preferido. Ambos eu vinculei na seção de ferramentas e peças.
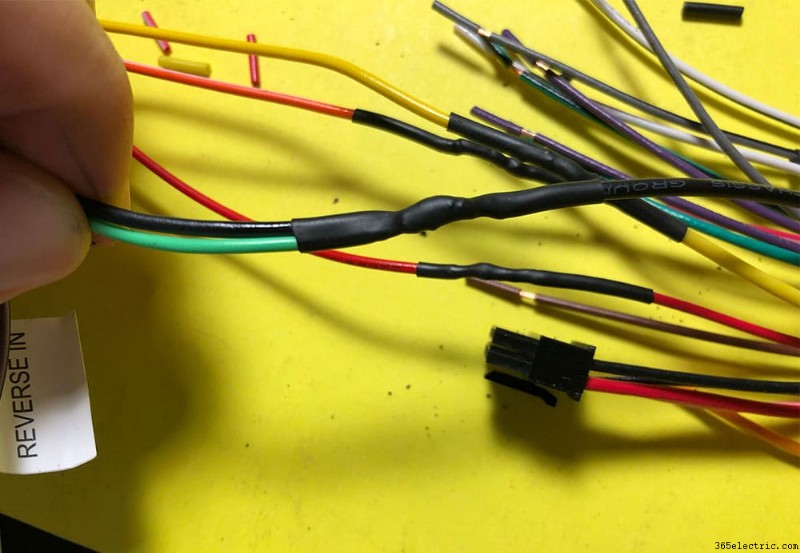
Nesta etapa do processo, você vai pegar cada fio codificado por cores no chicote da unidade principal e amarrá-lo com a cor correspondente no chicote CRUX. Aqui estão algumas fotos para mostrar como eu fiz (novamente usando o método de solda).
Algumas coisas a serem observadas quando você está conectando os chicotes:
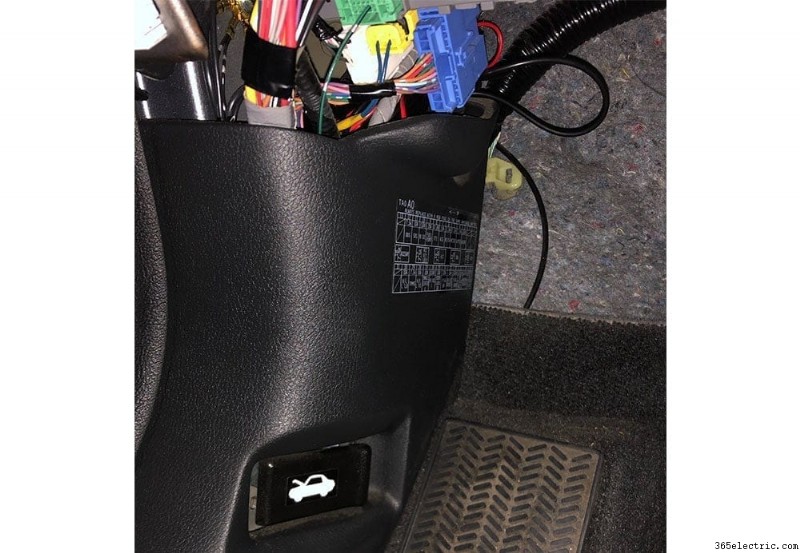
- Opcional:em vez de aterrar o fio verde-claro na interrupção de emergência, você também pode aterrá-lo diretamente no fio terra principal (preto). Isso permitirá que você utilize qualquer um dos recursos de vídeo que podem ser limitados apenas quando o veículo estiver estacionado. Algumas das unidades mais recentes usarão GPS, então isso nem sempre é um fim, tudo é corrigido. Veja a imagem abaixo.
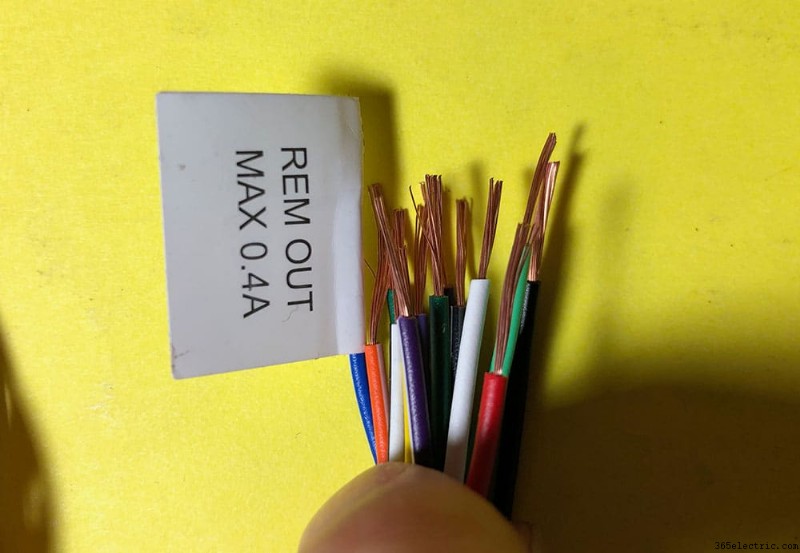
- Haverá alguns fios não utilizados - iluminação e dimmer (laranja e laranja com branco) não foram usados para mim.
- As antenas energizadas (plugue macho grande com um fio azul conectado a ela) precisarão ser amarradas ao fio azul correspondente no chicote CRUX.
E voilá! Depois de conectar todos os fios, seu chicote deve ficar como abaixo e você estará pronto para configurar a unidade CRUX.
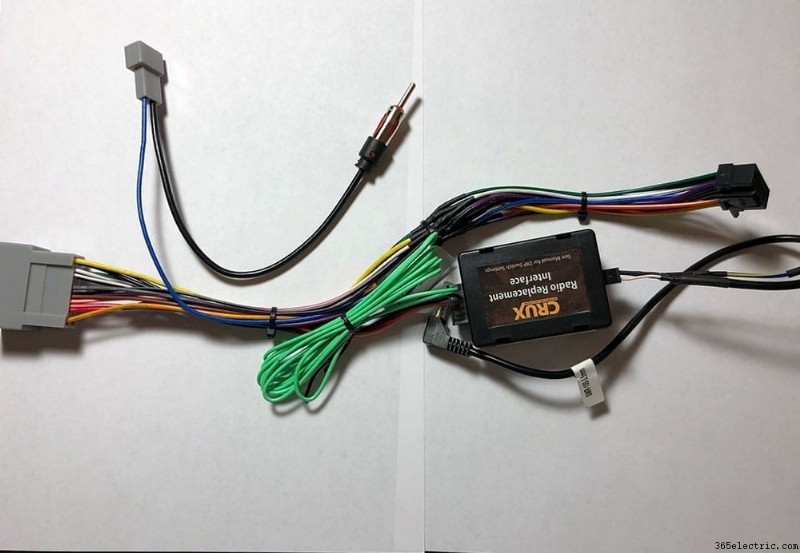
Configurando seu adaptador CRUX
A unidade CRUX foi um pouco cara, mas valeu a pena. Há vários componentes alternativos que você pode usar para adaptar os controles do volante a uma aplicação de pós-venda que é universal. Mas o que foi bom sobre o CRUX é que você aciona alguns interruptores de acordo com as instruções fáceis de ler e está tudo pré-configurado. Com unidades universais, você deve programar a unidade principal para corresponder ao sinal do seu volante individualmente. Eu pensei que isso era mais direto e honestamente não valia a dor de cabeça de programar todos os botões do meu volante para o controle dentro da unidade principal.
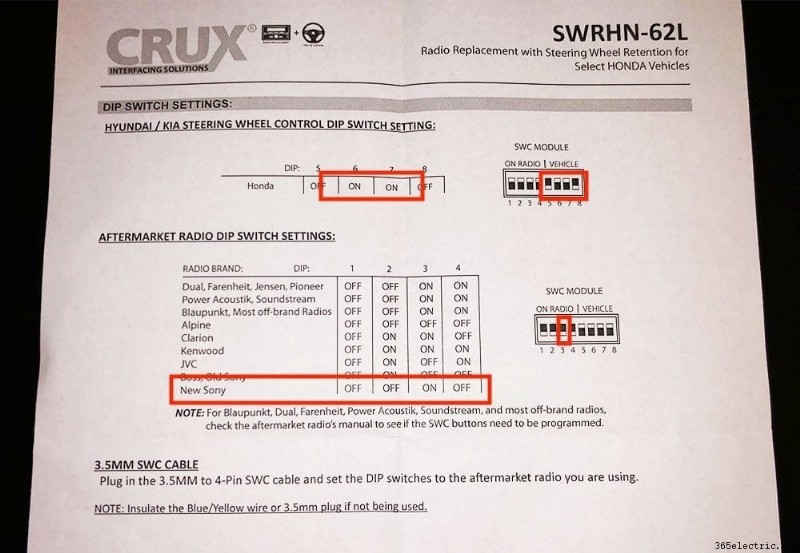
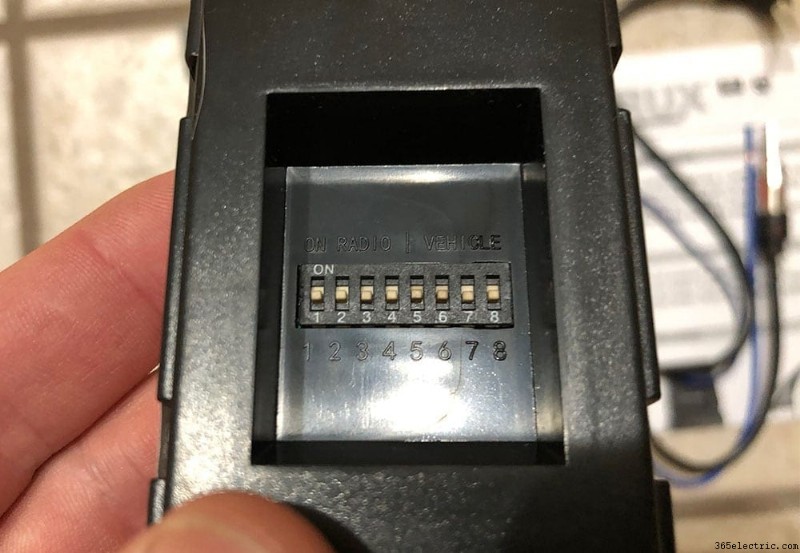
Para configurar a unidade CRUX (caixa preta), vire-a para ver os oito interruptores miniatura na parte traseira. Você precisará garantir que cada um deles esteja na posição correta antes de instalar tudo no carro. Consulte as instruções fornecidas para encontrar a configuração correta. Se você estiver usando uma nova unidade principal da Sony, a configuração será:
- Desativado
- Desativado
- Ativado
- Desativado
- Desativado
- Ativado
- Ativado
- Desativado
As primeiras quatro chaves determinam o tipo de rádio que você está instalando. Portanto, se você estiver instalando um Pioneer, por exemplo, os interruptores seriam:1. Desligado 2. Desligado 3. Ligado 4. Ligado. Os últimos quatro interruptores serão o que determina o seu veículo. Todos os veículos Honda têm os mesmos quatro últimos interruptores. Aqui estão algumas fotos de como configurá-lo junto com o manual.
Pré-instalando sua unidade principal
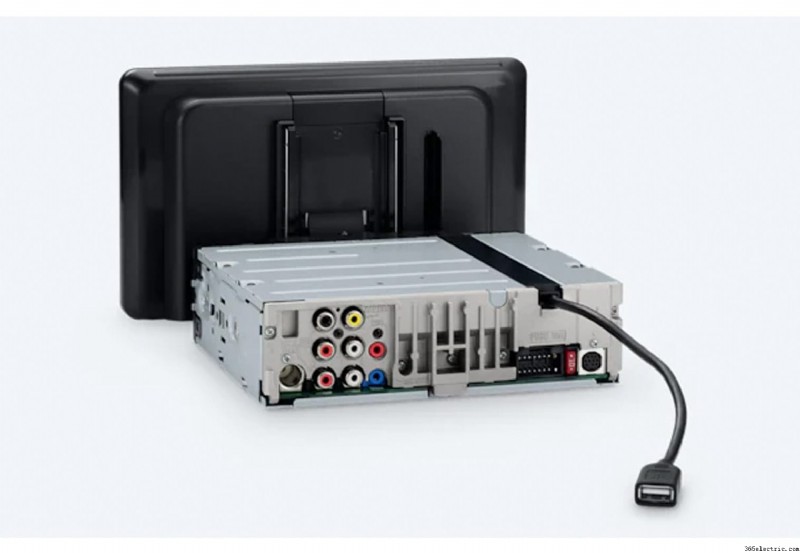
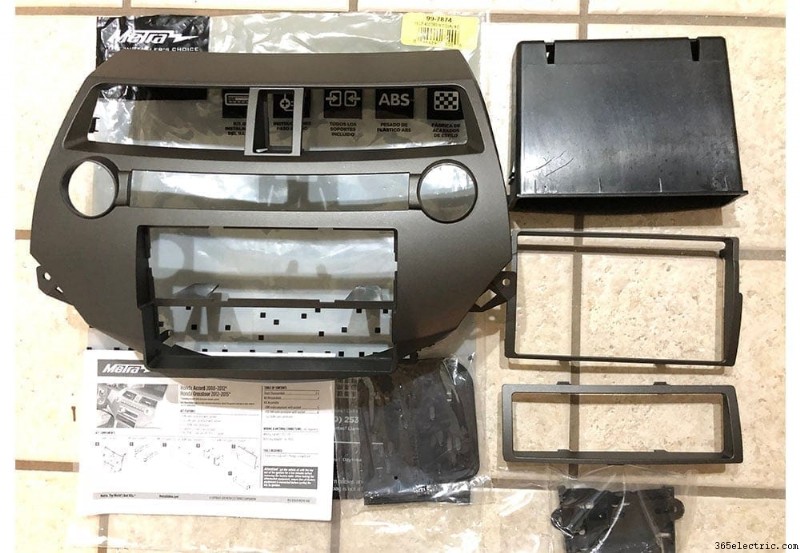
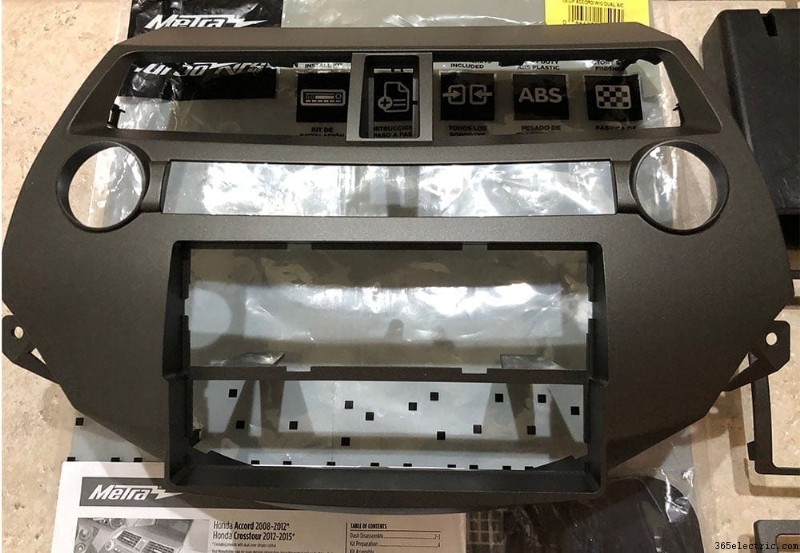
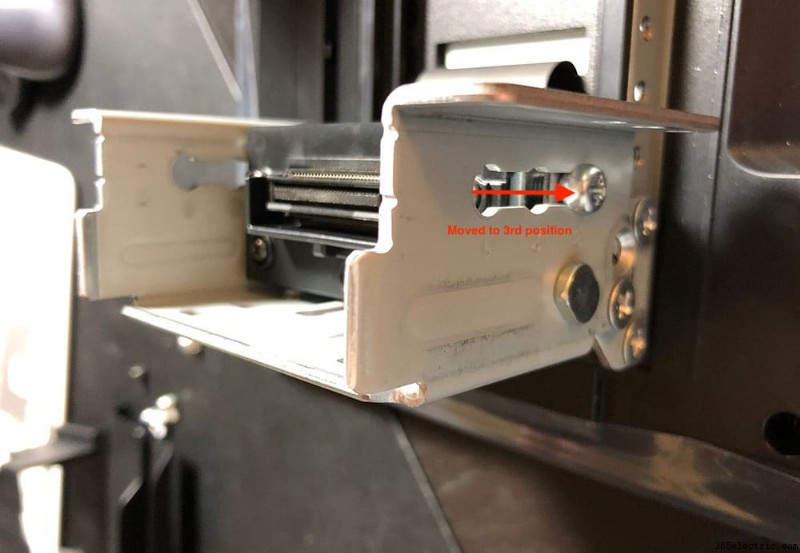
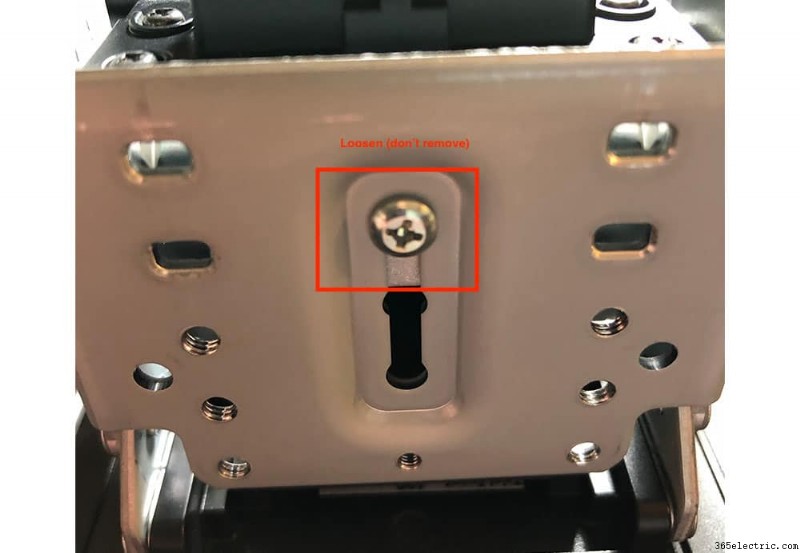
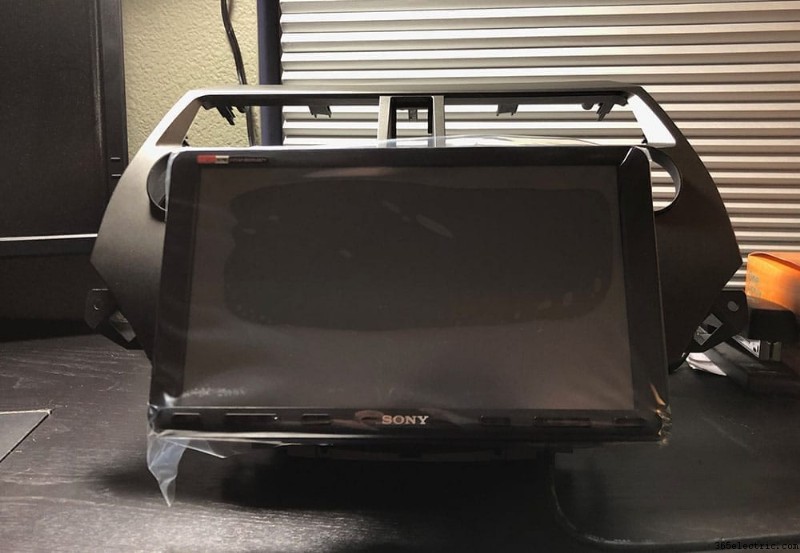
A próxima coisa que você vai querer fazer depois de terminar toda a preparação da fiação é preparar o chassi real da unidade principal para instalação em seu novo kit de painel. Na minha seção Ferramentas e Peças, há um kit de traço Metra. Este kit de painel é todo o painel que substituirá o painel existente que envolve o controle climático e os botões de opção OEM. Como você o tem fora do carro, é uma tarefa fácil instalar os suportes de montagem em seu rádio de reposição e testá-lo no novo painel. No meu caso, tive que configurar também os ajustes de inclinação e altura porque o Sony XAV-AX8000 tem um monitor superdimensionado que não fica no painel (veja as fotos). Mas, para instalações típicas de single din e double din, é uma questão de colocar os suportes e garantir que a profundidade da unidade principal seja a esperada.
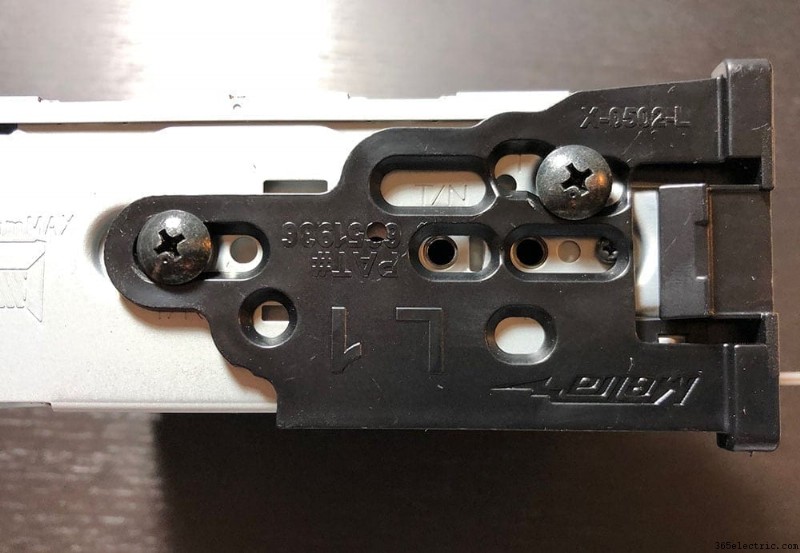
Para testar o ajuste, encontre os suportes single din ou double din que são montados na lateral da unidade principal. Deve haver dois pares - um para um chassi de din único e outro para um din duplo. Selecione o apropriado para o tamanho da sua nova unidade principal. Parafuse os suportes na lateral de sua nova unidade principal, mas apenas o suficiente para mantê-la firme sob leve pressão. Você pode querer ajustá-lo depois de testá-lo em seu novo painel.
Coloque a unidade principal na moldura e certifique-se de que a profundidade da unidade principal é exatamente como você gostaria. Se você estiver instalando uma única unidade principal din, o slot inferior será na verdade um compartimento, então você precisará colocar esse compartimento no painel antes de inserir sua unidade principal.
Quando terminar de ajustar sua unidade principal e tiver a tela (se necessário) e os suportes do chassi ajustados corretamente, remova a unidade do painel e vá para a próxima etapa do processo de instalação.
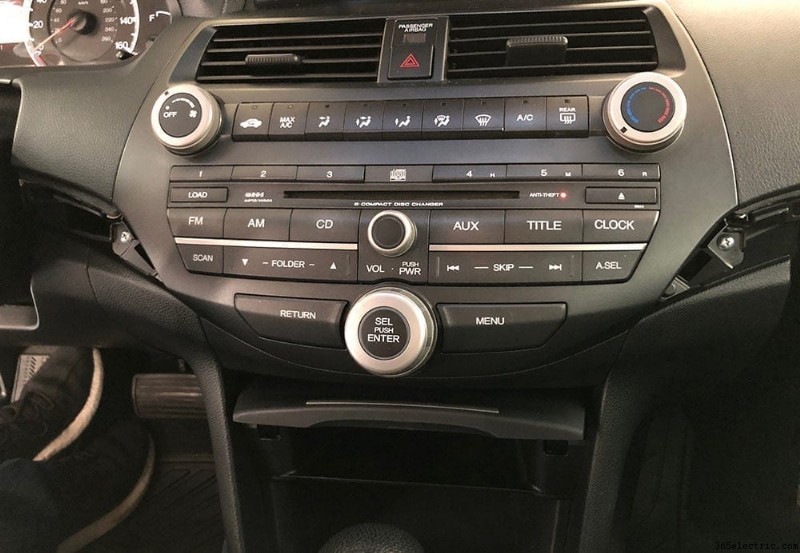
Etapa 2 – Remoção da unidade principal OEM do seu Honda Accord
Remoção do corte do traço
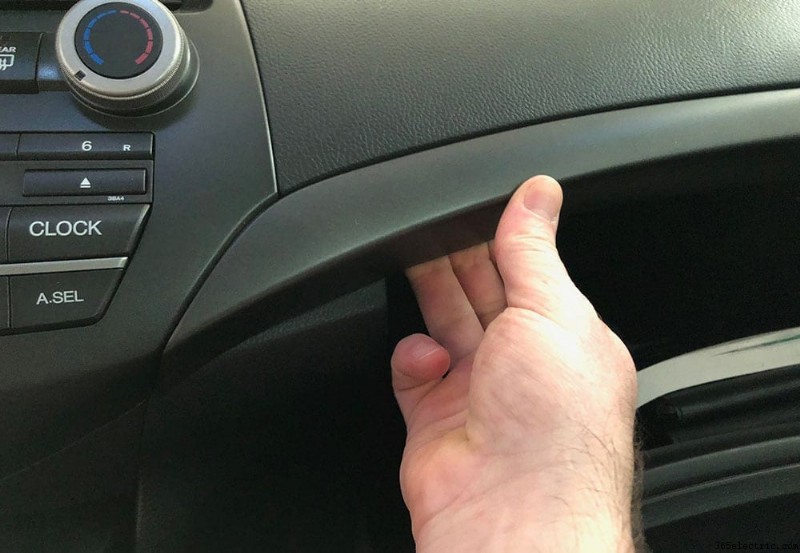
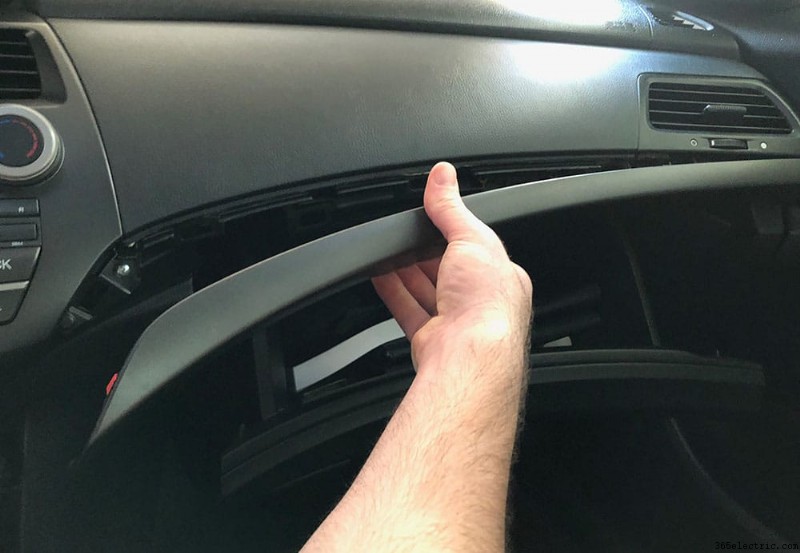
A primeira guarnição que eu removi é a guarnição que está acima do porta-luvas. Este é relativamente fácil - abra o porta-luvas e pegue a parte inferior do acabamento com os dedos e puxe para fora, começando mais próximo da unidade principal no lado esquerdo do acabamento. Um por um, retire os clipes da guarnição da esquerda para a direita. Isso irá expor um parafuso no lado inferior direito da unidade principal do OEM.
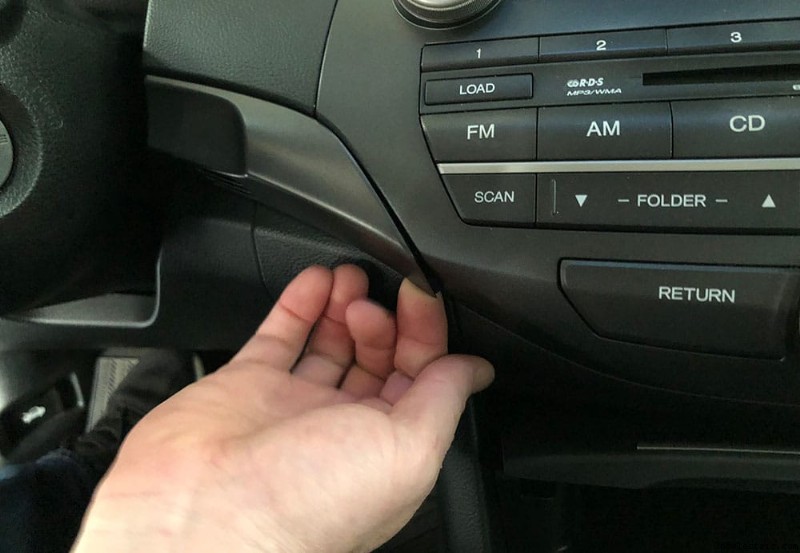
Em seguida, mova para a pequena peça de acabamento entre a unidade principal e a coluna de direção. Este pode exigir uma cunha para retirar. Eu recomendaria usar uma ferramenta de remoção de guarnição de plástico para que você não risque a guarnição. Consegui usar meus dedos para puxar a borda da peça de acabamento mais próxima da unidade principal, mas você pode precisar usar uma ferramenta adequada para puxá-la se for teimosa. Uma vez que esta peça de acabamento é removida, irá expor outro parafuso para a unidade principal.
Depois que as duas peças de acabamento forem removidas e os parafusos estiverem expostos, você poderá remover os dois parafusos na lateral da unidade. Agora, vá para o console central e cubículo para acessar os 2 parafusos finais para remover a unidade principal.
Console Central e Remoção do Cubby
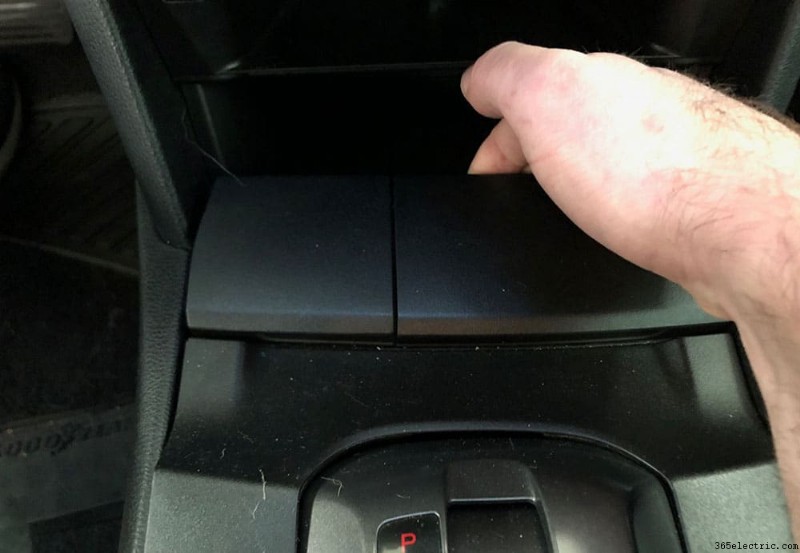
Para acessar os dois parafusos finais na unidade de cabeça OEM do seu Honda Accord, você precisará remover o acabamento do console central e o cubículo. Para fazer isso, comece erguendo a parte de trás da peça central. O melhor lugar para começar a bisbilhotar é dentro do console central. Abra o console central e comece a empurrar / erguer a parte traseira da peça de acabamento central. Comece a partir deste ponto e levante suavemente até começar a estourar os primeiros clipes de corte. É um longo pedaço de plástico que se estende do console central até a área do cubículo, mas não há parafusos segurando essa peça. Trabalhe seu caminho para frente até chegar ao câmbio.
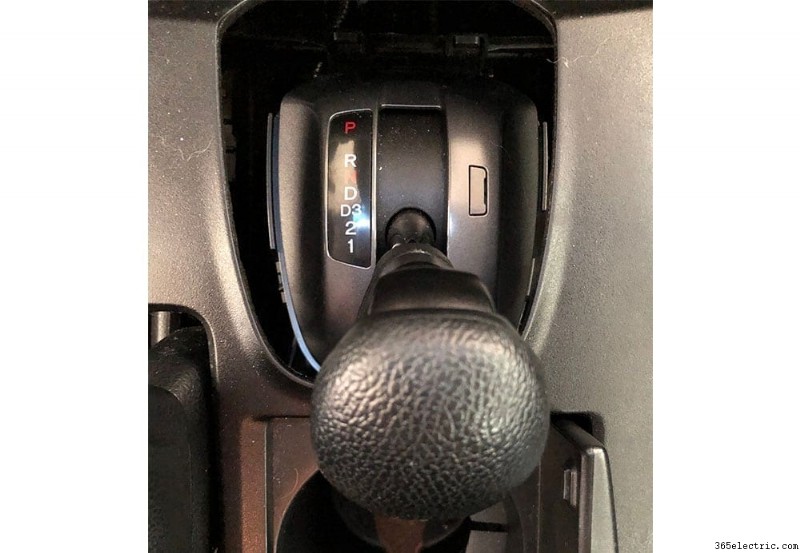
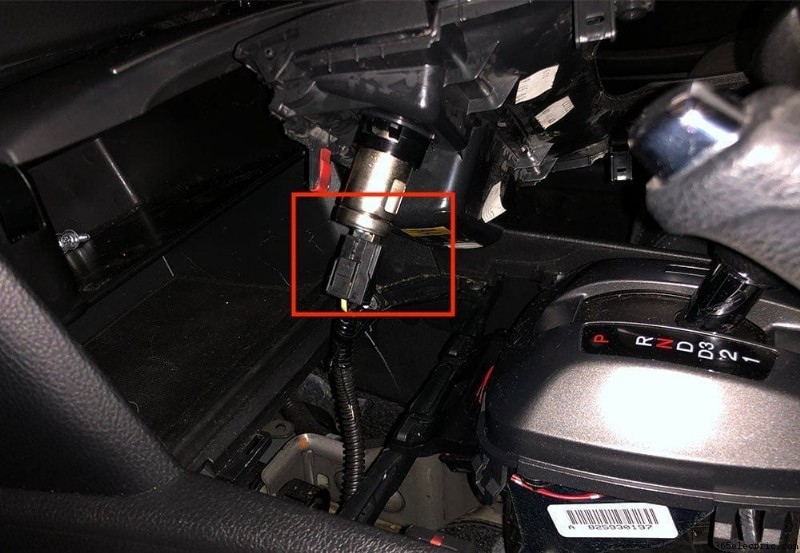
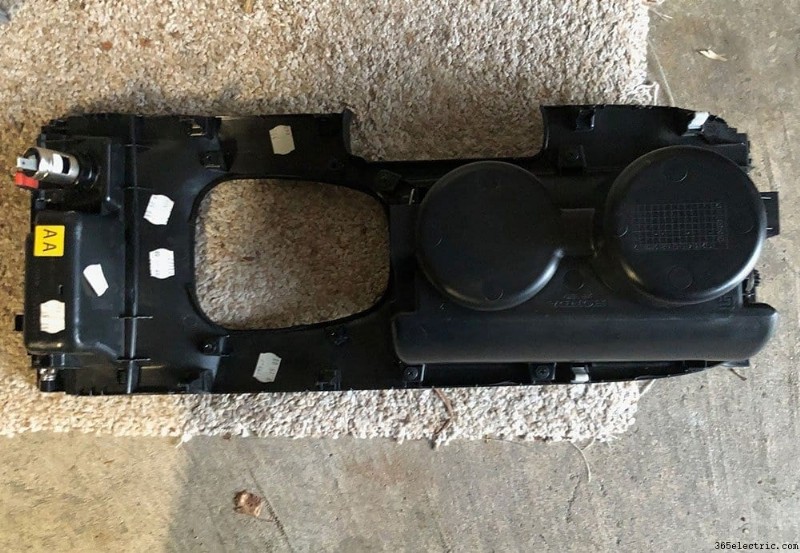
Assim que chegar ao câmbio, você precisará colocar seu carro em D1 para a remoção mais fácil da peça central. Coloque o freio de emergência firmemente, então mude seu carro para D1 e continue a remover a peça central até que todos os clipes sejam desfeitos. Neste ponto, todos os clipes são desfeitos e a peça de acabamento será quase removida, com exceção de um plugue de alimentação que alimenta o plugue acessório no compartimento frontal. Remova o plugue puxando-o pela parte de trás do painel. Uma vez que o plugue é removido, você pode manobrar a peça central em torno do botão de mudança e sair do carro.
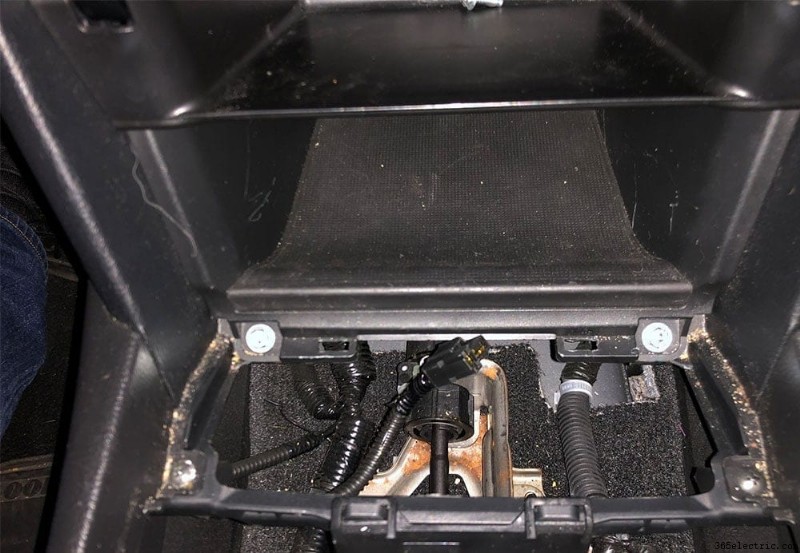
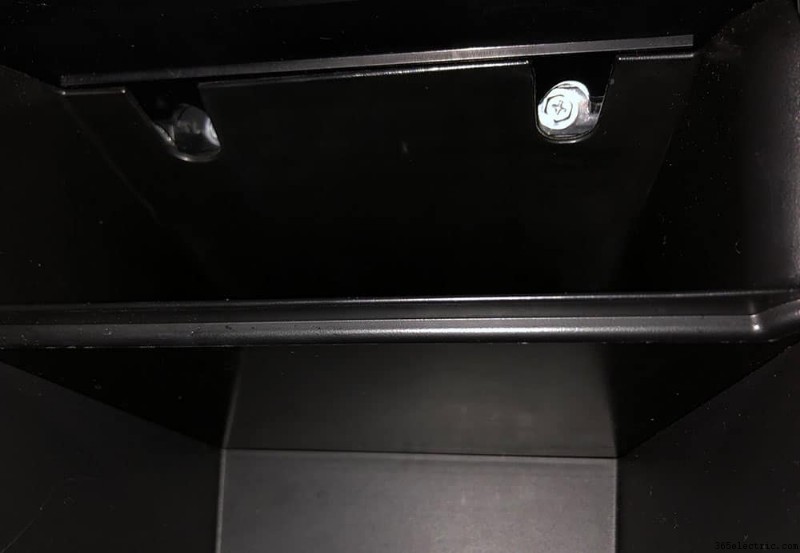
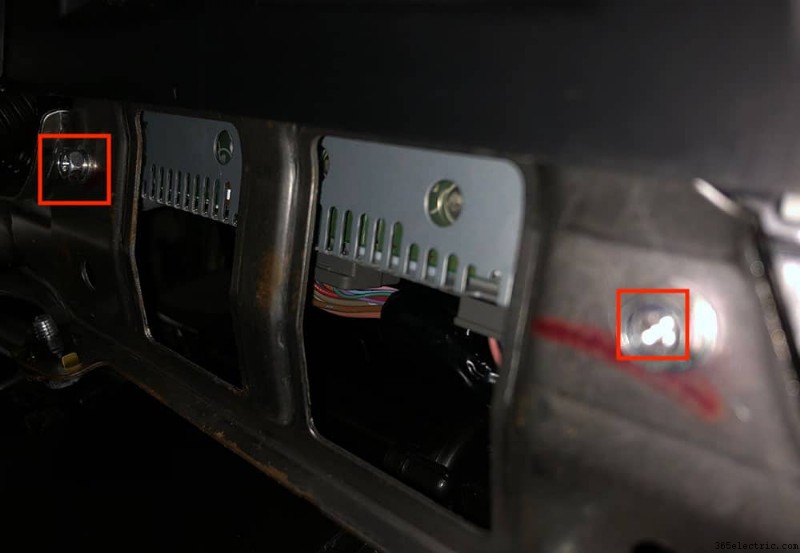
Agora que você removeu a guarnição central, você verá dois parafusos na parte inferior do cubículo. Remova estes dois parafusos. Existem dois parafusos finais na área superior do cubículo. Estes são difíceis de ver e ainda mais difíceis de remover. Use uma chave de fenda curta para acessar e remover esses dois parafusos e, em seguida, remova o cubículo puxando diretamente para fora.
Once you've removed the cubby, you'll now be able to access the final two screws to pull your OEM head unit from within the area above the cubby.
Removing the Head Unit and Components
Now that you've removed all of the head unit screws, you can begin removing the head unit. In addition to screws, the unit also has clips that are holding the plastic trim in. Start removing the head unit by wedging the bottom edge with a flat surface and begin to pry upwards, gently. You'll hear the clips pop and you should begin to be able to remove the unit. Once the unit is loose, unclip all of the wiring that is connected to the head unit, climate control and emergency lights switch and pull the unit out of the dash.
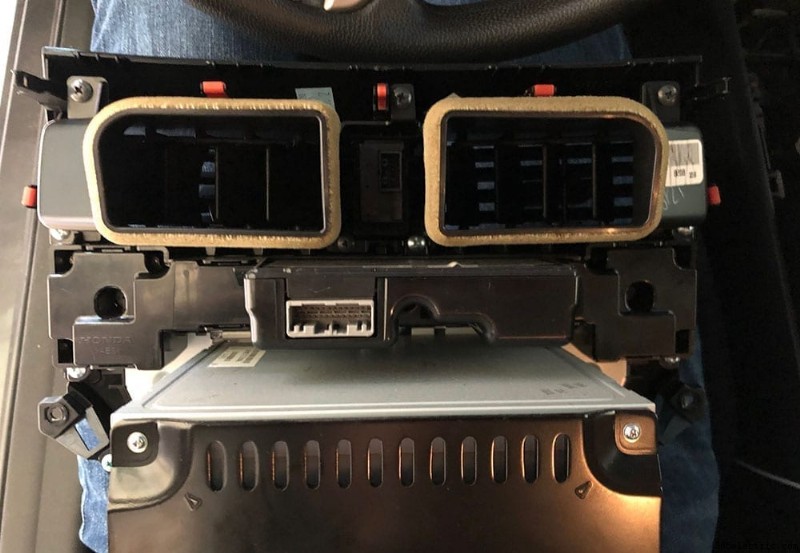
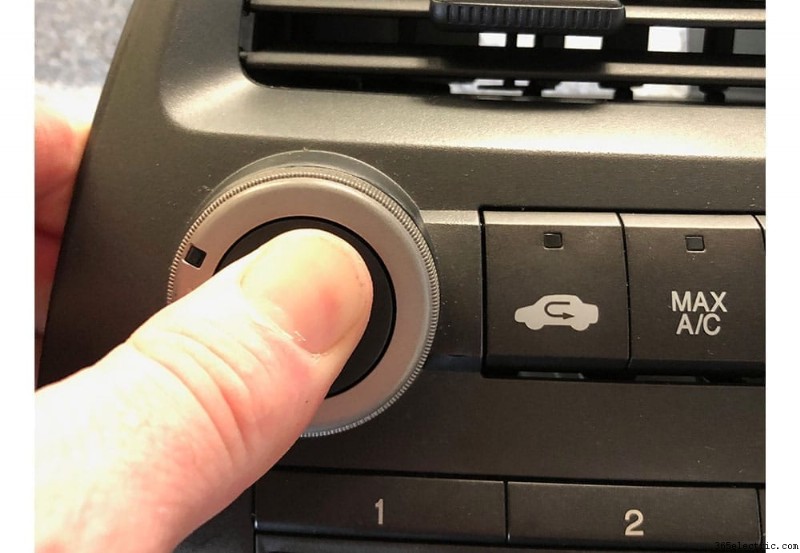
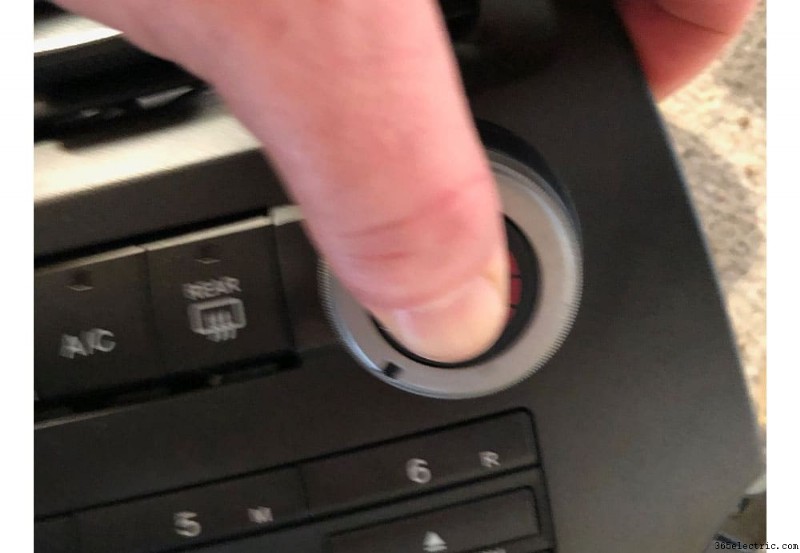
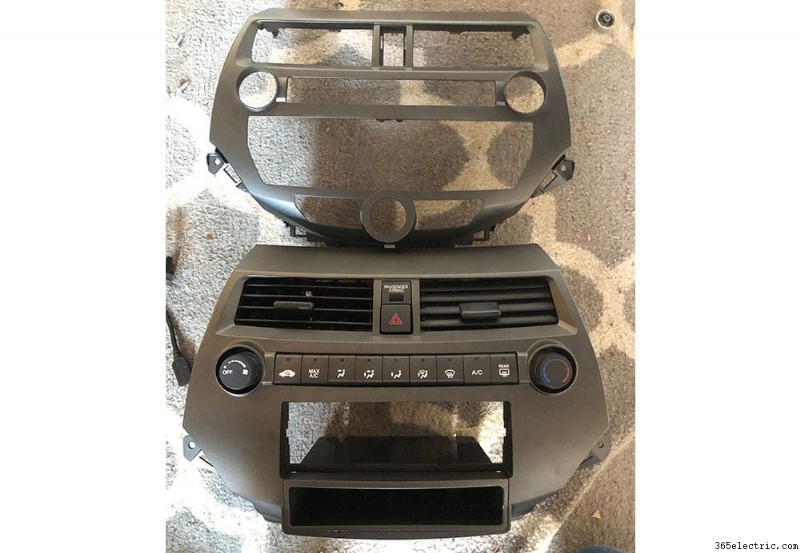
The dash trim has a number of components that you'll need to reuse and carry over to your new Metra dash kit. This includes the vents, climate control and the emergency button switch. To get access to these, you'll need to remove the head unit from the plastic trim. Remove the head unit by removing the screws in the back, then move to the climate control unit. The climate control unit also has a few screws to remove. Once you've removed those screws you'll need to pop off the two control knobs on the face in order to fully remove the climate control unit. Veja fotos.
The hazard/emergency button has a few clips holding it in. Gently pry them apart to push the button out towards the face of the trim.
Finally move to the vents. Remove the final screws in the old trim and pull the vents off. The remaining plastic dash trim should be completely empty and you should now be able to place the components back into your new aftermarket dash kit.

Step 3 – Re-installing Your New Aftermarket Head Unit
If you're not installing an aftermarket backup camera, you're now ready to reinstall your aftermarket dash bezel and new head unit back into the car. If you are installing a backup camera, see the Installing a Backup Camera section.
Wiring Your Microphone
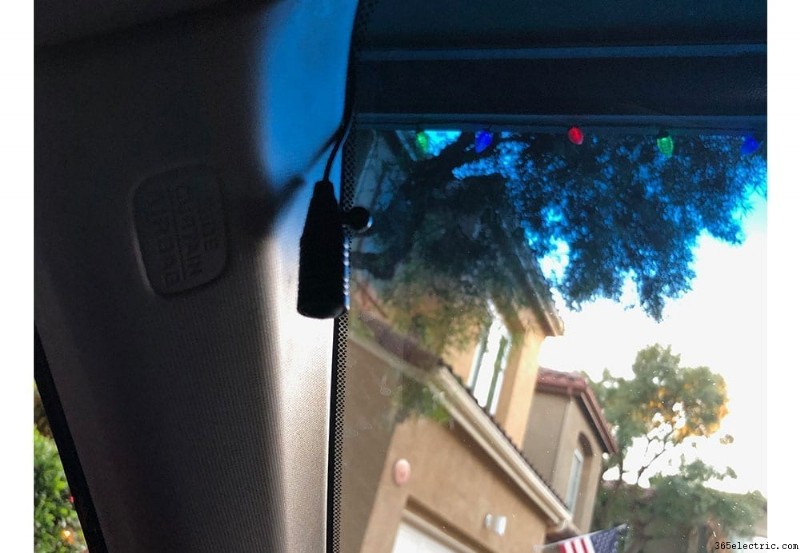
Before you put the head unit back into the car, plug the harnesses in and secure it you'll want to wire the microphone up first if you have one. I normally place my microphones in the headliner closest to the driver side front pillar bordering the windshield. So this walk through is based on that position.
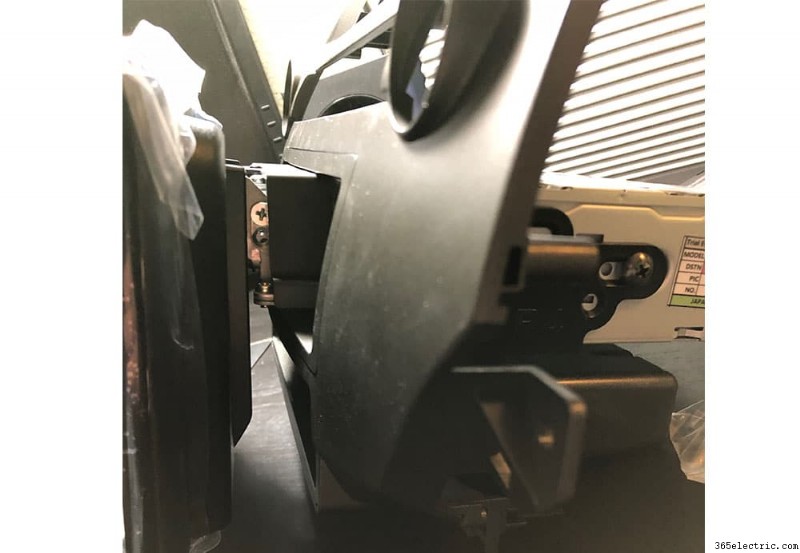
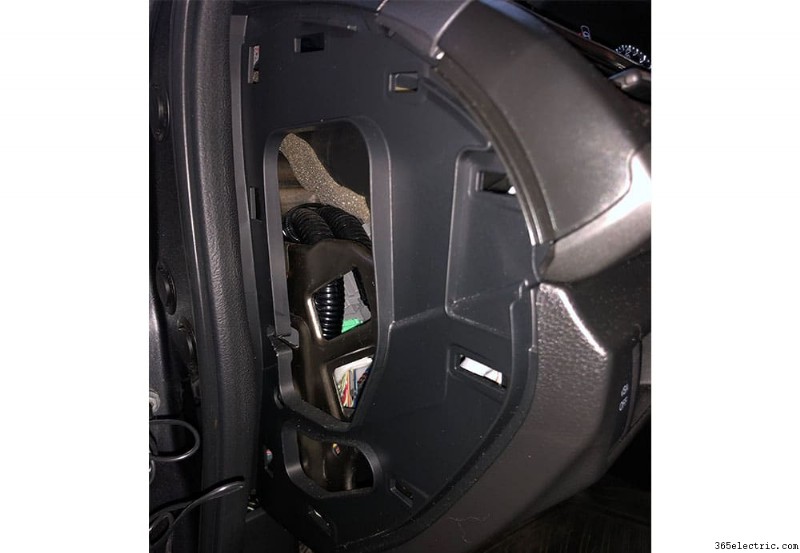
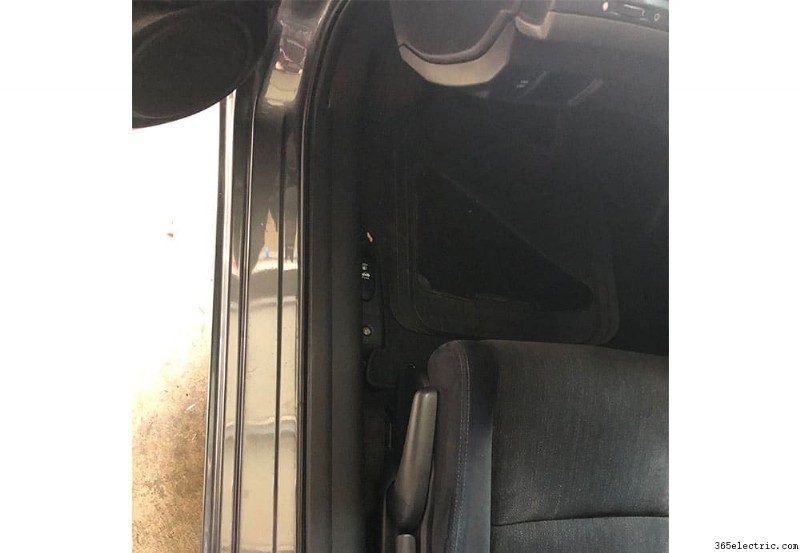
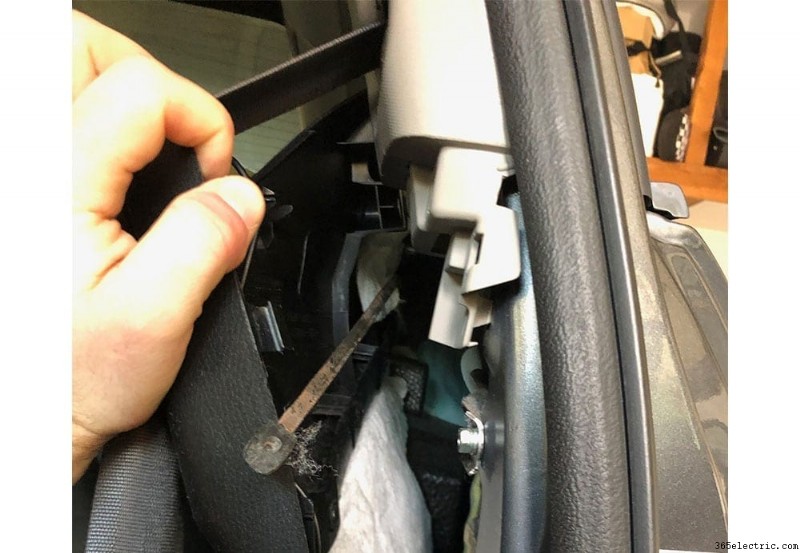
Start by removing the plastic cover on the left hand side of the dash (see image). This panel has a few clips, start by gently prying the corner to the right, closest to the vent. Once this is removed, you'll have access to run the microphone wire through and underneath the dash to the stereo compartment along with through to the pillar of the car to the headliner.
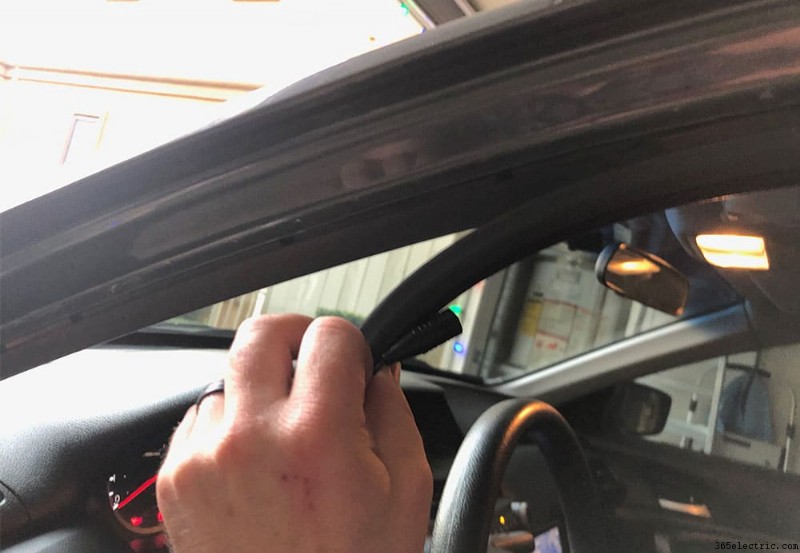
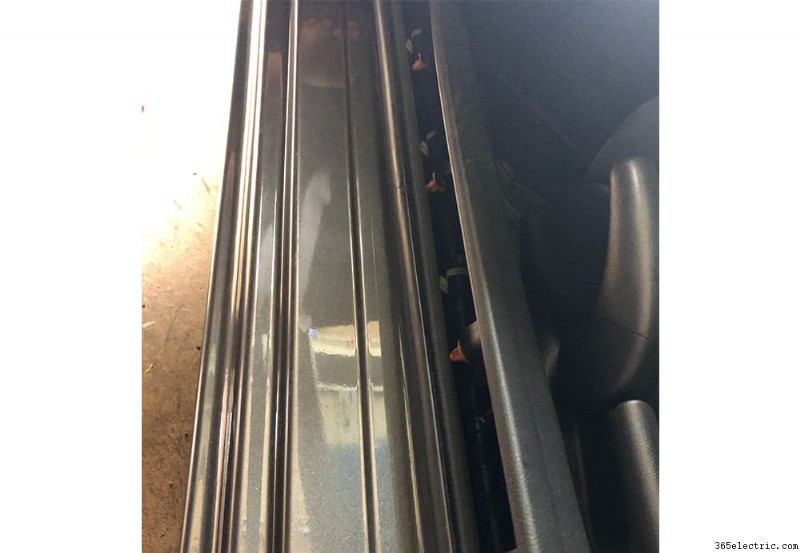
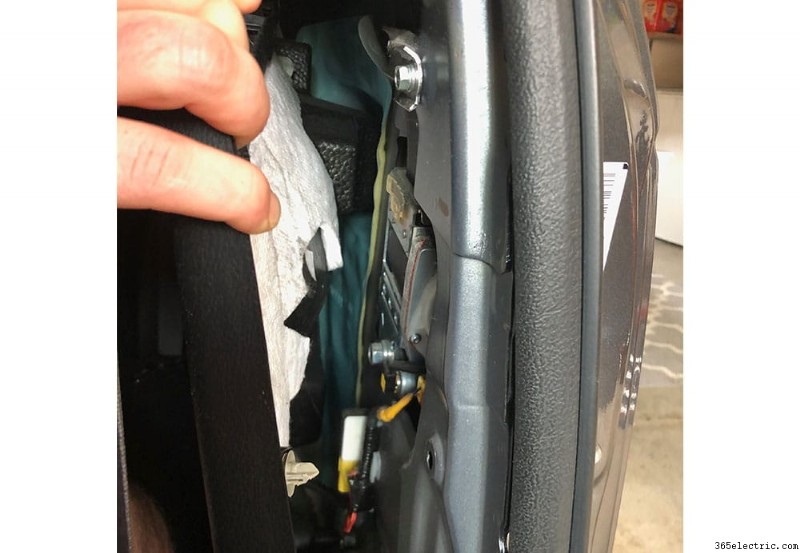
Gently pull the door seal closest to the panel that you just removed, enough to push the microphone wire behind it, in between the metal frame and the dash panel. Run the microphone wire up through the pillar cover and around through to the windshield facing side of the pillar. Clip the microphone to the headliner.
On the other side of the microphone wire, run it through the panel that you pulled, behind the dash and out through the stereo compartment where the head unit will go back in. You can zip-tie the wire behind the dash to the existing wire harness so that it doesn't drop down into your feet. Once you've ran the microphone wire into the stereo area, leave about 12 inches of slack and then bundle and zip tie the slack together so that your wire doesn't look like spaghetti behind the stereo and get in the way of the install. I zip tied it to the metal sub frame behind where the stereo will sit.
Install the Aftermarket Bezel and New Head Unit
Once the microphone is wired, you can begin to install your new bezel and head unit. Start with the wire harnesses. Clip your new aftermarket wire harness into the OEM harness. There are two clips – the primary that houses all of the wires you joined in the preparation phase and then the power antennae which has a blue wire and a wire with a male plug on it.
At this point, you should have your bezel WITHOUT the head unit installed. Keep the new aftermarket head unit out of the bezel until you've installed the bezel into the car. Install your bezel by placing it back into the dash the same way you removed it. Be sure to re-connect the hazard/emergency lights button and the climate control. Pull the microphone wire, the head unit harness (black plug) and the CRUX male plug for your steering wheel controls all out through the space in your bezel in which your head unit will be installed. Once your wiring is accessible through the bezel, place the single or double din trim piece into the bezel before you secure the new head unit. This is a slim piece of plastic that comes with the bezel to basically frame the outside of the head unit once it's installed.
Now, take your new aftermarket head unit and plug in all of the wires that you should have hanging out through your bezel. Once all of the wires are plugged in, place your head unit into the bezel until it ‘snaps' into place. Voilá!
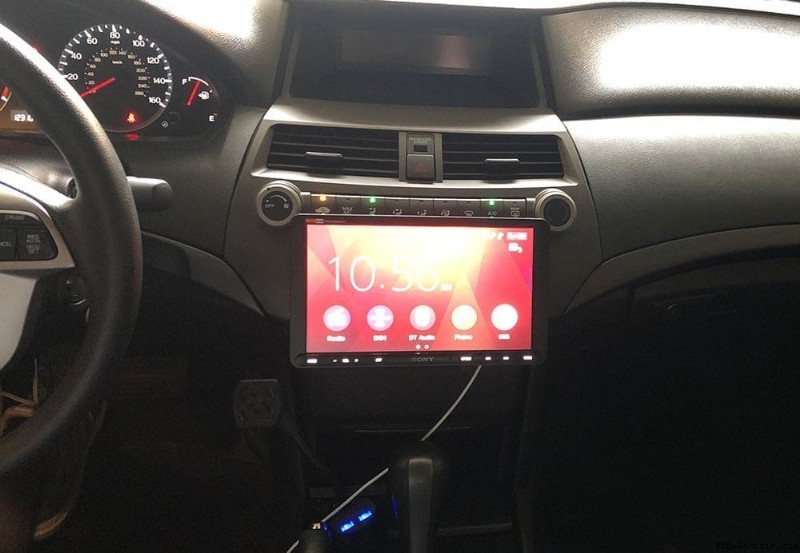
Test Your New Head Unit and Reinstall Trim
Before you screw your bezel back into place and re-install the trim, be sure that your new stereo works! Turn the car on and run through the key features – make a phone call, connect your usb device, turn on the radio, etc.
If all checks out, start to replace all of the trim back where it came from. In my tools and parts section, I recommended buying some extra trim clips. I wasn't able to find all of the clips from my center console trim so I purchased extra and replaced the missing ones before I re-installed all of the trim pieces. I recommend doing this to prevent (or help prevent) vibration noises. Before placing your trim and center console trim piece back on, I recommend pulling all of the clips and placing them directly onto the trim piece you're re-installing. Leaving them in the clip hole instead of on the trim itself makes installation much more challenging. If you place them back on the trim piece they just pop back in like they should.
Additional – Backup Camera Installation
If you're a Honda Accord owner without a backup camera and are looking to add an aftermarket camera to a supporting aftermarket head unit, we have you covered. In addition to the head unit that we installed, we also added a backup camera. In this section, we'll walk through the steps that we took to run a wired backup camera in a 2008 – 2012 Honda Accord.
If you're installing a backup camera at the same time as a new head unit, continue with this step after you are done with Step 2. If you're installing a backup camera to an existing head unit that supports a backup camera feed, complete Step 2 through the “Center Console &Cubby Removal” section first.
For our installation we used an AUTO-VOX Cam 6 license plate camera, but this walkthrough should apply for any other license plate camera or universal wired camera.\
Wiring Your Backup Camera
A wired backup camera requires you to wire reverse signal power and ground, along with a signal wire (typically an RCA that connects to the back of your head unit).
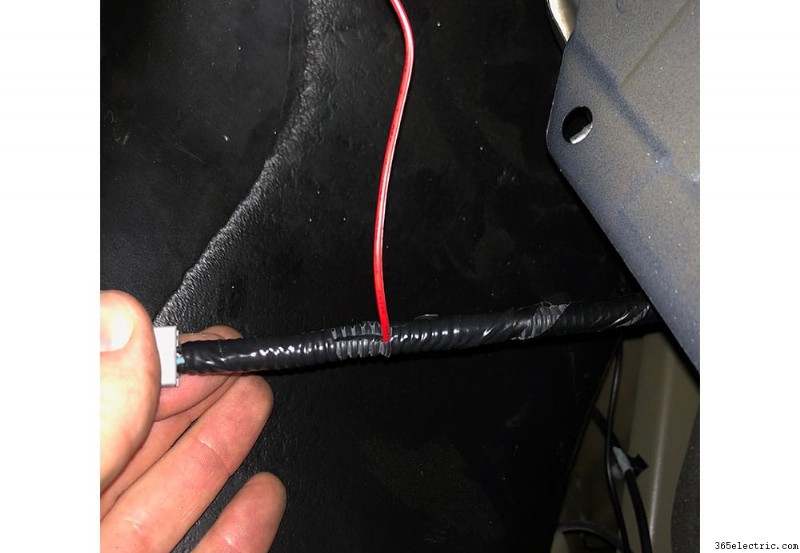
The first (and most time consuming) step is to run your camera's signal wire from the dash to the rear of your car. Start by feeding the signal wire through the bottom of the dash near the driver petals into the head unit area of the dash. Feed the wire through the opening where your head unit will be installed and leave about 12″ of extra cable for when you plug your head unit back into the harness and other signal wires.
Run the wire underneath the driver side of the dash above the petals. I typically will use zip ties to secure the signal wire to an existing harness so that it doesn't become a hazard while driving. Loosen the door seal that's to the left of the kick panel (panel that's closest to the driver's left foot while seated) and run the wire along the left hand side of the panel underneath the seal.
Next, you'll need to loosen the panel along the bottom side of the door along with the panel along the driver side of the rear seats.
If you have a four door, you'll need to run the wire along the column between the front and rear doors and also loosen the panel along the bottom side of the rear door to run the wire. 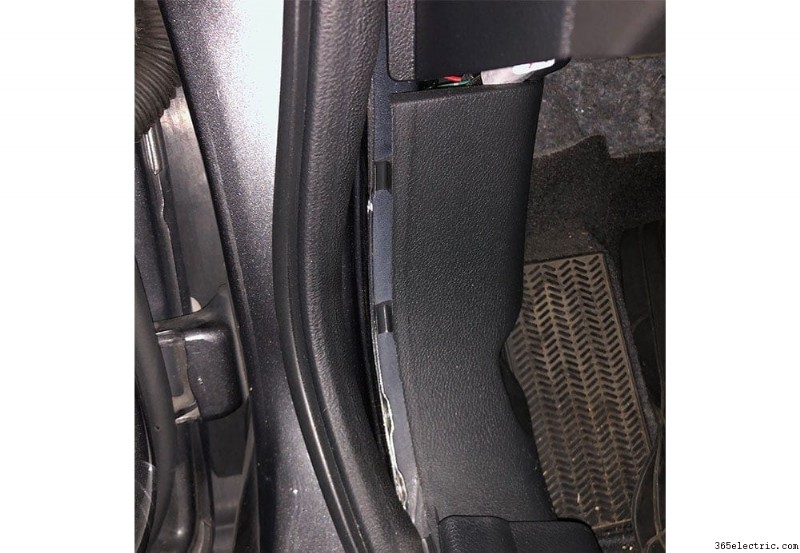
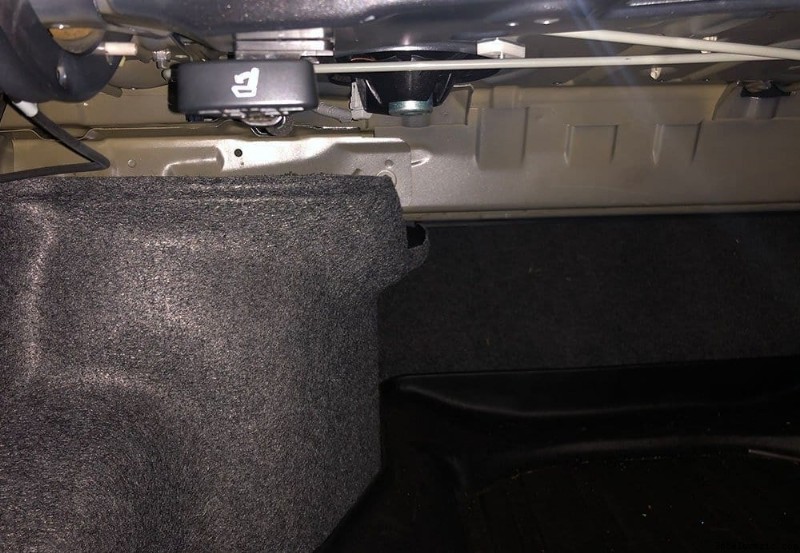
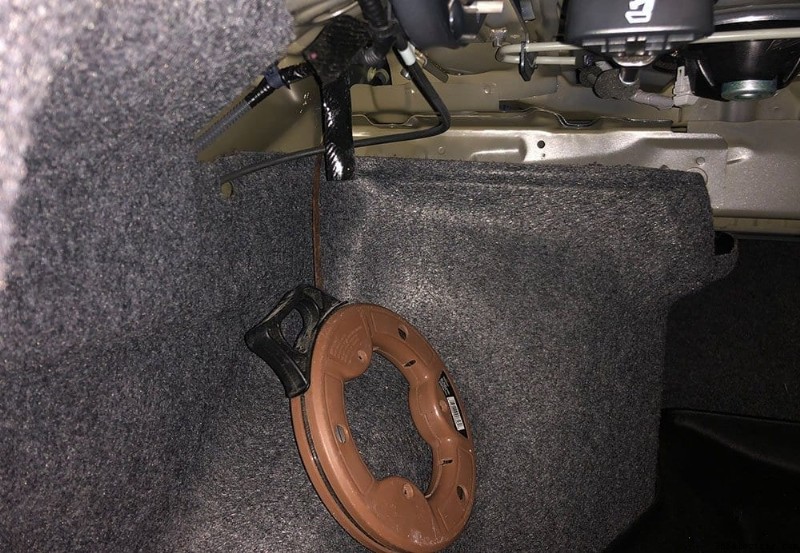
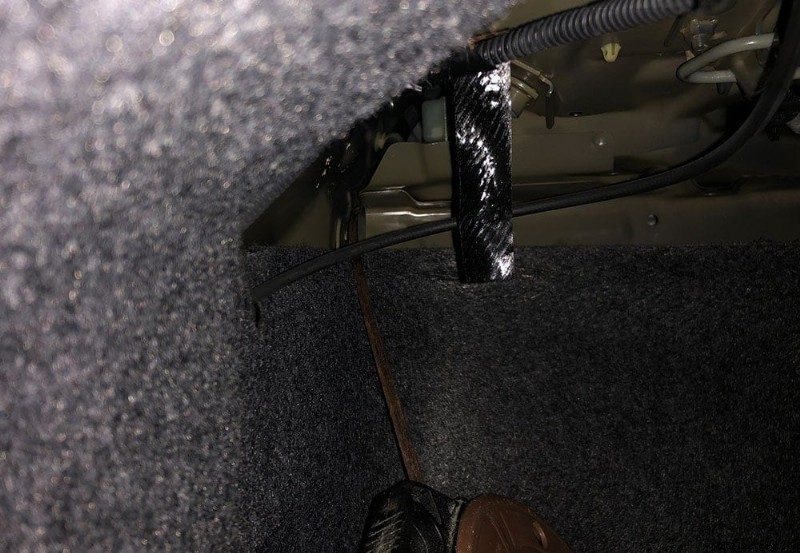
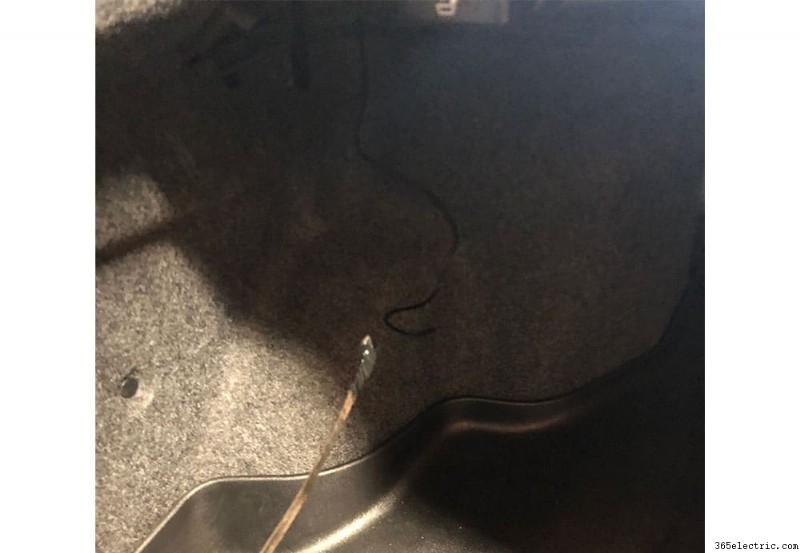
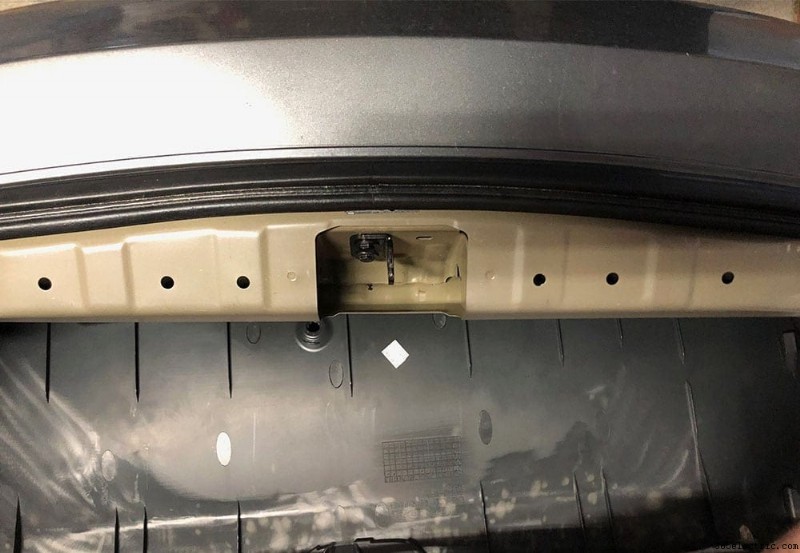
Once you've run the signal wire through the driver side floor panel, you need to wire it through to the trunk. To do this, fish it through the panel between the rear seat and the trunk. Start from the trunk side and run your fisher through the trunk into the panel that you loosened earlier.
Hook the camera signal wire to the fisher and then slowly pull the fisher through the panel to the trunk.
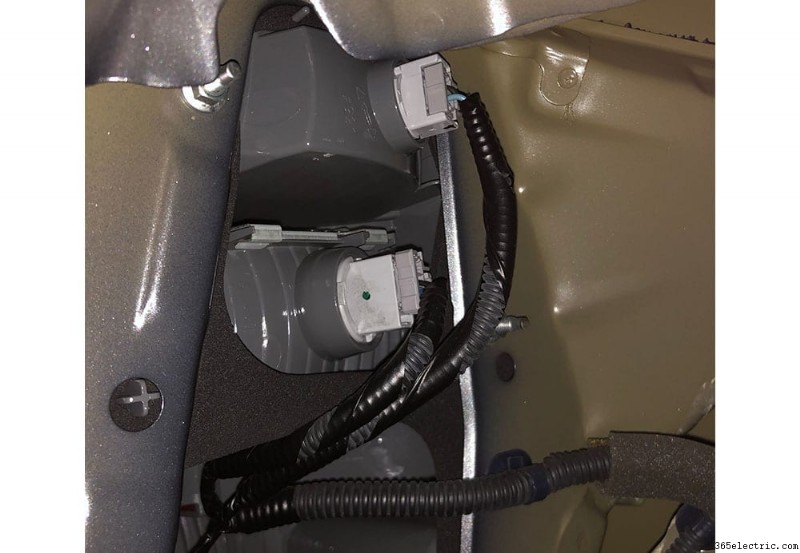
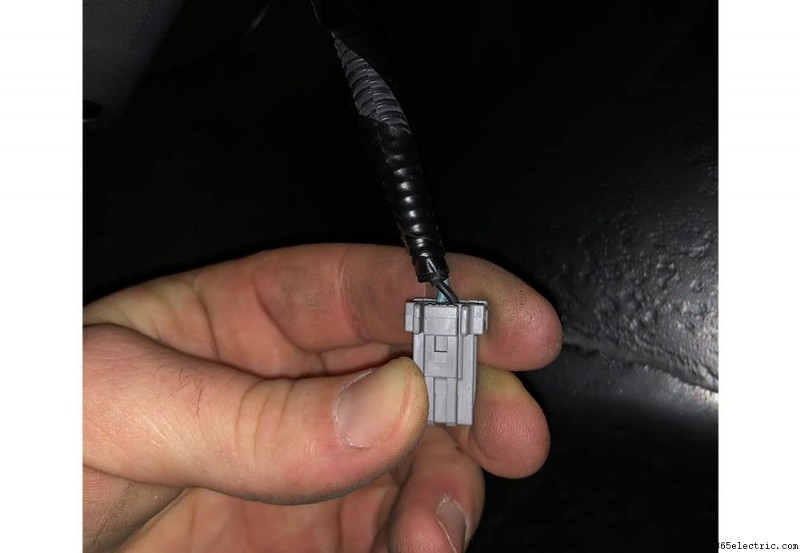
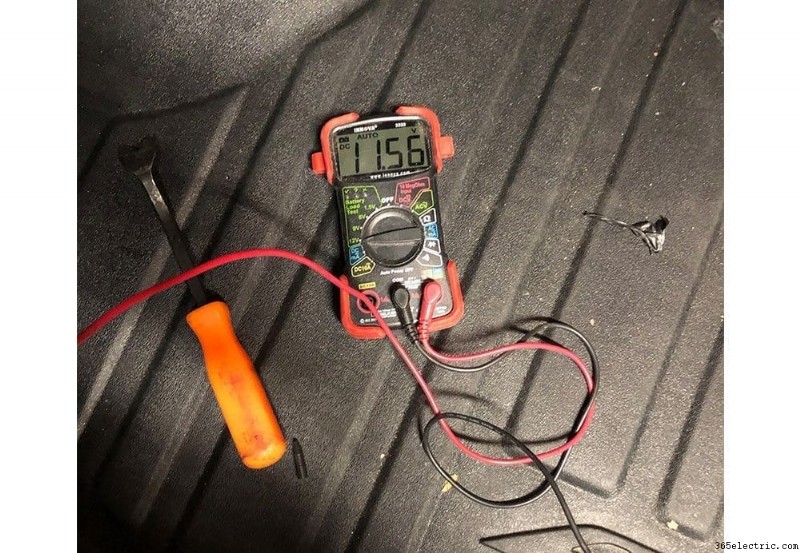
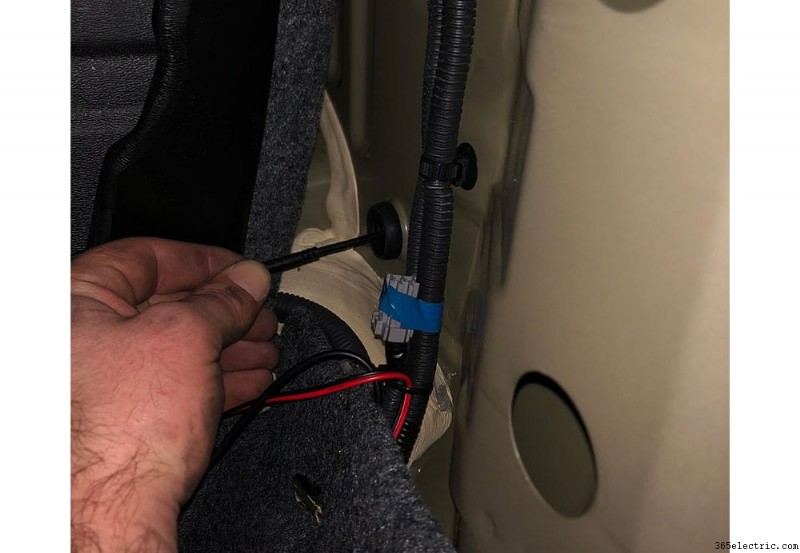
Most cameras require a signal/power wire to tell it when to turn on and when the car is in reverse. The easiest way to signal the camera when the car is in reverse is to tap into positive wire in the reverse light. To do this, you'll need to pull the panel inside the trunk to get access to the tail light.
Pull the clips to the panel and remove the panel to gain access to the tail light plugs. I tested the plugs with a voltmeter while the car was in reverse in order to determine which wire was positive and tapped into the wire for the positive source for the camera. You can use a wire tap to do this. For the negative wire, I used an existing ground that was bolted to the frame behind the plastic panel closest to the bumper.
Installing the Camera
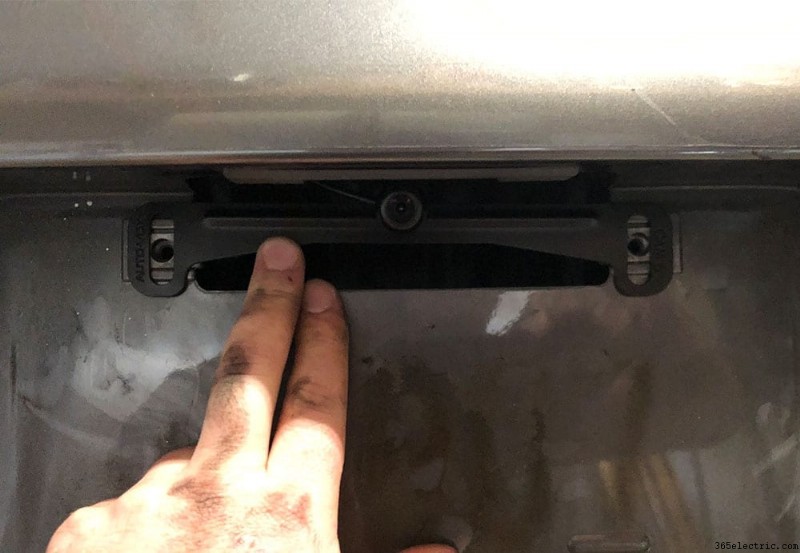
Since I used a license plate camera, there was no need to drill holes. If you choose a camera that does require custom mounting you'll need to find a good location for the camera and mount it. I would recommend above the license plate.
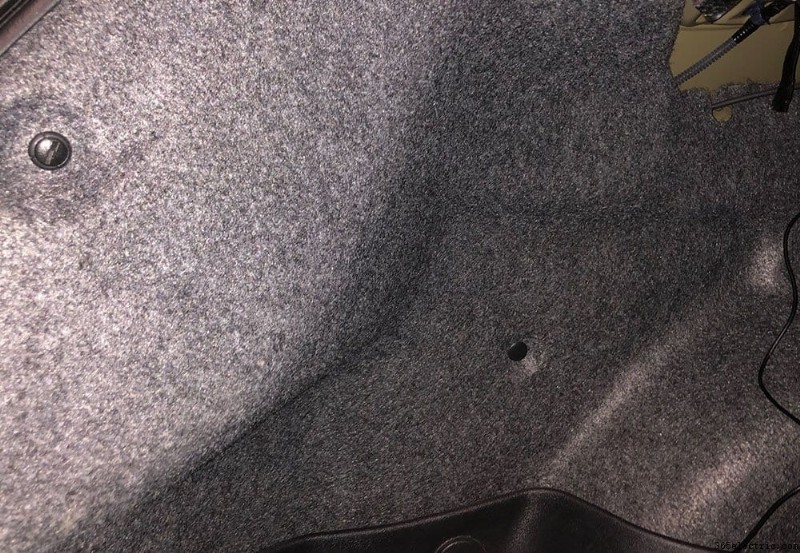
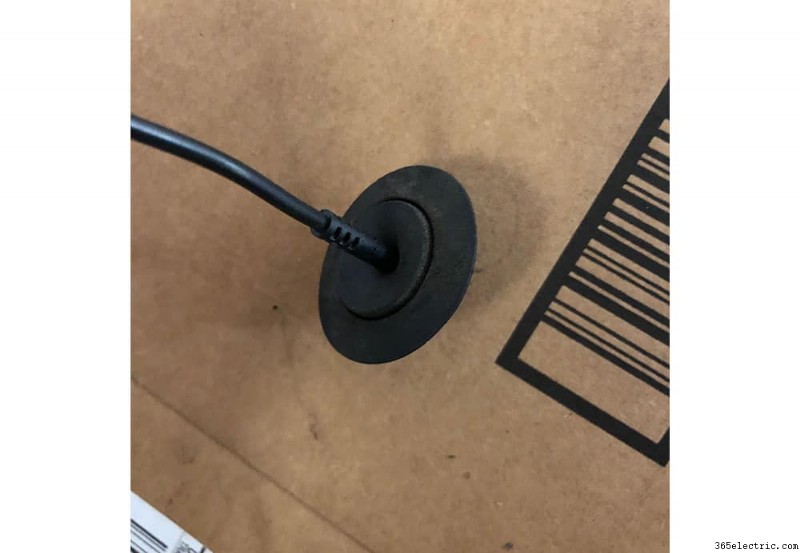
Before you mount the camera (license plate or not), feed the wire through the hole above the license plate and behind the bumper. Behind the plastic, there's a grommet that will lead directly into the back of the trunk where your positive, negative and signal wire should already be. Use a knife or drill to poke a hole in the grommet large enough to run the wire through it and place the grommet back into the hole with the wire fed through it. Once it's through the grommet, you should be able to access it from within the trunk area and connect it to the existing wires you've already ran.
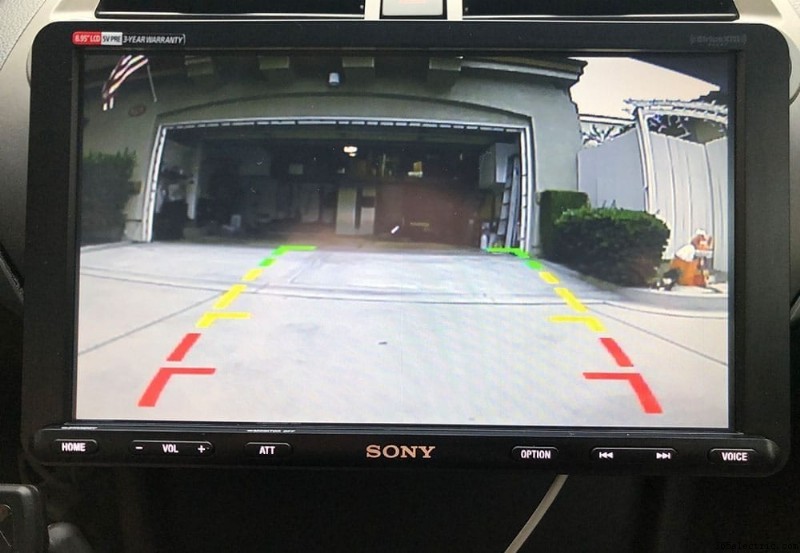
The final step is to pull any extra wire through the grommet, and mount your camera. Once everything is plugged in and mounted you're ready to test! Plug in your camera signal wire into the back of your head unit, turn on the car and put it in reverse!

Obrigado por ler! Por favor, use os comentários abaixo se você tiver alguma dúvida/comentário!
