Neste artigo: Vamos orientá-lo nas etapas necessárias para substituir um atuador de porta defeituoso em um Honda Accord 2008 – 2012. - Ferramentas necessárias
- Peças necessárias
- Etapa 1:removendo o painel da porta
- Etapa 2:removendo seu atuador de porta quebrada
- Etapa 3:preparando seu novo atuador de porta
- Etapa 4:reinstalando o atuador e o painel da porta
Dificuldade do projeto:Fácil
Tempo estimado:1,5 horas (ou menos)
O atuador da porta do lado do motorista no meu Honda Accord 2009 começou a fazer barulho há cerca de 6 meses ao travar e destravar. Era particularmente perceptível quando as portas eram fechadas e o carro começava a rolar no drive – o travamento automático. Soou um pouco como um gemido (por falta de um termo melhor).
Finalmente, cerca de duas semanas atrás, ele parou de responder ao bloqueio e desbloqueio intermitentemente. Percebi que toda vez que eu me afastava de um semáforo, ele tentava travar – semáforo após semáforo. Percebi que a porta do lado do motorista não estava travando e que o recurso de travamento automático continuava tentando trancá-la toda vez que o carro começava a rolar. Essa era a minha fila para substituí-lo.
Neste artigo, mostrarei as etapas para remover o painel da porta e substituir o atuador da porta do seu Honda. É bem simples na verdade.
Lembre-se:para uma boa prática e segurança, lembre-se de desconectar o lado negativo da bateria do seu veículo antes de qualquer trabalho elétrico para evitar fusíveis estourados ou danos elétricos ao seu carro! Peças necessárias
Há realmente apenas uma parte (ou duas se você estiver fazendo duas portas):
- Atuador do lado do motorista para Honda Accord 2008-2012 – US$ 37
- Atuador do lado do passageiro para Honda Accord 2008-2012 – US$ 32
Ferramentas necessárias
Este projeto foi bastante direto e simples e exigiu apenas algumas ferramentas:
- Chave de fenda Phillips
- Chave de fenda de ponta chata
- chave de 10 mm ou soquete e catraca
- Ferramenta de alavanca de plástico
- Super cola
- Fita adesiva
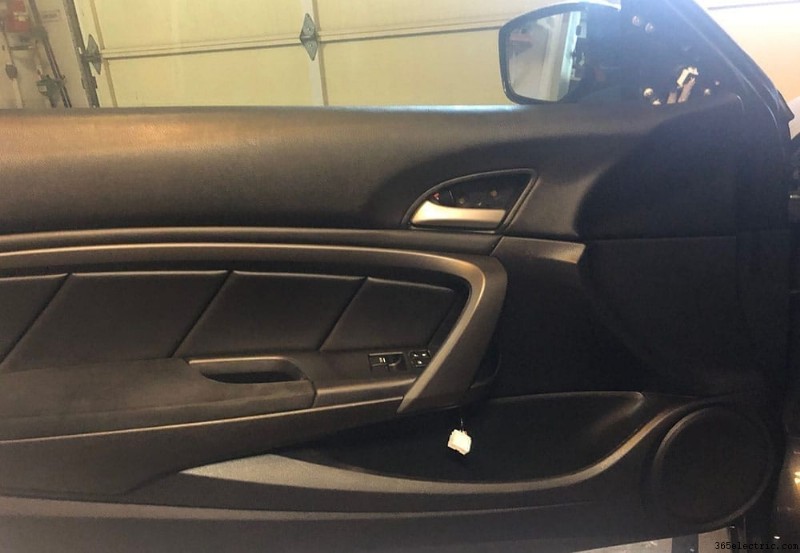
Etapa 1:remover o painel da porta
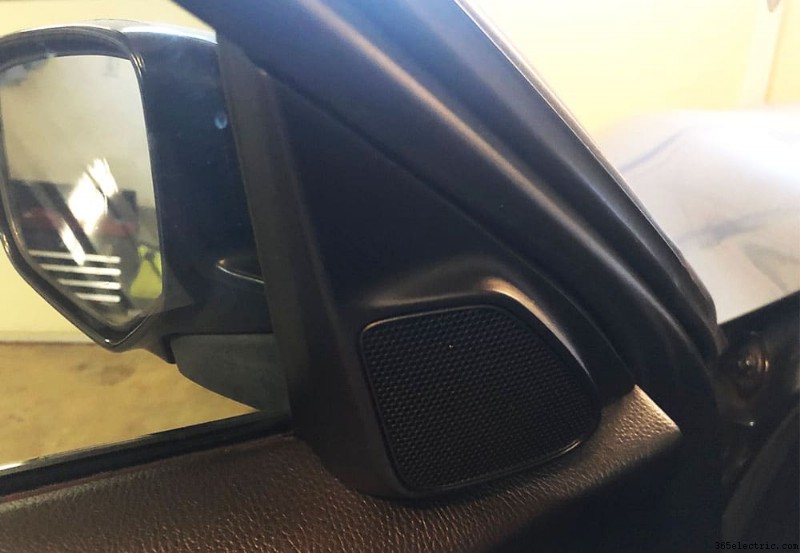
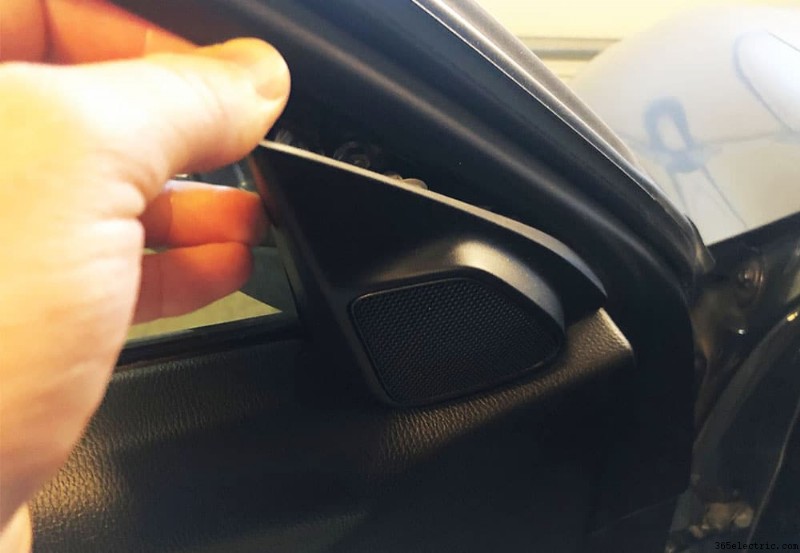
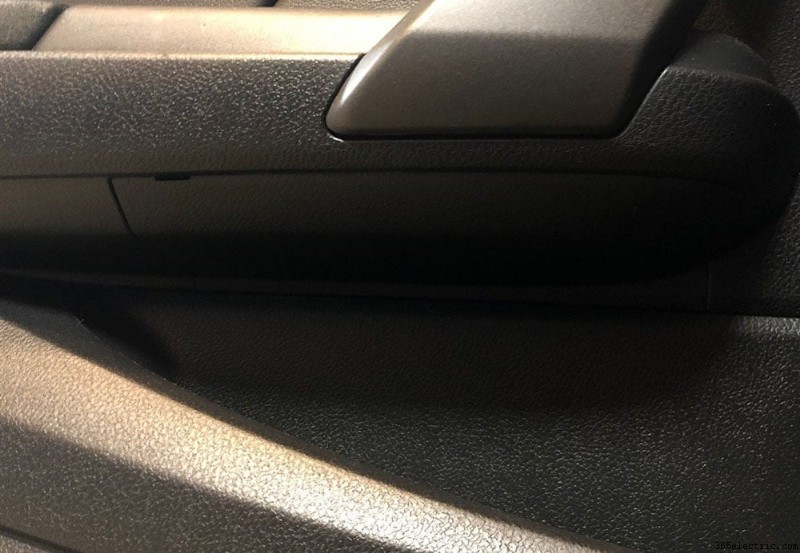
A primeira coisa que você precisa fazer é remover os parafusos do painel da porta e soltar e remover os painéis da porta do seu Accord. Para fazer isso, comece com o tweeter na parte superior da porta. Coloque os dedos entre a janela e o painel do tweeter e puxe suavemente. Há um único clipe atrás dele, então ele se soltará com relativa facilidade. Uma vez solto, remova o plugue do tweeter único e coloque o tweeter de lado.

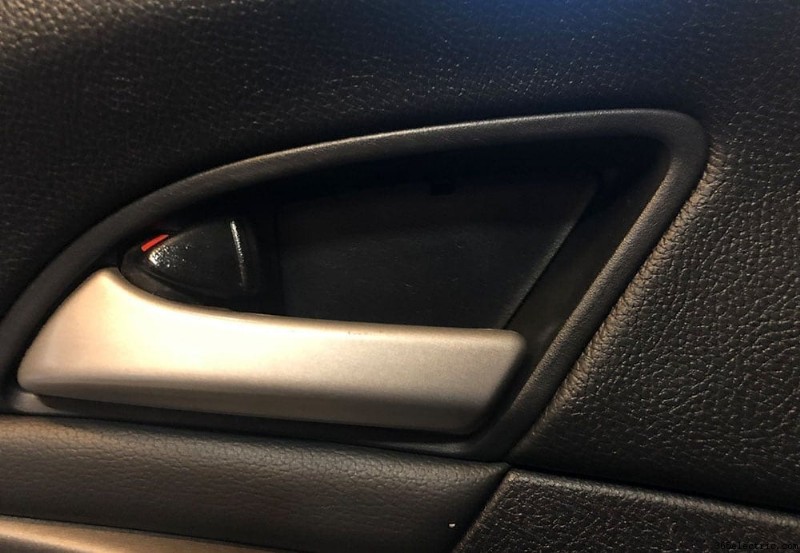
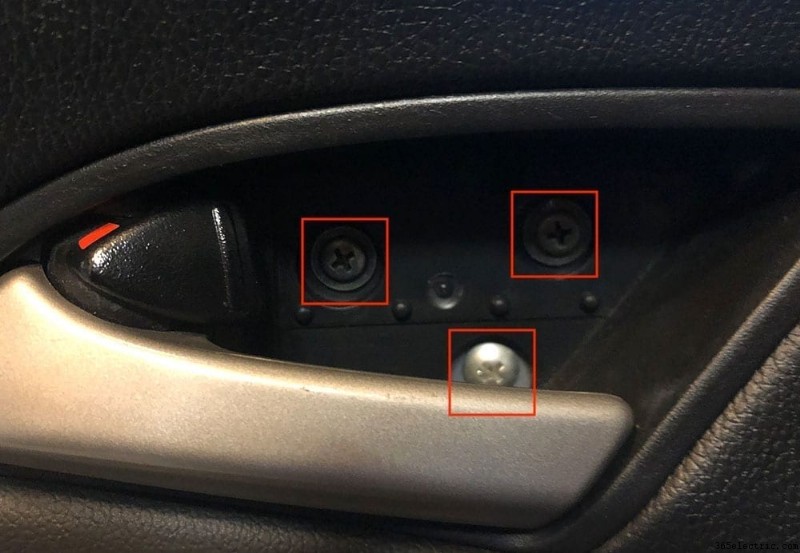
Com o tweeter removido, desça até a maçaneta da porta. Atrás da maçaneta da porta há uma tampa de acabamento que cobre três parafusos. Na parte superior da tampa de plástico, você notará um pequeno clipe. Use uma pequena chave de fenda para empurrar o clipe e puxe o painel para expor os três parafusos da porta. Desaperte todos os três parafusos e coloque-os de lado para quando você reinstalar a porta.
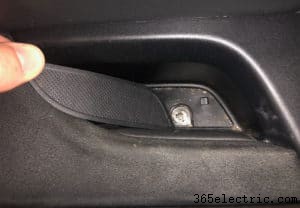
No apoio de braço e maçaneta da porta, há outro parafuso a ser removido. O parafuso está sob uma tampa de borracha que é colocada na parte inferior da área da maçaneta da porta. Use uma cabeça chata para encaixar entre o canto e levante a tampa para ter acesso ao parafuso embaixo. Em seguida, desaperte este parafuso do painel da porta única.
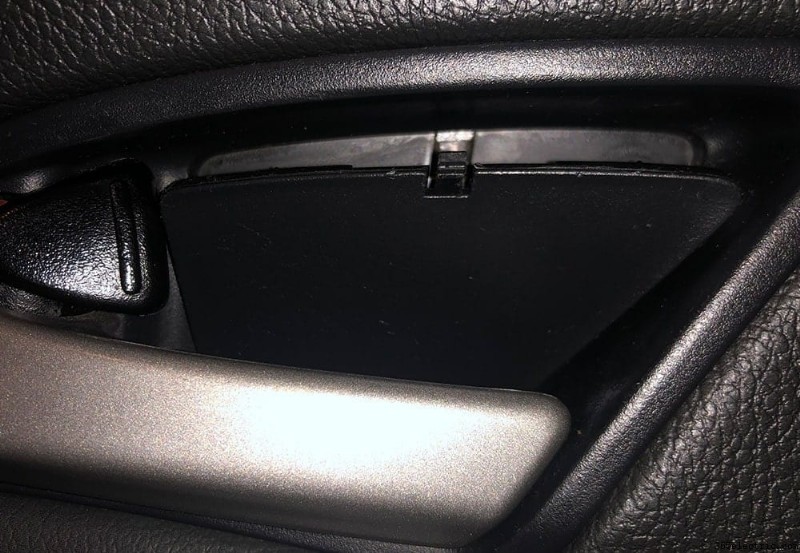
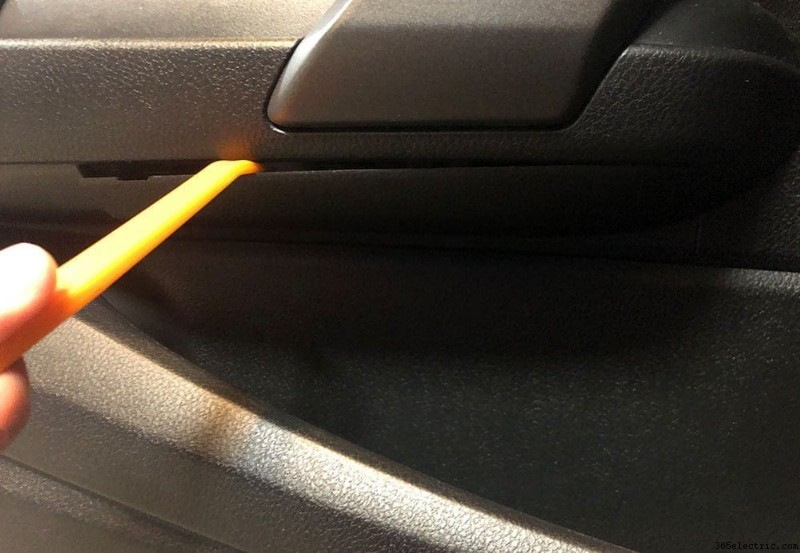
O último parafuso que você precisará remover está atrás de um painel na parte inferior da maçaneta da porta. Usando uma ferramenta de cunha, levante o painel para baixo para remover e ter acesso ao parafuso atrás dele. Desaperte o parafuso final e reserve. Em seguida, solte os plugues branco e cinza do painel da porta e empurre-os por trás do painel na porta. Isso permitirá que sua porta se mova livremente quando você puxar o painel da porta.

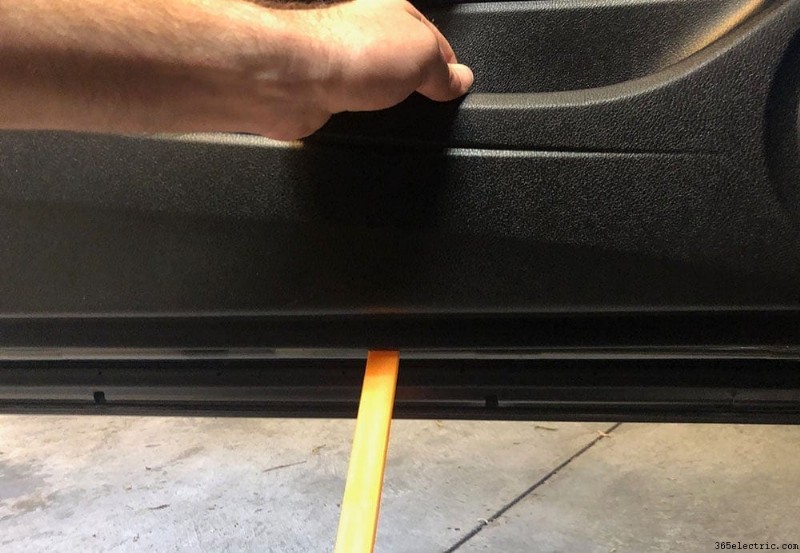
Com todos os seus parafusos, tweeter e plugues do interruptor removidos, você está pronto para soltar o painel e removê-lo da sua porta. Para fazer isso, coloque uma ferramenta de alavanca grande na parte inferior do painel. Se você não tiver uma ferramenta de alavanca grande o suficiente, há um espaço onde seus dedos se encaixam ao longo da parte inferior do painel.
Puxando do lado inferior do painel e da área do cubículo, puxe o painel da porta para fora da porta para soltar todos os clipes da porta inferior. Normalmente, este será um 'POP' alto e abrupto e a parte inferior do painel se soltará. Existem clipes ao longo de toda a parte inferior do painel e um ou dois na lateral.
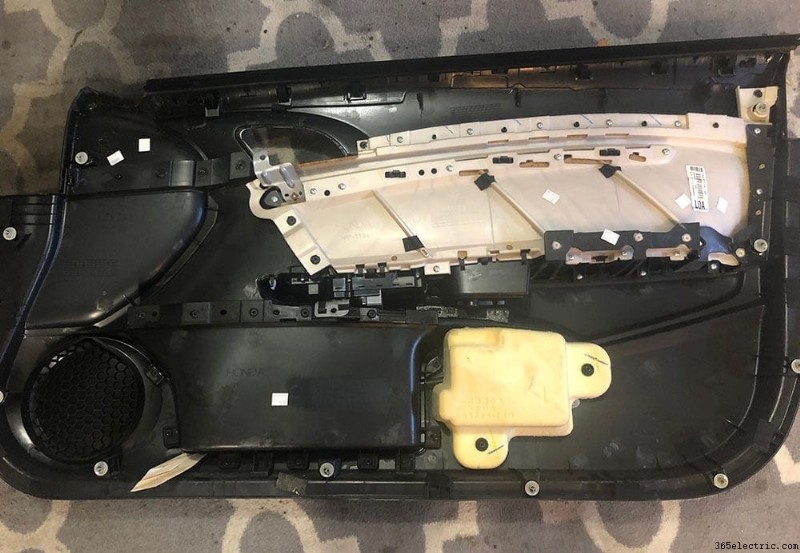
Once all of the clips are free, lift upwards on your door panel to remove it. Once it's lifted away from the door the last piece you'll need to pull free from the panel is the handle. There's a few plastic clips on the back side of the handle that you'll just need to lift upwards to break the handle free and detach it from the door panel.
Place it on a rug or towel to prevent any scratching of the surface.
Step 2:Removing Your Broken Door Actuator
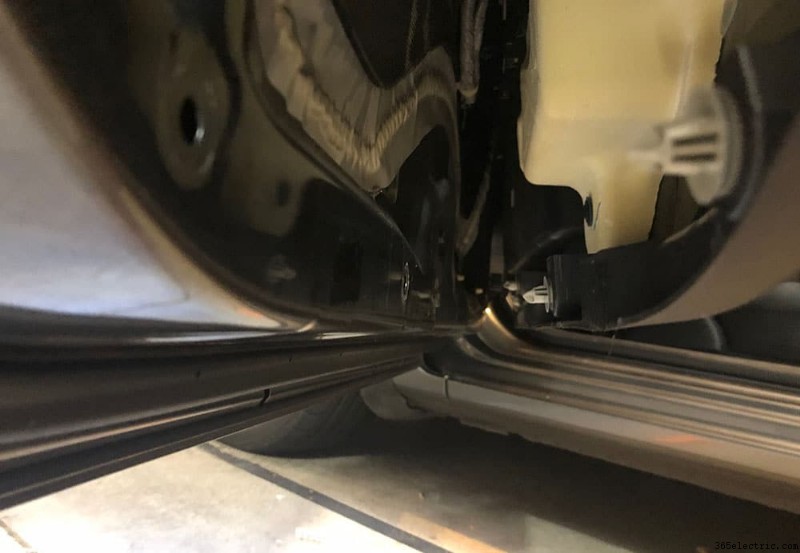
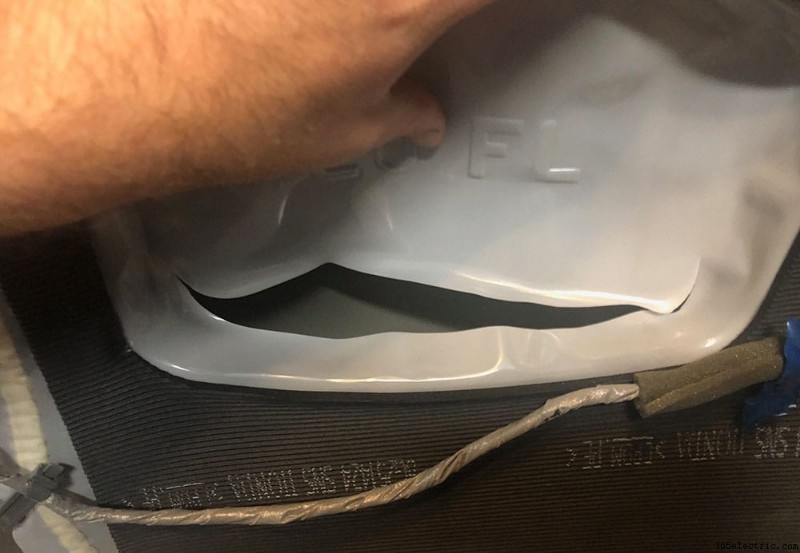
With your door panel removed, you now will be able to gain access to the back side of the door and ultimately the actuator. To begin, you'll need to get behind the damping material that covers the opening of the door panel so that you can reach and access the cable and actuator rod. You can do this by running a razor blade along the adhesive that holds the damping material to the door and peel the material back a foot or two – enough to reach the actuator. In my case I cut a sizable slit in the center to try to limit the damage to the damping.
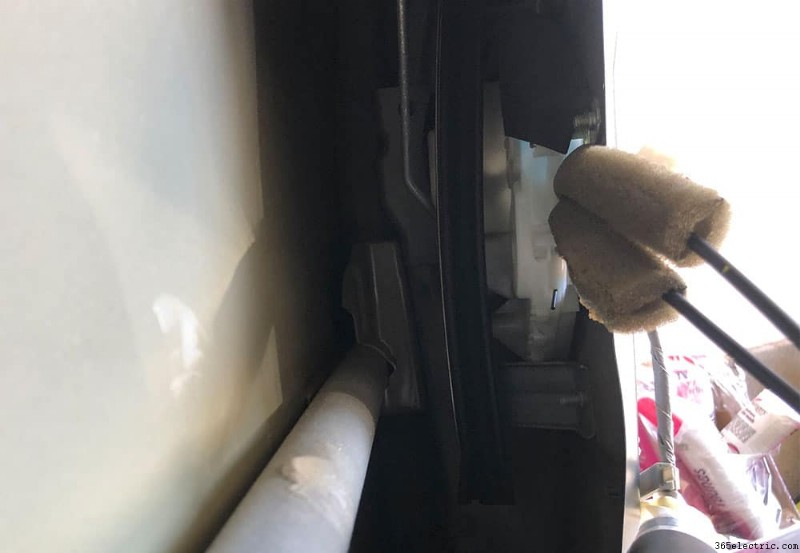
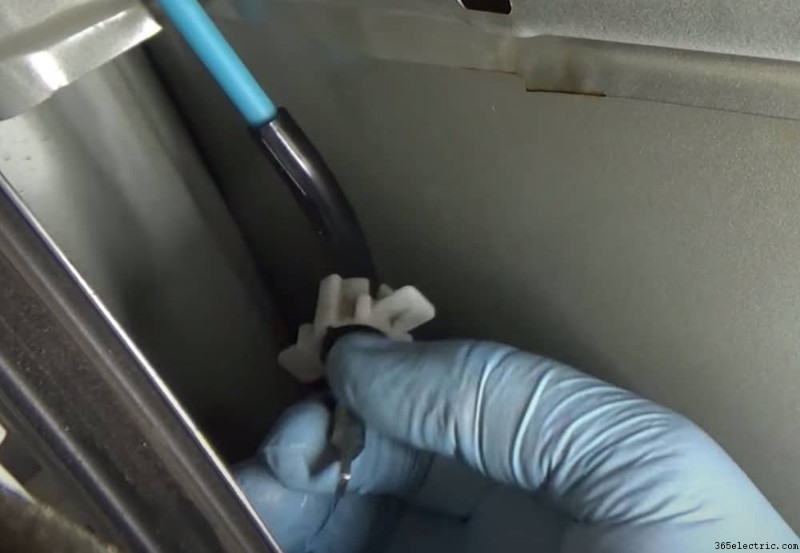
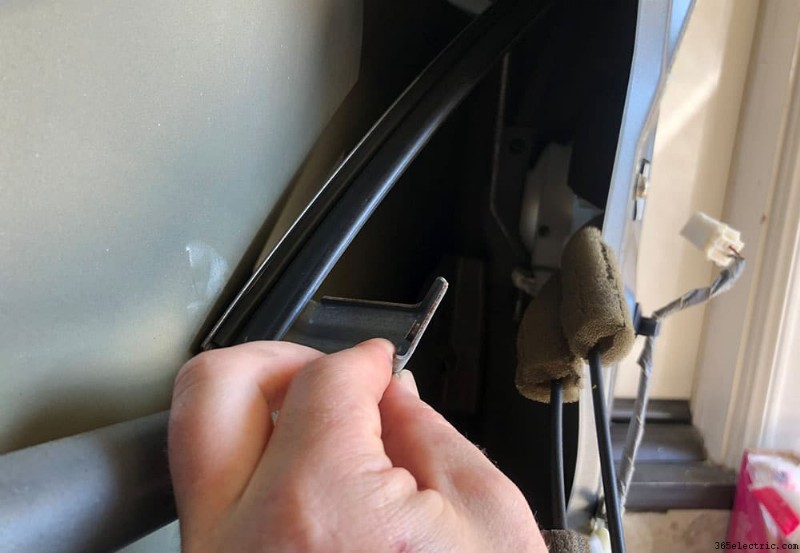
Next, you'll need to unclip the door latch cable that runs along the door and into the back side of the actuator. Once unclipped you can either feed the cables and latch through the damping material or you can leave it hanging for now until you remove the actuator.
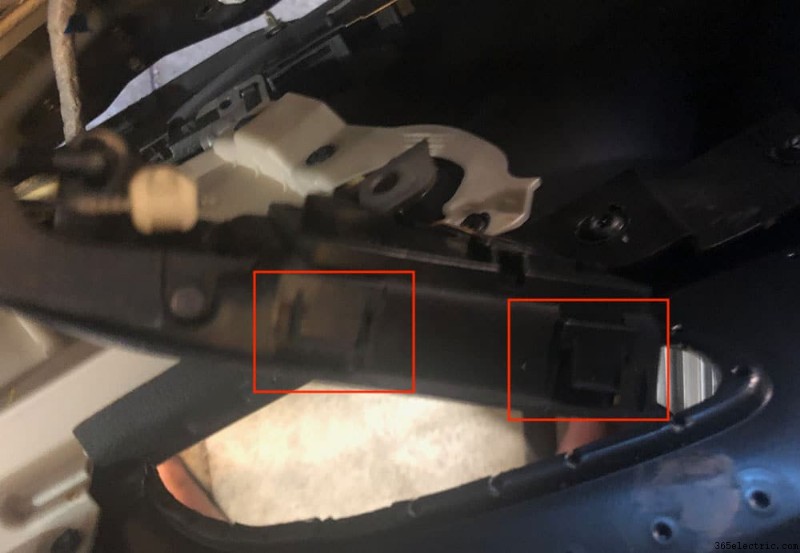
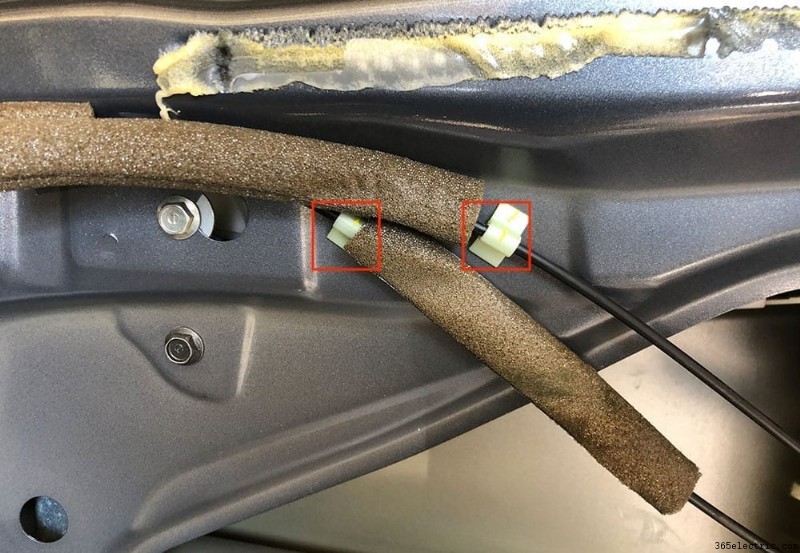
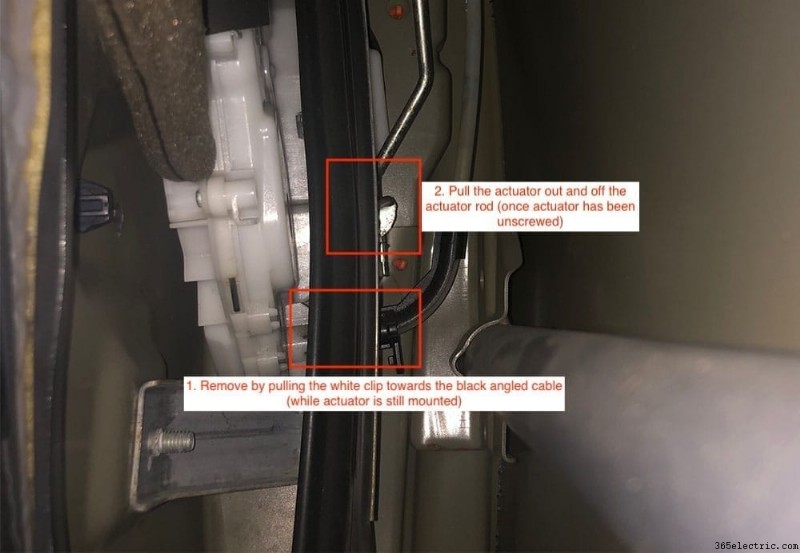
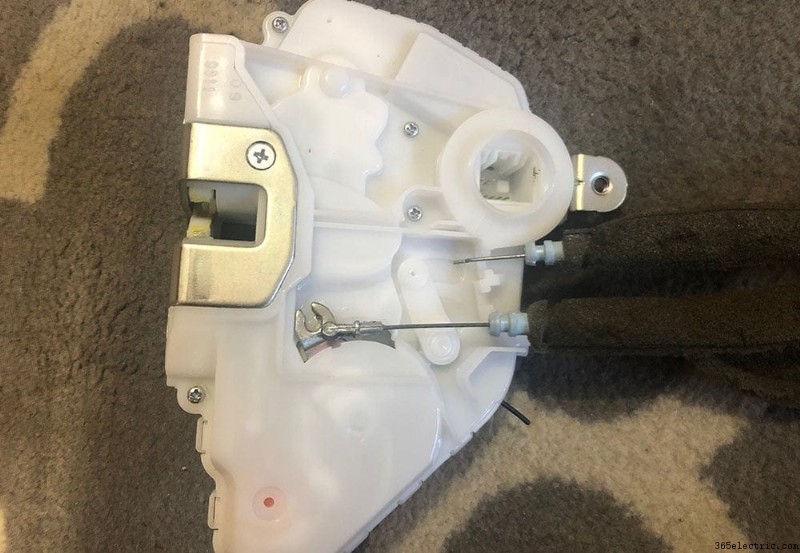
Using the slit in the damping to access the actuator, for those who are replacing the driver side actuator you'll need to remove a single cable that feeds directly into the back side of the actuator
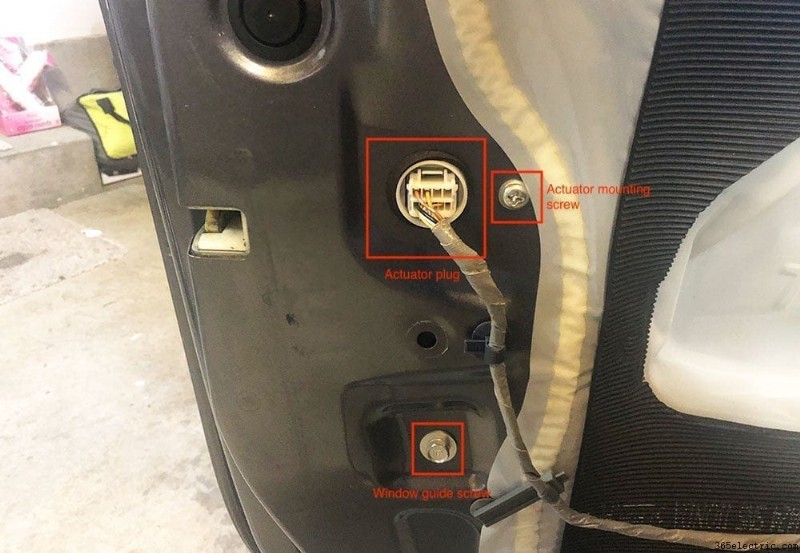
(*note this single cable that goes to the back-side of the actuator is only located on the driver side door actuator) . To do this, you need to grasp the white clip that surrounds the black cable housing and pull it away from the actuator to get it to unclip. Once it's unclipped you can remove the cable from the actuator itself (see images). Finally, pull out the plug that powers the actuator.
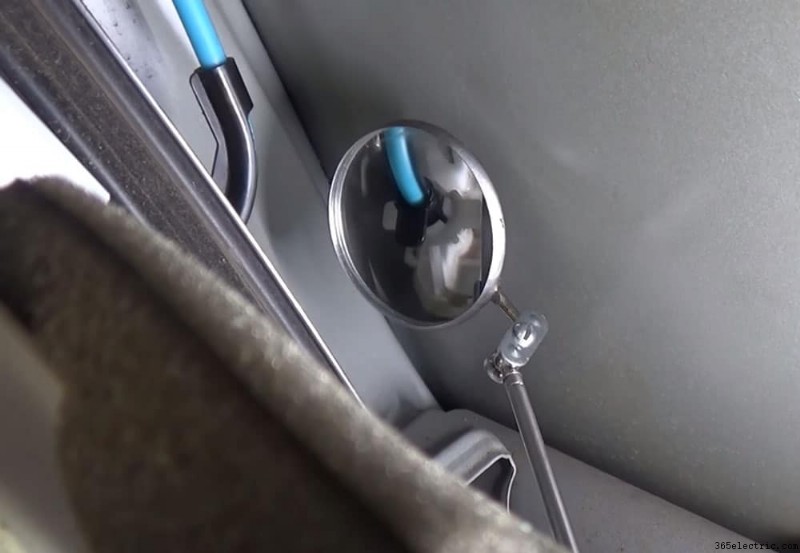
With the cables unhooked from the door and the single cable removed from the back side of the actuator you're ready to unmount the actuator from the door. There are a total of 4 phillips screws that hold the actuator to the door. Remove all 4 screws along with the 10mm bolt that holds the window guide behind the door. This will allow you to pull the actuator from behind the door a little easier with the window guide pushed aside.
Start to pull the actuator from the door, working the remaining rod out. Once the rod is removed you can pull actuator out completely and begin the process of preparing your new actuator.

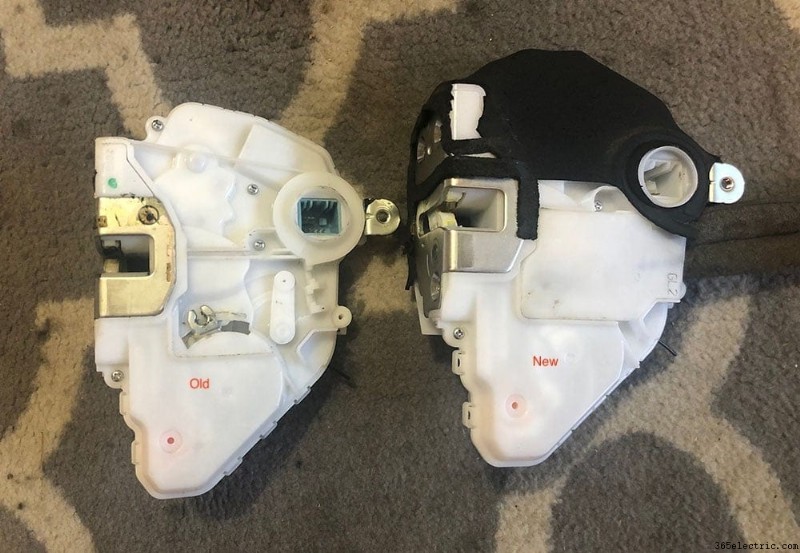
Step 3:Prepping Your New Door Actuator
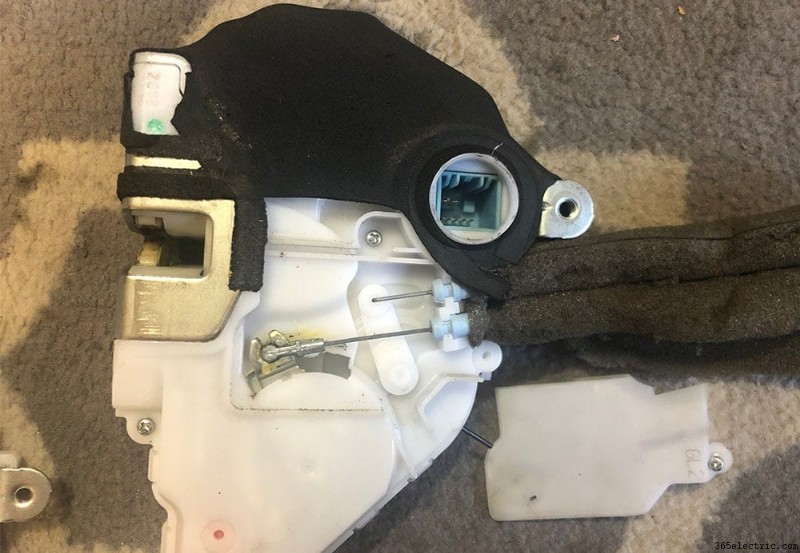
There's a couple things you'll need to do to prepare your new door actuator for installation. First, the door handle cables that run to the interior door handle will need to be pulled from the old actuator and installed on the new one. There's a panel that covers the cables with a single phillips screw holding the cover in place. Unscrew the panel to gain access to the two cables.
Remove the two cables from the old actuator and then place it onto the new one along with the cable cover, screwing it back into place.
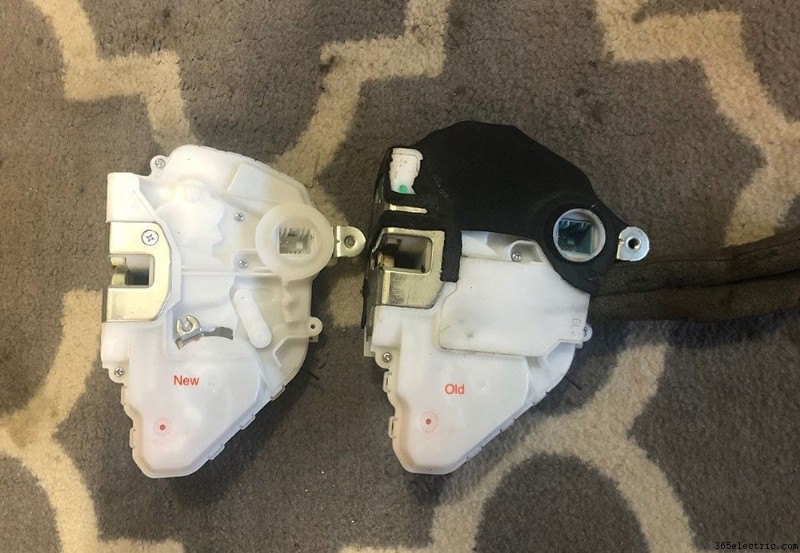
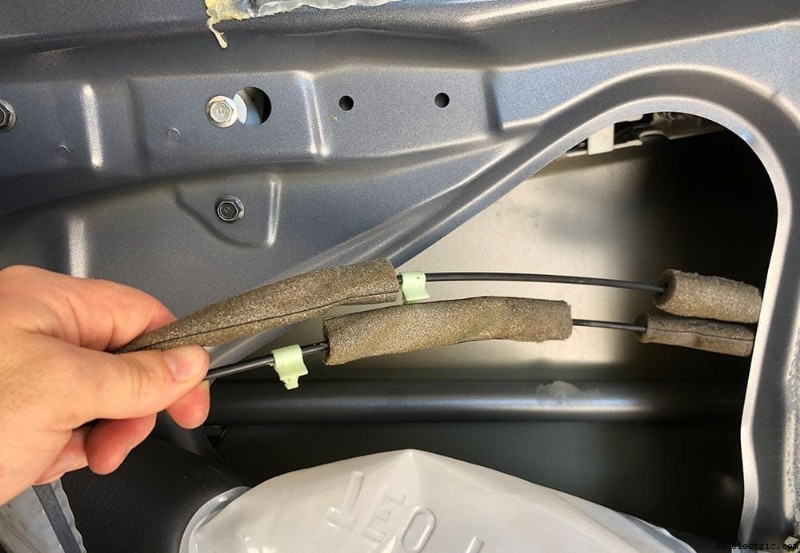
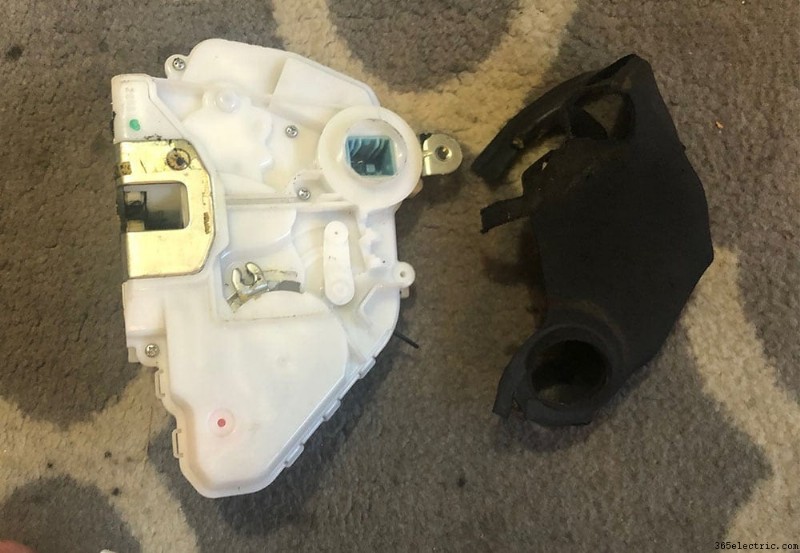
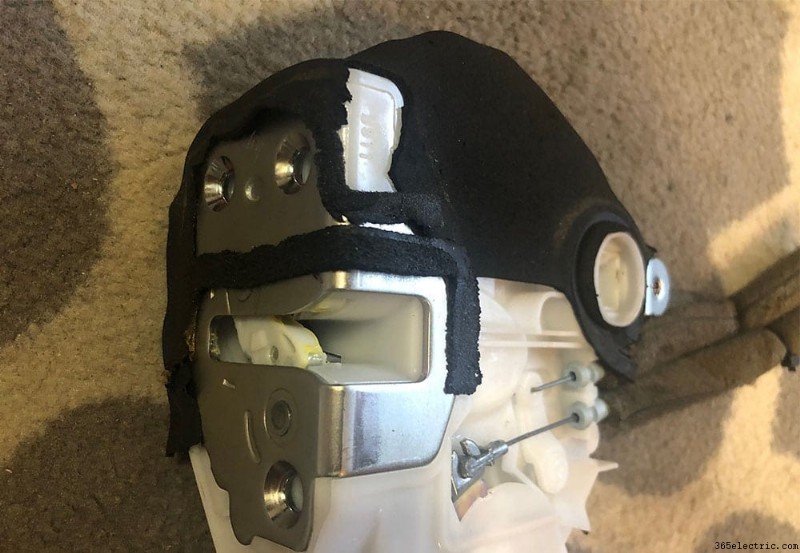
Once the cables are in place on the new actuator, the only thing left to do is to remove the old padding that's on the old actuator and place it onto the new one. Unfortunately, the new actuator doesn't come with the padding so it'll need to be reused from the old, broken unit.
I used a razor blade to separate the padding from the actuator with minimal damage and then used a few dabs of super glue to fuse it to the new one. For the most part, the padding is placed between the door and the actuator so naturally when it's mounted it'll stay in place.
Step 4:Re-installing Your Actuator and Door Panel
The rest of the process is pretty simple. Re-install your actuator, feeding the actuator rod back into the actuator and then mounting it to the door. Plug the actuator plug back in, then insert and re-clip the single cable back into the backside of the actuator.
After the actuator is mounted and the cables are in place, be sure to re-install your window guide and screw it in, along with clipping back the door handle cables to the door.
At this point, you're ready to test your new actuator. Close your door (note that you should ensure the door is unlocked before you close it), and then use your remove to lock and unlock to ensure your new actuator is working properly. As for the slit that you cut (if you cut one) into the damping, I used some heavy duty duct tape to seal it back up. With the damping fixed you can re-install the door panel, ensuring that the window and door lock buttons are plugged back in. Re-install your tweeter, and you're done!
Hope you enjoyed the how-to, please feel free to leave us a note or ask questions in the comments below!