Não muito tempo atrás, logo após instalar novos alto-falantes de porta no meu carro, tive que tirar um e consertar o anel de espuma.
Felizmente, não demorou muito para que o alto-falante fosse consertado e colocado de volta no carro, e pensei que seria uma boa ideia escrever um artigo sobre como consertar o ambiente do alto-falante.
Em geral, para reparar pequenos danos no anel circundante, preencha um local danificado com cola elástica de silicone. Danos e rachaduras maiores devem ser cobertos com um remendo fino para dar resistência extra. Em caso de danos maiores ou anéis circundantes rasgados, pode ser necessário substituir o anel inteiro por um novo. No artigo abaixo, mostrarei como consertar o anel de espuma de um alto-falante de carro quebrado para que você possa ouvir suas músicas favoritas por muito mais tempo.
O que é um anel circundante de espuma de alto-falante e o que ele faz?
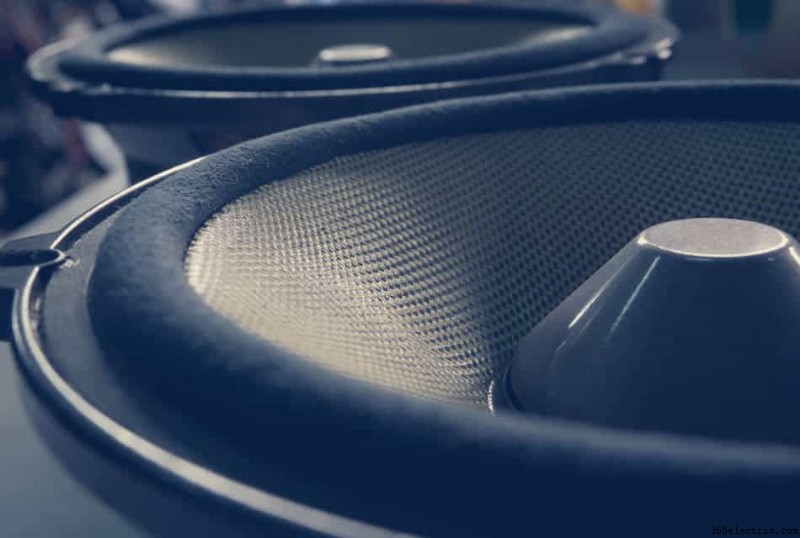
O anel de espuma faz parte da suspensão do alto-falante que funciona como um pacote completo com cone e aranha. Ambos surround, e uma aranha na parte inferior do alto-falante mantém um cone em uma posição centralizada que garante um movimento livre da bobina de voz dentro do espaço magnético.
Uma bobina de voz deve se mover apenas para cima e para baixo sem movimentos laterais, por isso é fundamental manter um cone reto.
Danos ao entorno de um lado, especialmente quando é maior do que apenas um furo, faz com que um cone se desloque um pouco para o lado mais forte. Como efeito, como a bobina de voz em seu alto-falante não é mais paralela ao interior do ímã, ela começa a se mover com um lado muito próximo do ímã e você pode ouvir um zumbido.
Esta posição pode causar ainda mais danos à bobina de voz. No extremo, pode esfregar no ímã e pode ser completamente destruído. Lembre-se também, não toque alto-falantes com surround podre.
Os arredores de espuma se desgastam relativamente rápido, pode levar vários anos, dependendo do ambiente em seu carro, antes que você precise repará-los.
Alto-falantes de alta qualidade usam bordas de borracha ou fibra que podem durar muito mais do que espuma ou papel, mas também podem ser danificadas mecanicamente.
Como consertar um surround de alto-falante rasgado?
Não são apenas os cones do alto-falante sendo danificados, muitas vezes acontece que o alto-falante começa a rasgar ou algo foi perfurado através de uma borracha fina na borda.
Se algum deles acontecer, você não precisará gastar dinheiro com os novos alto-falantes e, da mesma forma que os cones danificados, existem maneiras fáceis de consertar o ambiente.
Não importa realmente qual material de anel seus alto-falantes têm quando estão danificados. Você pode ouvir o som batendo, especialmente nos alto-falantes graves que têm grandes vibrações. Mesmo um pequeno corte ou furo pode causar mais danos ao alto-falante, então tente repará-lo assim que o vir.
O surround do alto-falante pode ser consertado em alguns minutos se o dano for pequeno, por exemplo, você vir uma borda rasgada ou perfurar a espuma ou a borracha. Para quebras maiores, pode ser necessário substituir todo o surround.
Abaixo, você encontrará um guia passo a passo para ambos os cenários, vamos em frente e começar com reparos simples.
Como reparar o surround do alto-falante?
Para consertar espuma de alto-falante ou anéis de borracha danificados, você não precisa de ferramentas especiais. Use uma faca de lâmina, bisturi ou uma tesoura. Como cola, usei recentemente o Parts Express Speaker Repair Glue, e a vedação foi ótima.
Mas se houver um furo ou rachadura maior, você fez mais alguns passos para consertar o alto-falante.
O primeiro passo para reparar um anel de espuma ou borracha é limpar essa área. Eu uso removedor de esmalte padrão, e ele limpa borrachas e espumas perfeitamente.
Quando a espuma estiver limpa em ambos os lados, vire o alto-falante e deixe-o assentar no entorno. Essa posição é excelente porque o peso do alto-falante ajuda a manter juntas as duas partes que você deseja colar.
Se você estiver trabalhando em um woofer maior que tenha grandes movimentos do cone, é bom cobrir essa área com um remendo extra. Para fazer é só usar uma espuma fina e cortar um pedacinho que vai cobrir o estrago.
Pegue um pouco do silicone e cubra toda a área danificada, mas não coloque muito. Cubra também o remendo com a cola e cole-o no anel.
Não deixe lacunas nas bordas e, se notar alguma, adicione mais cola para preencher a lacuna completamente. Agora você terminou o lado inferior, então vire um alto-falante e coloque-o no ímã.
Repita o processo na parte superior do alto-falante. Preencha o buraco ou rachadura com uma fina camada de cola e cole o remendo no anel.
Aplique um pouco de pressão na área reparada, você pode esfregar um dedo sobre o remendo.
Quando terminar, deixe o alto-falante em um local ventilado durante a noite para deixá-lo secar completamente. Às vezes pode demorar mais para secar, depende da cola usada. Em casos raros, pode ser necessário esperar 48 horas.
Como substituir o surround do alto-falante?
Mais complicado é substituir todo o disco circundante, mas não se preocupe, isso também é simples se você estiver seguindo as etapas na ordem correta.
#1. Corte o anel da borda do cone. Certifique-se de fazê-lo com cuidado para não danificar o cone.
#2. Retire a espuma da borda e limpe todos os detritos onde a área ao redor será colada.
#3. Pegue um novo anel circundante e cubra a parte interna com uma camada de cola. Não coloque pouca cola porque a ligação entre o cone e a envolvente deve ser sólida e totalmente vedada. Além disso, não cole dentro e fora do anel ao mesmo tempo. Ao fazer isso, você corre o risco de sua bobina de voz ficar fora do centro e isso pode matar seu alto-falante.
#4. Vire uma área ao redor e cole colada na borda do cone. Certifique-se de que o entorno esteja centralizado sobre o cone. Para uma melhor aderência ao cone, aplique um pouco de pressão nas bordas coladas, você pode bater suavemente em toda a volta com um dedo.
#5 . Esta etapa é a mais importante em toda a substituição. Você terá que colar o anel no alto-falante ao redor, certificando-se de que o cone esteja centralizado contra o ímã.
O vídeo abaixo mostra a maneira ótima e rápida de como centralizar a bobina de voz e testar um alto-falante ao mesmo tempo.
Another way to centre the voice coil is to remove a dust cap and use shims. This method, however, may not work in all car speakers due to their size.
#6. When the voice coil is centred, you can connect the foam ring to the speaker basket. Apply glue over the whole area and gently push a speaker ring down until it touches the basket. Rub fingers over the all surround, making sure it will stick to the basket with no gaps in between.
#7. After gluing, it is good to keep both parts together. You can use plastic clips and leave the speaker overnight. The next day when the glue is dry, push a cone a few times down, and if you do not feel any rubbing, the speaker is ready to be installed in the car.
How to Protect Speaker Foam Ring From Damages?
For mechanical damages, try to cover speakers with grills, and if not possible, try not to place any heavy sharp object in front of the speakers.
To prevent tears on the foam or rubber rings, do not keep speakers in a high humid condensation. It may be difficult during rainy days, but when you often use AC in a car, the air should dry the speakers’ surface quickly.
Also, sunlight is a killer for soft foam. Especially, when you have speakers in the dashboard or in the rear deck, they are exposed to the sunlight for the whole day, and that does not increase their lifetime at all. Tinted windows may help but not on the dashboard.
To protect your surroundings from tearing too fast, you can cover them with lubricate, like
INTERIOR RESTORER CREAM from ArmorAll.
The extra coating will prevent foam from drying too quickly and can add a few more years to your speakers’ lifetime. For the best effect, try to cover both sides of the surrounding.
It may not always be possible to access this area in the smallest speakers, but you can use thin ear sticks with a little cream at the end and rub it gently.
It is essential to check the speakers from time to time. If you notice any signs of damage to the surroundings, try to repair them as soon as you can. This way, you can prevent more complicated repairs in the future.
I am checking my speakers twice per year before and after winter, and so far, they are in good condition. I am going to keep it that way also for the new speakers.
Perguntas frequentes
How to Fix a Torn Speaker Surround?
The most common type of damage to speaker surrounds is tearing. This can be caused by the speaker’s age, sun exposure, or simply when using the speaker too much.
There are two ways to fix this problem:you can either replace the surround or repair it.
If the tear is small, you may be able to repair it with glue. The best type of glue to use is a cyanoacrylate adhesive, also known as super glue.
This will bond the surround material with the speaker basket and the cone and make it strong enough to last for a long time.
If the tear is large, you will need to replace the surround. This is not a difficult task, but it does require some patience.
You will need to remove the old surround and install the new one. Make sure that you use the same type of glue that you used to repair the small tear.
How to Replace Speaker Surround?
Replacing the speaker surround is more complicated than repairing it because the cone will be free after removal.
Hence, keeping the cone in the speaker’s centre while installing a new surround is critical. Otherwise, the speaker will not work correctly.
#1. Remove the old surround:Use a razor blade or sharp knife to cut around the edge of the old surround. Be careful not to damage the cone.
#2. Install the new surround:Apply a thin layer of glue around the edge of the cone. Then, align the new surround with the edge of the cone and press it into place.
#3. Let the glue dry:Once the glue has dried, your speaker will be as good as new!
#4. Test the speaker:Make sure the speaker is working correctly before using it.
What Kind of Glue Is Used for Speaker Surrounds?
The best type of glue to use is a cyanoacrylate adhesive, also known as super glue.
This will bond the surrounding material together and make it strong enough to last for a long time. Super glue is also great because it dries quickly, so you won’t have to wait long for your speaker to be ready to use.
What Does It Mean Refoam a Speaker?
Refoaming speakers involve replacing the foam surround attached to the speaker cone.
The foam surround helps keep the cone in place and absorbs any vibrations. However, over time, the foam surround can degrade and cause the speaker to sound distorted, especially in the car speakers used in harsh conditions.
To keep the speaker in good condition, the surrounding should be replaced.
How Much Does It Cost to Have a Speaker Refoamed?
The cost of having a speaker refoamed will depend on the speaker itself and the surrounding type you use.
Generally speaking, it will cost between $40 and $100 per speaker, it is therefore not recommended for cheaper speakers.
How to Repair Torn Speaker Foam?
If your speaker foam is torn in a large area, then it needs to be replaced.
You can replace the foam yourself, but it is best to leave it to a professional, especially when you do not have experience with repairing speakers.
How to Repair Subwoofer Foam Surround?
Repairing foam surround on a subwoofer is not much different from fixing a speaker’s surround, but the materials used have to be much stronger.
To repair the subwoofer’s foam surround, follow the steps below:
#1. Remove the subwoofer from the enclosure. This will give you better access to the foam surround.
#2. Use a sharp knife to trim away any loose or damaged bits of foam surround.
#3. Apply a generous amount of glue to the new foam surround.
#4. Place the new foam surround onto the subwoofer cone.
#5. Use a clamp or heavy object to hold the new foam surround in place while the glue dries.
#6. Once the glue has dried, reassemble the subwoofer and place it back into the enclosure.
The above steps work in case of minor damages, but when the subwoofer’s surrounding is bad over a larger than two inches area, the subwoofer’s surrounding has to be replaced.
Can I Replace the Foam Surrounding With a Rubber?
Many people prefer to replace the foam surround with a rubber surround. This is because rubber surrounds last longer than foam, producing a better bass response.
