Seu iPad é um dos muitos pequenos dispositivos convenientes que está sempre com você e, graças às câmeras integradas, é uma ótima ferramenta para tirar fotos e vídeos em movimento. Infelizmente, os iPads são famosos por produzir imagens borradas, o que também pode ser causado por outros fatores.
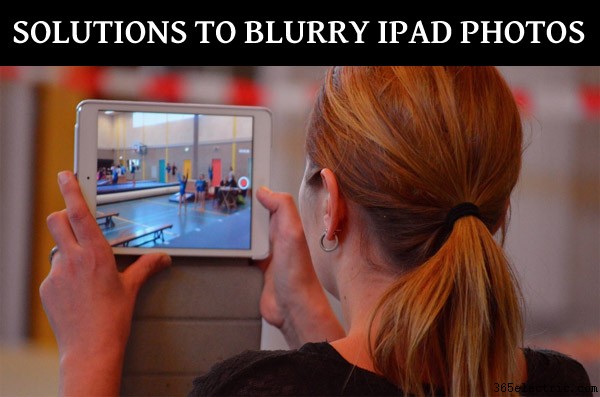
Se você possui um iPad e sempre se perguntou como tirar fotos nítidas, detalhadas e bonitas com ele, ou se está enfrentando um novo problema de desfoque, você está no lugar certo.
Existem várias soluções diferentes para superar as fotos borradas do iPad e isso vai depender das causas subjacentes. Fotos desfocadas podem ser causadas por lentes sujas, uso inadequado de flash, ponto de foco incorreto, detritos na câmera, iluminação ruim, zoom usado, interferência de caixa, status de HDR, problemas de software ou várias outras coisas.
Continue lendo para saber como lidar com cada um desses problemas.
Fotos borradas são uma preocupação para qualquer fotógrafo, independentemente do tipo de câmera que eles usam, porque não podem ser corrigidas facilmente como super ou subexposição. Embora os iPads sejam leves e tenham talvez um dos melhores sistemas de câmera, eles são suscetíveis a produzir fotos borradas. Por quê? Em parte por causa das técnicas erradas que um fotógrafo usa e em parte por causa das limitações da câmera. Eles também podem ser causados por problemas de hardware e software que abordaremos mais tarde.
Além disso, é imperativo saber a diferença entre fotos borradas e trepidação da câmera. Quando suas imagens aparecem embaçadas com um pouco de movimento nelas significa que suas mãos se moveram durante a exposição e o que você vê é a trepidação da câmera.
Para evitar a trepidação da câmera, sempre use uma velocidade do obturador mais rápida do que um sobre a distância focal da lente e, se possível, use um tripé. Mais sobre isso mais tarde.
Ponto de foco incorreto
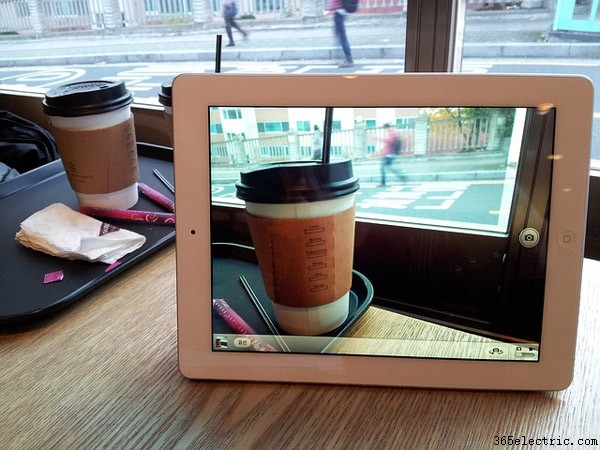
Uma das razões críticas para capturar fotos borradas com seu iPad é a seleção incorreta do ponto de foco. O ponto de focagem é o ponto na fotografia que coincide com um ponto de focagem automática. Este é o ponto na imagem que é o mais nítido. Normalmente, esse é o assunto da foto.
Qualquer coisa que esteja nesse plano focal (plano imaginário que atravessa esse ponto de foco) também é nítida.
Para obter o foco, tudo o que você precisa fazer é tocar suavemente no ponto preciso da tela onde deseja que a câmera foque. A lente embutida bloqueia automaticamente o foco nesse ponto.
A razão pela qual às vezes as fotos do seu iPad ficam desfocadas é devido à seleção incorreta de um ponto de foco pela câmera usando o foco automático ou pelo fotógrafo.
Deixe-me explicar.
Digamos que você está tirando uma foto de paisagem. Agora, em uma imagem de paisagem, espera-se que a maior parte do quadro seja nítida. Isso é fácil de fazer em uma DSLR ou qualquer outro tipo de câmera onde você pode selecionar uma pequena abertura e focar na distância hiperfocal.
A distância hiperfocal é a distância mais próxima que você pode focar, garantindo que qualquer coisa no infinito seja aceitavelmente nítida na imagem. Infelizmente, em um iPad, você não pode alterar a abertura sob demanda. Cada uma das lentes vem com uma única fixa. Para alterar a profundidade de campo de suas composições, você deve usar diferentes técnicas e uma dessas técnicas é focar com precisão.
Dito isso, você sempre pode contornar a questão da abertura fixa usando esses truques - Para contornar o problema da profundidade de campo rasa, foco em cerca de 2/3 no quadro. E, por outro lado, para diminuir a profundidade de campo, coloque o assunto mais perto de sua câmera, deixando espaço suficiente entre o assunto e o fundo. Mais sobre isso mais tarde.
Existem muitos aplicativos de calculadora de distância hiperfocal disponíveis em lojas de aplicativos. Esses aplicativos informarão a distância precisa da distância focal da lente, modelo da câmera e abertura para focar para a maior profundidade de campo.
Não confie no foco automático
A pior coisa que você pode fazer como fotógrafo é depender do mecanismo de foco automático do seu iPad. O mesmo vale para todos os fotógrafos, independentemente da câmera que estejam usando.
Sempre escolha seu ponto de foco manualmente. Isso lhe dará um controle preciso sobre o que você deseja focar. Isso é importante para todos os gêneros de fotografia, de retratos a paisagens.
A melhor maneira de selecionar seu ponto de foco manualmente é tocar suavemente no ponto em que você deseja bloquear o foco. No entanto, esta técnica tem um problema crítico. É impossível firmar as mãos perfeitamente enquanto você está tirando as imagens e isso significa que depois de travar o foco, se a câmera se mover, o ponto de foco mudará, fazendo com que sua imagem fique embaçada. Ou pelo menos o assunto pretendido ficará embaçado.
Para evitar isso, alguns fotógrafos preferem travar o foco. Mas mesmo assim é difícil evitar uma imagem borrada porque quando você trava o foco e suas mãos se movem a câmera não readquire o foco. A solução está em usar um tripé.
Use um tripé
Um tripé ou algum tipo de equipamento de estabilização é a melhor solução para uma imagem sem desfoque usando seu iPad. Como os iPads são dispositivos maiores (e mais pesados que os telefones celulares), você precisa de adaptadores ou suportes de tripé especiais para montar um iPad em um tripé.
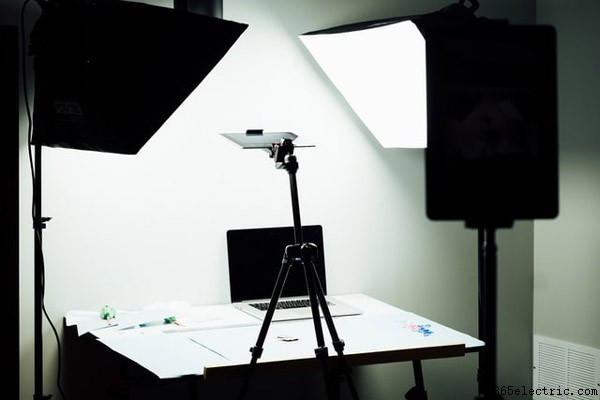
O tripé lhe dará a estabilidade necessária para fotografar gêneros como paisagem, produto e macrofotografia, onde até mesmo o menor movimento da mão pode se tornar um grande problema.
Use flash ou outra iluminação
A má iluminação é outro motivo importante para fotos borradas. Your iPad lens works pretty much like a normal lens. That means it excels in bright well-lit conditions. But unlike larger lenses which are designed for interchangeable lens cameras, the smaller lenses on iPads struggle in low light conditions.
What they do is either slow down the shutter to capture a lot of light or use a high ISO number. It is this slowing down of the shutter that causes image blur. To help these cameras make up for their inability to shoot images in low light conditions, it becomes necessary to use external lights.
External lights will help you to fill the gap between what is the optimum light for shooting an image and the available amount of ambient light.
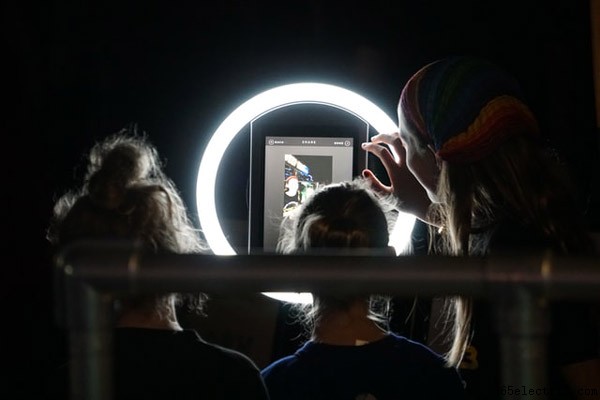
There are many different types of external lights that you can use to make sharp images in low light conditions. External lights can be broadly classified into two – (a) continuous lights and (b) flash/strobe.
Continuous lights, as the name suggests are always on (i.e., when you switch them on). They are easy to use because you capture the same image you see on the LCD screen. But the power of LED lights is lower than strobes.
On the other hand, strobes are more powerful, but difficult to set up. You have to go through a long trial and error curve when setting these up. That means you have to take several test shots to fine-tune the amount of power that you need as well as finalize the angle of light.
Both these types of lights are more readily available for ‘proper’ cameras, I mean cameras that allow you to change the lens (interchangeable lens cameras). For iPads and mobile phones specially made smaller flash units are designed.
Continuous lights, however, can be used both with mobile phones as well as proper cameras-there are no limits. Here are some lights for tablets.
Be careful with digital zoom
All mobile camera systems as well as iPads come with a fixed focal length lens. These days most mobile devices would have more than one camera at the back (and in some cases in the front as well). This is to bypass the limitation of mobile camera lenses in the sense of their inability to zoom in and out.
So, there would be a standard focal length lens, a long focal length lens, and a short wide-angle lens to capture three different perspectives.
But what if you want to zoom in a bit tighter than what is possible with the built-in zoom lens? You pinch and zoom just like everybody else. Every mobile device comes built-in with a digital zoom feature. It magnifies the image not optically by moving elements inside the camera but by using software that enlarges the image.
You may have noticed that at extreme zooms images appear pixelated. This is the reason for that. These images also appear blurry because they are.
Check interference from case
The reason for blurriness in iPad photos could be as basic as part of the iPad case blocking part of the lens and the device not being able to focus properly. Don’t forget that there are all kinds of sensors on these devices, and not just the lenses themselves. Nothing can be blocked by objects and it doesn’t take a large object to interfere enough to mess up an image.

In addition, the image stabilization function could be adversely affected by a magnetic add-on lens or a metal case. Simply remove any accessories and see if the images improve.
If your case is the issue, you may be able to enlarge the camera opening in the case until the interference is gone. Just dont try it while the iPad is inside your case or you may damage the lens.
Clean your lenses
The issue causing your blurriness may be as simple as a fingerprint from your finger, oil or a dried liquid on your lens.
Clean it carefully with a clean microfiber cloth. Never use random material like a sweater or anything not meant for lens cleaning. Even types of napkins can be abrasive to the sensitive surface of a lens and it is just not worth it to create microscopic scratches on your expensive tablet camera.
Improper use of flash
If your photos look unnaturally bright and of poor quality, check to make sure your flash is not turned on when it should not be. This applies to conditions where the flash should not be going off, such as in daylight. The result may not exactly be blurry photos but you will be able to tell that something is wrong.
To turn off the flash on the iPad, from the Home screen tap on Camera. Tap the Flash icon and turn to Off.
Check HDR status
If you get color that is too bright or double exposure in your images, make sure your HDR (high dynamic range) is turned off. To turn off HDR, go to Settings/Camera or click the HDR letters on the Camera screen.
Look for debris inside lens
Debris may be a reason your camera is taking blurry photos. If you see anything inside the lens that looks like it should not be there or is moving, you need to bring your device to an Apple authorized service center or an Apple Store Genius Bar. You can also contact Apple support at https://support.apple.com/contact
If, on the other hand, it is not debris but condensation from humidity or exposure to moisture, this can also affect image quality. If this is the case, however, you may have moisture in your device in general, and should back up your data before trying drying methods such as silica or rice.
Switch cameras
The front camera is usually lower resolution than the rear camera. If you are getting blurry images using the front camera, try taking the same photo with the rear camera and see if things improve.
This is also a good way to see if just one of the cameras is malfunctioning for some reason, rather than a device wide error.
Restart your device
If all hardware and technique issues have been addressed, it may be a software issue. The first thing you do to diagnose software issues is to restart the device.
To restart your iPad, press volume up or down button and the top button until the slider appears. Slide it and wait for the device to shut down. If it will not, you need to force a shutdown.
To do so on an iPad with no home button, quickly press the volume up button, then do the same for the volume down button. Hold the side/top button until the Apple logo appears.
To do it on an iPad with a home button, hold the home button and power button together until the Apple logo appears.
Inspect your camera App
Try shutting down and restarting your camera App. To do so, go to the app switcher and swipe up on the app. Then reopen it by going to your home screen and tapping on the app.
You can also reinstall your camera app by first deleting it- hold the app down, then click Delete App when an actions menu appears.
Then go to the App Store and search for the app using the exact name of the built in app. Click the button to restore the app.
Another option if you suspect it may be the Camera App causing the issue is to try downloading another app that uses the camera and see if the problem is the Camera App or your iPad. This may be any other third party camera app or any app that uses the camera for some purpose.
Reset your settings
You can try resetting your device settings if the issues persist, but this is less likely to help. While you will not lose your data after doing this, your preferences and settings will disappear.
To do this, you can navigate to Settings/General/Reset/Reset All Settings.
Check for operating system issues
Owners often report getting camera app issues after they upgrade their operating system. You may try rolling back the iOS if nothing else works. Make sure you back up all your data first. To roll back,
On the other hand, there may be a bug in the camera of your current operating system. Since its always good to be up to date on any system updates, check and run any you may find available.
You can update your OS by going to Settings/General/ Software Update.
How do you fix blurry iPad photos already taken?
No one likes a blurry photo, regardless of the camera that they use. When we are faced with a blurry photo the first reaction is can we salvage it? I mean is there a way to make the image appear less blurry? Há. But before I explain a few techniques it is pertinent to note that it is always best to not attempt to fix blurry images unless they are only slightly blurry and you are not looking for perfection.
The easiest way to unblur or make an image appear less blurry is to add some sharpness to it. There are many different photo editing software available that can help you achieve what you want to do. But my first preference is always Adobe Lightroom. Adobe Lightroom has this ‘Sharpening’ tool under Detail that allows you to add some sharpness to your photos.
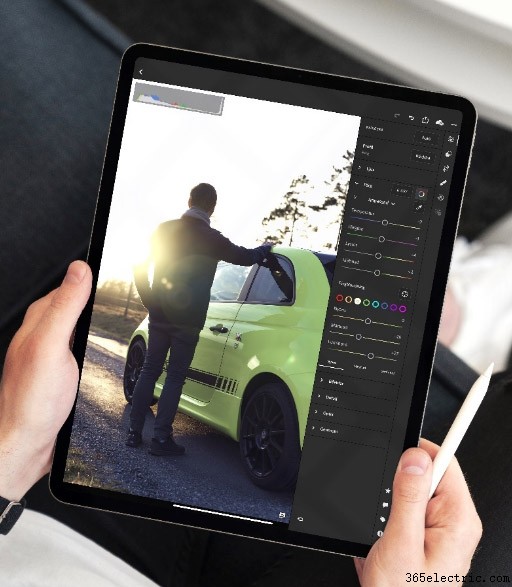
Dragging the sliders will allow you to define how much sharpness you want to add to the photos. Drag the Amount slider to the right and you will find that your image immediately starts to show some artifacts. That is never the right way. So ideally, you would like to keep sharpness down to an acceptable level.
Check out this video by DIY University if you are having other iPad camera problems:
I hope that this comprehensive article helped you get to the bottom of your poor quality iPad photos. If also else fails and you want to keep using an iPad for photography, consider purchasing a new or used one. They are getting more and more affordable.
Between an iPad and an iPhone, the latter is the clear choice for photographic nirvana. Want to know more about how to shoot great images using your iPhone? Check this article.
