Se sua câmera de segurança CCTV mostrar
sem imagem , leia este artigo para obter algumas dicas e sugestões. Aqui está um guia para solução de problemas de CCTV sem problemas de imagem. O guia é usado para câmeras de segurança com fio que usam conectores BNC e cabo coaxial. Aplica-se a câmeras CCTV analógicas e câmeras de segurança HD coaxiais (HD-TVI, HD-CVI, AHD).
Observação:as dicas mostradas aqui não se aplicam a câmeras IP. Sem solução de problemas de imagem de vídeo
Aqui estão algumas perguntas iniciais que você deve responder ao solucionar problemas de uma câmera de segurança sem imagem de vídeo.
Teste sua fonte de alimentação
Antes de enfrentar o problema e as despesas de comprar um monitor de teste ou um cabo CCTV sobressalente, recomendamos que você verifique se não tem um
problema na fonte de alimentação . A falta de imagem é causada principalmente por um problema de energia, a câmera nem está ligando.
Muitos sistemas de CFTV incluem transformadores de energia DC individuais para cada câmera (como o da imagem abaixo). Se você não tiver um sobressalente, poderá encontrar fontes de alimentação para câmeras de segurança aqui.
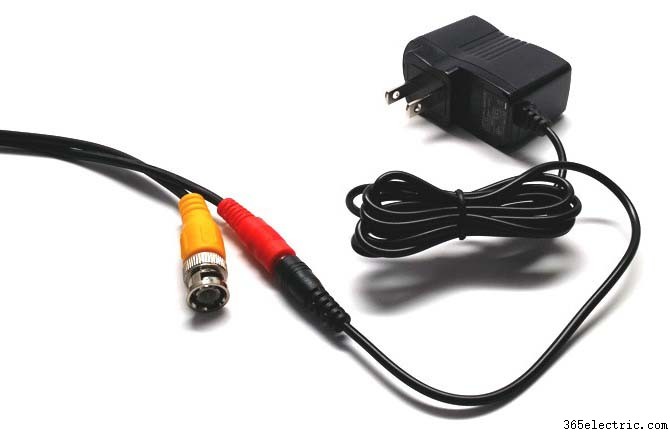
Certifique-se de verificar sua fonte de alimentação existente para confirmar se é
12VDC ou 24VAC . A maioria são 12V DC. Desconecte sua fonte de alimentação existente do cabo e conecte sua sobressalente. Conecte-o e teste para ver se sua câmera agora exibe vídeo.
Verifique os fusíveis da caixa de alimentação
Se o seu sistema de câmeras de segurança usa uma
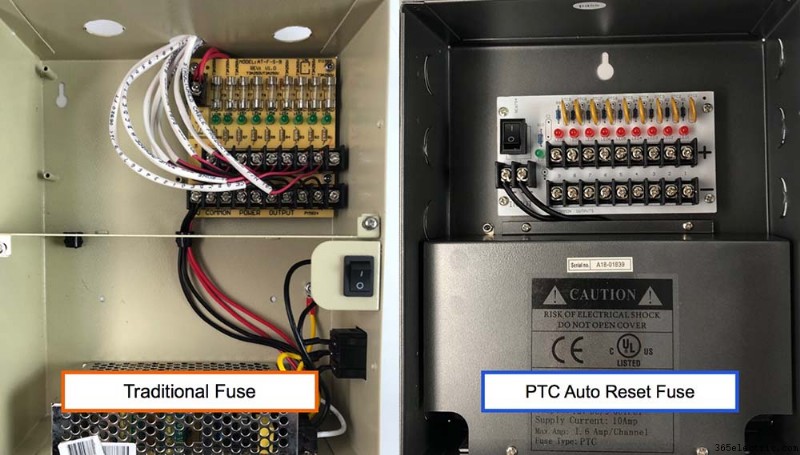
caixa de fonte de alimentação CCTV , recomendamos que você verifique os fusíveis dentro da caixa. A imagem abaixo mostra o interior de duas caixas de fonte de alimentação CCTV.
O da esquerda usa fusíveis tradicionais de uso único. O da direita usa “fusíveis de reinicialização automática” PTC. Ambos os tipos têm um interruptor liga / desliga o poder de controle para toda a unidade.
 Siga estas etapas para solucionar problemas de sua fonte de alimentação.
 - Certifique-se de que o botão liga/desliga esteja ligado e que as luzes de status do LED estejam acesas.
- Se a caixa da fonte de alimentação usa fusíveis tradicionais, confirme se nenhum dos fusíveis está queimado. Se um estiver queimado, a luz LED sob esse fusível específico estará desligada. Você deve substituir o fusível.
- Se a caixa da fonte de alimentação usa PTCs, em vez de fusíveis, confirme se as luzes LED estão acesas para todos os canais. Se não estiverem, você pode ter um curto-circuito em algum lugar. Desconecte cada câmera, uma de cada vez, para ver qual delas está causando o problema.
- Confirm that the wire power connections are securely in place and have not become loose or disconnected.
Test the camera on a different DVR port
This is uncommon, but it is possible that one of the BNC video input ports on your DVR went bad. It is a simple thing to test, so you may as well give it a try before you spend time on the other troubleshooting steps. Since you’re already at this step,
make sure the connection is not loose, on both sides:the camera side and the DVR side .
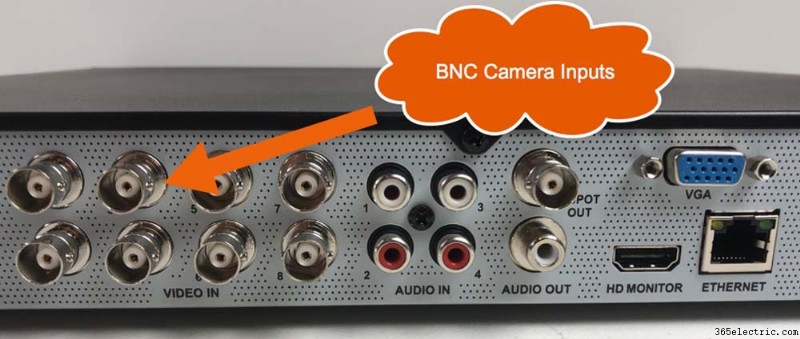
Disconnect the BNC video connector of the troubled surveillance camera from the back of your digital video recorder and plug it into one of the ports where a working camera is plugged in. Plug the BNC connector of the camera that is working into the port of the camera that is not working.
Does the working camera show video on the other BNC port? Does the troubled camera display video on the other port? If the troubled camera works and the camera that was working does not work, then you have a bad input port on your DVR.
Use a test cable and spare power supply
We recommend that you use a spare cable for testing. These
pre-made Siamese CCTV camera cables are a great choice. They allow you to run both the video and power.
Using a test cable will be feasible only if your existing cable run is not longer than 165 feet – the max length that pre-made CCTV cables are made.
 Here are the troubleshooting steps that we recommend if you are going to use a spare cable.
 - Before you go through the trouble of unwinding and running a spare cable from your camera to your DVR, we recommend that you check your existing power supply.
- Confirm that your spare cable is long enough to reach from your camera to the DVR or monitor that it is connected to.
- Disconnect only the BNC video cable from your camera and attach the spare cable.
- Disconnect the other end of the video cable from your DVR or monitor and attach the spare cable. Test to see if there is video.
- If there is still no video, use the power portion of the spare cable to run the power.
- If still no video, switch out the power supply.
- If there is still no video, you most likely have a bad camera.
Use a test monitor
If you have confirmed that your power supply is working properly and that the ports on your DVR are also working properly, the next step would be to determine if you have a bad power or video cable. Using a
test monitor is one way to do this.
A
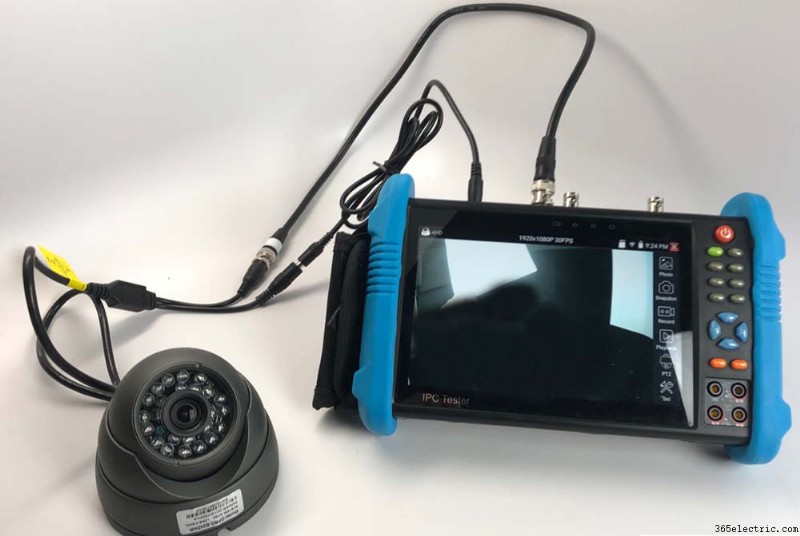
CCTV test monitor is extremely helpful when troubleshooting camera video issues. One of the most common problems, when a camera is not displaying video, is a bad cable or BNC connection. Using a test monitor, you can temporarily eliminate the power and video cable that your camera is using.
Many CCTV testers, like the one above, have a 12V DC power output that can be used to supply power to your camera.
Here are the steps that I recommend if you are going to use a test monitor to troubleshoot. - Disconnect the video cable from your camera and use a short RG59 BNC jumper cable to connect the video output of the camera to the BNC input of the test monitor. If your camera is already mounted and connected to a power supply, I recommend that you first only connect the camera’s video to the input of the test monitor.
- If you do not get a video signal, disconnect the power cable from your camera. If you have a test monitor that can supply power to your camera, connect the power output of the monitor to your camera.
- If you do not get any video signal after switching the video cable, power cable, and power supply, you most likely have a bad camera. If you have a spare camera, connect it to the test monitor to make sure that it is working properly, then connect it to the existing cable and power supply of the camera you are replacing.
Note: if you are replacing your camera, make sure the replacement camera uses the same type of power supply before connecting it. If your previous camera used 24VAC and you connect a 12V DC camera to a 24VAC power source, it will burn the circuit board and ruin the camera.
Security camera DVR compatibility
If you recently purchased a new DVR or a new security camera, you should confirm that the video format(s) that they support are compatible. We find that many people have purchased a 720p or 1080p replacement camera for their 960H DVR.
This will not work. If you have an analog 960H DVR, you can only use a CCTV camera that supports analog 960H video.
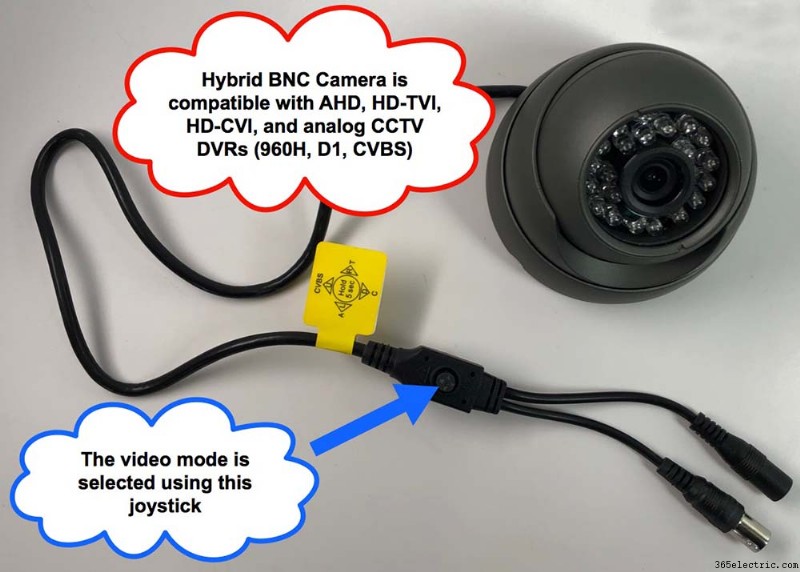
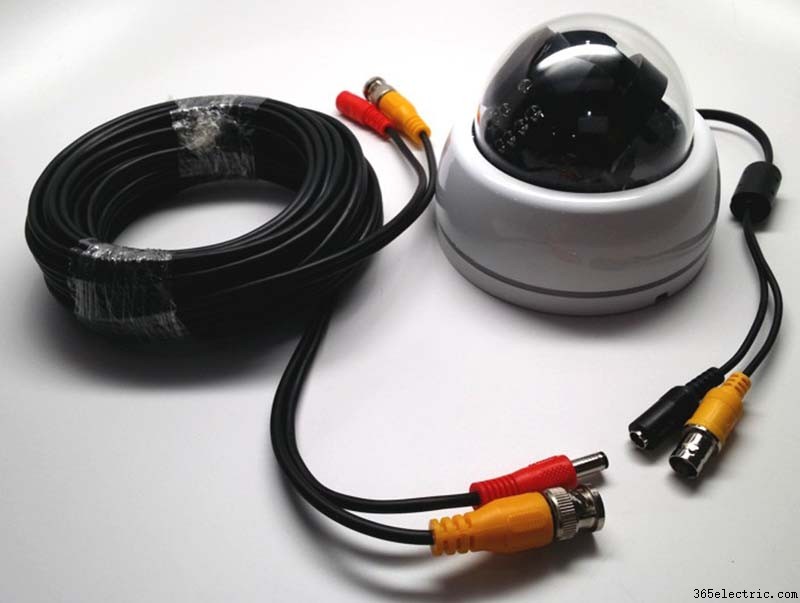
Many of the latest DVRs and cameras are “hybrid” which means they support multiple surveillance video formats. The above image shows a
4-in-1 analog CCTV / HD dome camera . Notice the small joystick that is attached to the video cable.
The video output of the camera can be switched by holding the joystick up / down / left-right for 5 seconds. This particular camera supports AHD, HD-TVI, HD-CVI, and analog 960H (CVBS) video formats.
If you are using a 960H type DVR that only supports analog video (CVBS), you must use a hybrid camera in analog CVBS mode for it to work with your DVR. You will most likely need to consult the owner’s manual of your DVR to know what video format(s) it supports.
Replacement CCTV camera recommendation
If you need to buy a replacement CCTV camera, we highly recommend
these 4-in-1 security cameras – especially if you are using an analog 960H or D1 format CCTV DVR. These hybrid cameras support analog CCTV format and multiple HD video surveillance formats (such as HD-TVI, HD-CVI, AHD).
They can be used in analog CCTV mode with your existing DVR and later switched to one of the HD video modes if you upgrade to an HD surveillance DVR.
