Como cuidar do seu robô aspirador
Quando se trata de limpeza doméstica, a melhor maneira de limpar o chão sem levantar um dedo é usando um aspirador de pó robô. Este dispositivo é como sua aia que cuida de limpar a poeira enquanto você está ocupado fazendo outra coisa.
Manter seu robô aspirador (ou robovacs para abreviar) limpo é vital para prolongar sua expectativa de vida. Um limpador de robô normalmente dura cerca de quatro a seis anos, mas pode durar mais com os devidos cuidados. Se você deseja obter o máximo do seu investimento, é melhor tratar seu aspirador corretamente seguindo estas etapas abaixo.
Estágio de pré-limpeza
Faça alguns testes
Um bot recém-saído da caixa precisa estar familiarizado com a planta baixa antes de poder trabalhar de forma independente. Durante os testes iniciais, ele precisa da sua presença para que você possa observar como funciona. Você terá uma ideia de como fazê-lo funcionar sem problemas, mesmo sem sua ajuda nas próximas sessões de limpeza.
Remova as obstruções
Mesmo o robô mais inteligente pode ter dificuldade em detectar o bloqueio em que pode tropeçar. Quando essas obstruções atrapalham as escovas do robô, ele pode se enroscar e atrapalhar seu desempenho. É importante fazer uma pré-limpeza do piso e retirar qualquer coisa que possa restringir seu movimento, como cabos, cortinas, brinquedos, etc.
Cuidado com as borlas e o Shag
Alguns robovacs podem subir nos tapetes, mas muitos não. É ainda mais desafiador para a máquina se o tapete tiver muitas borlas. Antes de ligar o dispositivo, certifique-se de colocar as franjas embaixo do tapete. Ou melhor ainda, remova o tapete para deixar o bot fazer seu trabalho sem interrupção e, em seguida, coloque-o de volta assim que a limpeza estiver concluída.
Criar barreiras
Restrinja o movimento do bot dentro do espaço já pré-limpo, configurando paredes virtuais ou isolando outras áreas com limites físicos, como caixas de bebê ou simplesmente fechando as portas. O objetivo de fazer isso é evitar que a máquina vá para outras partes da casa que ainda estão bagunçadas.
Arrumar mesas e móveis
A maioria dos aspiradores de pó robô pode pegar essas migalhas sob sua mesa de jantar ou sofá. No entanto, ajudará muito se você coletá-los antes de aspirar. Se isso for muito trabalho para você, pelo menos afaste os móveis para criar um espaço onde o robô possa se mover livremente.
Configurar cronograma
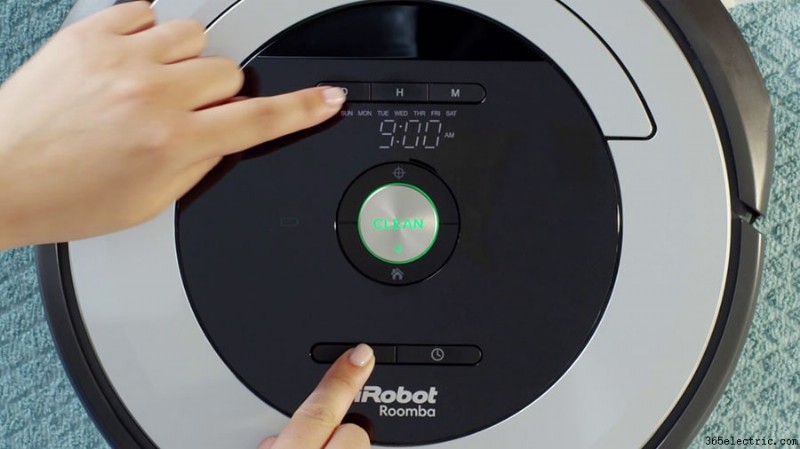
A limpeza regular é sempre melhor do que a limpeza uma vez por mês. Defina o recurso de agendamento do dispositivo para limpar a qualquer dia e hora. It will turn on and work automatically even when you’re not around. This way, the floors will look great once you come home.
Position the Charging Station in the Open
Many innovative models can chart their way to the docking station to charge the battery. However, this capability depends on how sophisticated the software of the device is. Find an open spot for the charging station and make sure that it’s always plugged in.
Cleaning Your Vacuum
Cleaning the robot regularly prevents dirt build-up and ensures that all the parts, especially the wheels and brushes, are not restricted in their movement. The maintenance procedures must include emptying the dustbin, taking out debris off the filters, and removing hairs caught up on the brushes.
A clean sensor is essential for smooth navigation. Periodically wipe off sensors using a clean, damp cloth. Replace the filter once a year or as per recommendation from the manufacturer.
To get a good grasp on cleaning a robovac, let’s see how to clean the Roomba as an example.
Bin and Filter
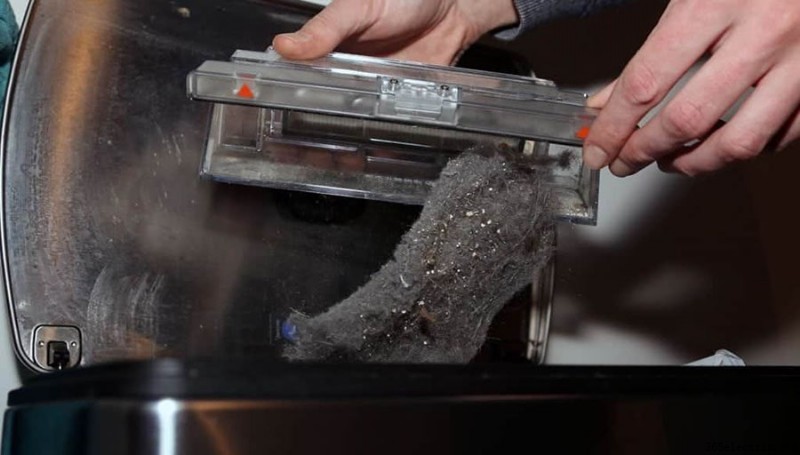
You don’t need to wash these parts. Just tap off the debris and wipe the bin and filter with a clean cloth.
Charging Contacts
Charging contacts are installed in the Home Base (dock) and the machine itself. They “talk” to each other to allow the robovac to charge when it’s running out of battery.
Use a slightly dampened cloth or melamine foam, such as Magic Eraser, to wipe off the dust in charging contacts.
Front Caster Wheel
Pull the wheel firmly to detach it from the robot. Remove the debris and hairs inside the wheel cavity. Wipe all the parts of the wheel before installing it back to the machine.
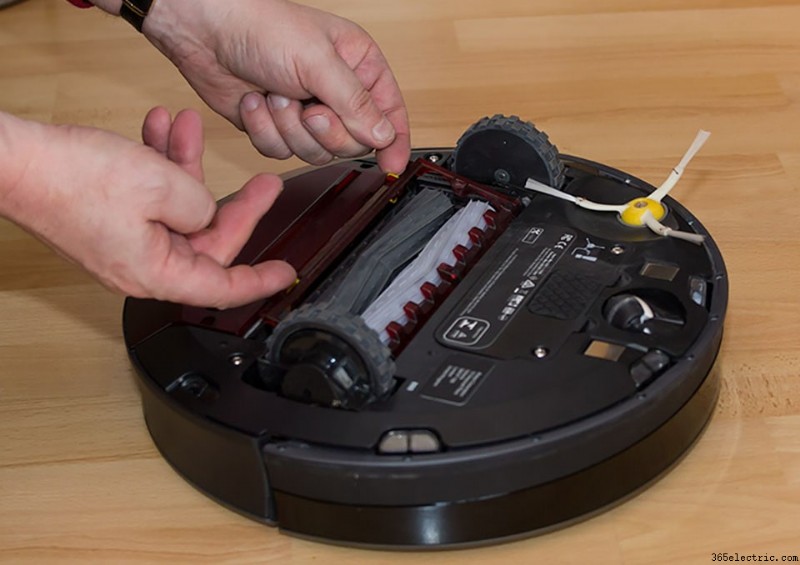
Brushes
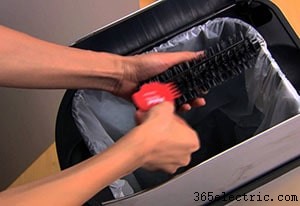
Detach the brushes from the device. Use the cleaning tool to untangle hair from the brush bristles. Make sure to remove hairs from the yellow brush bearing. Once done, install the brushes plus the bearing back to the device. Make sure that you re-install them properly before turning on the machine.
Edge Sweeping Brush
Use a small screwdriver to loosen the sweeping brush. Take it out and remove hairs from the bristles. Place it back and secure it in place.
