Você já viajou em um carro excelente, mas teve música de baixa qualidade? Infelizmente, isso tem sido um problema na maioria dos carros.
Geralmente, muitos carros vêm com unidades de cabeça montadas de fábrica que não estão à altura da marca. Isso ocorre porque a maioria dos fabricantes de automóveis não se esforça ao máximo na qualidade do som e do equipamento de áudio de um carro.
A decisão mais comum e melhor é substituir a unidade principal do carro por um rádio de reposição, mas como conectar um aparelho de som automotivo a partir do zero? Vamos descobrir.
O primeiro passo para a fiação de um rádio de carro é remover o chicote elétrico e desconectar os fios que conectam os alto-falantes e a alimentação. Em seguida, é necessário conectar os fios ao novo chicote ou ao adaptador de chicote e conectá-lo ao novo rádio. Quando conectado, teste o rádio do carro e, se funcionar corretamente, coloque-o no painel. Todo o processo de substituição envolve a instalação e fiação do rádio do carro. Neste artigo, mostrarei um guia passo a passo sobre como conectar um rádio de carro.
Como ligar o rádio do carro do zero. Um guia completo.
Como outros processos, seguir as instruções adequadas de fiação do estéreo garante que você tenha áudio de alta qualidade em seu carro.
Reserve um tempo para ler cada passo cuidadosamente e agir de acordo. Certifique-se de não trabalhar com pressa e preste muita atenção ao trabalho.
Quais ferramentas são necessárias para conectar um estéreo de carro?
Antes de fazer qualquer coisa com o rádio do carro, existem algumas ferramentas básicas, mas necessárias, que você deve preparar.
Você provavelmente tem tudo na sua garagem, mas se não tiver, adicionei os links da Amazon às ferramentas que uso e estou feliz com a qualidade:
- Bateria de 9 volts ou testador de alto-falante.
Etapa 1:remova o rádio e desconecte o chicote elétrico
Primeiro, remova o aparelho de som antigo do painel e desconecte o chicote de fiação. Neste ponto, dependendo do novo rádio, você pode precisar de um
adaptador de fiação para ajudá-lo a conectar seu novo rádio do carro ao clipe existente do carro.
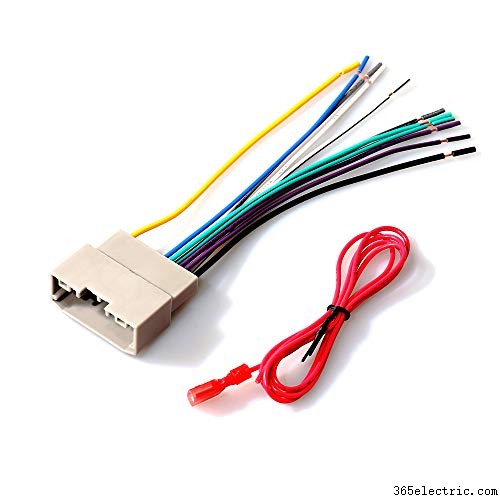
Um adaptador de fiação ajuda a conectar estéreos automotivos exclusivos com a conexão DIN padrão do carro e evita conexões incorretas.
Etapa 2:desconecte a bateria
Ao fazer o processo de fiação, você terá que trabalhar no sistema elétrico.
Portanto, há chances de choque elétrico, e é por isso que é recomendável desconectar a bateria antes de iniciar o processo de conexão dos fios.
Na maioria dos carros, você encontrará a bateria sob o capô, com alguns casos raros quando instalada na parte traseira do veículo.
Depois de localizar a bateria, use uma chave de mão ou soquete para soltar o cabo preto do terminal negativo da bateria.
Considere perder o parafuso e puxe o cabo para o lado da bateria para garantir que ele não toque nos fios positivos. Deixar de desconectar a bateria pode causar danos a você ou ao equipamento elétrico do carro.
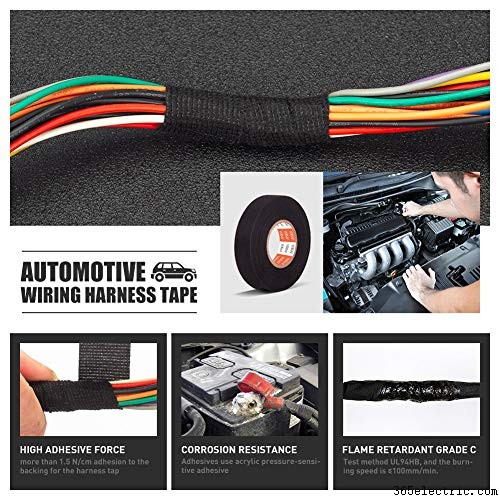
Etapa 3:Enrole todos os fios conectados
O significado de fazer isso é proteger seus pontos de conexão.
Depois de verificar todos os fios e conectá-los ao carro, é essencial tornar as conexões permanentes.
Certifique-se de que não haja fios desencapados no rádio do carro e, para deformar as conexões dos fios, você pode usar
fita isolante .
Você pode usar outras maneiras de enrolar os fios, mas usar fita adesiva é o método mais fácil, barato e comum que muitas pessoas usam.
Etapa 3:teste o rádio do seu carro
Depois de fazer as conexões e prendê-las, você deve reconectar a bateria para poder testar o estéreo antes de colocá-lo permanentemente no painel.
É aconselhável instalar o rádio do carro depois de verificar se está funcionando perfeitamente. Primeiro, no entanto, você precisa verificar todas as suas funções, incluindo as conexões dos alto-falantes.
Encontrar algo que está funcionando incorretamente significa que os fios não estão conectados corretamente e, muitas vezes, o erro é a conexão errada dos fios do alto-falante.
Etapa 4:coloque o chicote de fios no painel
After ensuring that all of your connections are tight and secure, it’s now time to install wiring inside the dash.
This includes connecting an often-forgotten antenna wire from car radio signal reception equipment so you can enjoy clear communications while driving!
You have to remember that there should be enough space for your radio in the dashboard, so make sure all wires are pushed into the dashboard.
This way, the stereo won’t get stuck when trying to move or remove from its position later on without damaging anything!
Step 5:Place the Car Radio Into Its Place
In most cars, there is an opening inside the dash where the car radio should be placed.
While installing the car radio, make sure it perfectly fits into the slot, and there are no extra wires that would block free movement.
If you feel some resistance while pushing the radio, never force it with too much pressure to its position. Otherwise, you can damage the wiring connectors at the backside.
In this case, an adaptor is very helpful at sliding the car radio properly in its correct position. An adaptor is available at any electronic store or auto parts store.
Step 6:Secure the Car Radio in Its Position
You can secure a car radio into two main methods.
- One of them is for the car radios that need spring clips. Once the stereo is locked at the correct position, the clips close and you can hear a click sound.
- The other one that is less common, involves brackets and bolts that need proper fixation. Bolting the radio permanently helps to secure it in the place.
Step 7:Install Dashboard
This is the final step of the wiring process and involves assembling every piece of the trim and the plastic clips.
At the same time, be careful to avoid the damage of any plastic parts and take time to check if the overlapped pieces have been correctly layered.
If you come across some plastic parts that have been broken, you can use hot glue to secure them.
However, using glue is not highly recommended since the plastic parts you fix can become difficult to remove in the future.
If the entire rim piece has been broken completely, the only option you have is to buy a replacement.
How to Test Car Radio Wire for Their Right Connections
All wires have to be in good condition and connected to the radio without interruptions.
Below I listed a few simple checks you can do to make sure the stereo’s connection is correct:
Constant wire
This wire comes with 12 volts, and it supplies power directly from the battery.
To test if it is working, the first thing you should do is put off your ignition. Afterward, ground the black wire, pick up the red meter probe and connector, and touch it with the constant yellow wire.
The constant wire should give the reading up to 12 volts with a 0.5V difference.
Speaker wire
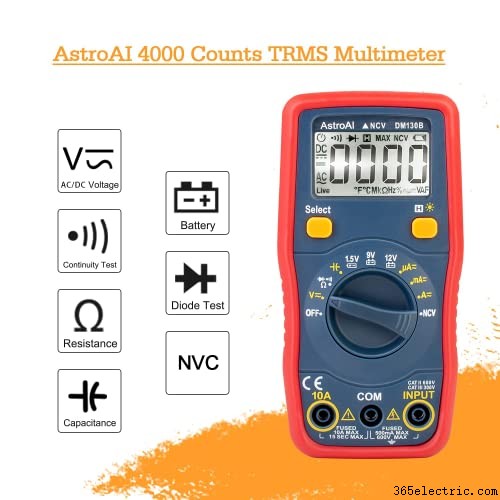
The simplest way to test the speaker wires is to use a 9-volt battery. You can also use a multimeter to test the speakers but make sure you set it to resistance before testing.
Accessory Power
Turning off the ignition makes the wire show a zero volt reading at a meter. Upon turning it on, it reads 12 volts and 0.5 volts.
Ground wire
Identifying the ground wire is straightforward after identifying the constant wire. Then, after proper testing, the ground wire is connected to the black wire.
Note that it is necessary to begin attaching a red meter probe with constant wire and later a black meter probe with the wire you are testing.
If the reading on the meter is similar to the constant wire testing, that is the ground wire.
Frequently Asked Questions (FAQs)
Where Is the Ignition Wire Located?
Depending on the car, the ignition switch harness is located inside the steering wheel column on either the left or right side.
The ACC wire is the one often 18 gauge yellow or pink. Installing this wire at a local electrical specialist can help you ensure the installation.
What Happens if You Do Not Ground a Car Stereo?
It is impossible to operate a car stereo without a proper ground wire installed.
The correct ground connection allows your radio to work perfectly without malfunctioning issues when the car is on.
How Can I Tap the Wires When Wiring a Car Stereo Without the Harness Clip?
The best solution is to look at your car’s electrical manual. However, if the manual is unavailable, you have to trace every wire.
Using a multimeter will be a good idea in this task. Since car electrical systems can be tricky to manage, do not attempt to play with the car’s electrical system without basic knowledge.
Conclusão
You have no reason to stay in an excellent car with a poor music system with the above guides.
Remember, adding a new car radio in your car is a great way to breathe new life into your vehicle. However, for the stereo to work at its own best, you have to follow the installation and wiring process.
