Fotos e vídeos de uma câmera de ação podem ser incríveis. Mas como obter as melhores fotos? É tudo sobre a montagem da câmera e vamos dizer-lhe como fazê-lo.
Como e onde você monta uma câmera de ação?
O lugar mais popular para montar uma câmera de ação é em um capacete usando um suporte curvo . No entanto, você pode montar uma câmera em quase tudo que se move. Continue lendo para descobrir como. Existem diferentes suportes para diferentes posicionamentos da câmera. Toneladas de montagens exclusivas estão no mercado. Você também pode DIY suas próprias montagens. Você precisará da montaria e, talvez, mais de uma. Veremos alguns dos muitos suportes que você pode usar com sua câmera de ação.
Como fazer:um guia
O bom dos suportes fornecidos com sua câmera de ação é que você pode usá-los em quase tudo. Normalmente, você tem uma montagem curva e plana com sua câmera, bem como uma fivela de montagem e uma estrutura de montagem. É uma boa ideia comprar mais desses para que você os use em várias superfícies. Separá-los é apenas uma questão de aplicar um secador de cabelo ou pistola de calor no adesivo que prende o suporte no lugar.
Veja como montar sua câmera de ação em uma variedade de superfícies, incluindo:
Montagem de capacete Montagem de skate Montagem de prancha de surf Montagem de Gol de Futebol Suporte para carro ATV/Montagem de barco Montagem de pulso Montagem de linha de pesca Montagem de cachorro Montagem da Espada E se sua câmera de ação tiver um tipo de montagem diferente?
GoPros usam o tipo de montagem com slots e um parafuso lateral. Muitos fabricantes de câmeras de ação estão usando o mesmo suporte em suas câmeras para poder usar os mesmos acessórios. No entanto, se sua câmera de ação usa um tipo de montagem diferente, como um parafuso vertical, aqui está o que você precisa para adaptar todas as montagens listadas acima a esse tipo.
Montagens
1. Montagem de capacete
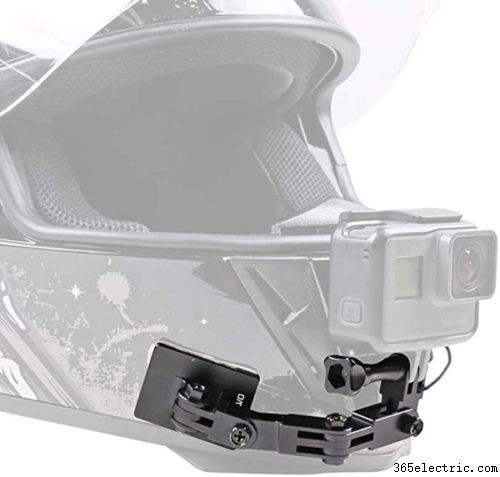
Esta é a montagem mais fácil e popular de colocar. Usando o suporte curvo ou plano, dependendo de onde você deseja sua câmera, basta conectar a base do suporte ao capacete. Dê-lhe 24 horas e você está pronto para ir.
Preferimos o suporte de queixo para a câmera do capacete. Aqui estão as instruções sobre como fazer isso:
- Limpe e seque seu capacete antes de colocar o suporte. Você quer que o adesivo grude em uma superfície limpa.
- Remova o adesivo do suporte curvo.
- Coloque o suporte curvo abaixo dos orifícios da boca do capacete. Pressione firmemente o suporte para que o adesivo grude.
- Cobrir o suporte com fita adesiva. Isso ajudará a fixar a montagem corretamente e a mantê-la no lugar enquanto seca.
- Aguarde 24 horas para se certificar de que está seco.
- Retire a fita.
- Coloque o conector (deve ser fornecido) no suporte, usando o parafuso fornecido com sua câmera.
- Prenda a câmera ao conector usando outro parafuso.
- Você deve conseguir mover sua câmera um pouco para obter o ângulo desejado na filmagem.
- Vá fazer um ótimo vídeo.
Descobrimos que o processo de montagem no queixo funciona melhor para a câmera de ação, mas você pode literalmente colocá-lo em qualquer lugar do capacete. Use o suporte plano se quiser a câmera na lateral do capacete e use o suporte curvo se quiser a câmera na parte superior do capacete.
Para comprar este tipo de montaria clique aqui.
2. Montagem de skate
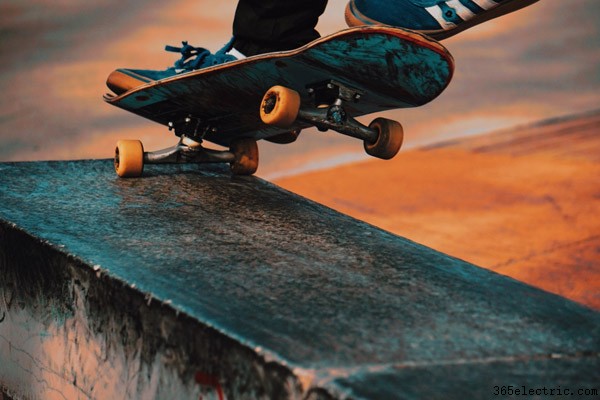
Você pode obter ótimas imagens e fotos em um skate. Com uma câmera de ação, você pode montar a câmera no capacete ou no pulso para algumas fotos de ação, mas e se você quiser a câmera no próprio skate? Isso pode ser um ponto de vista fantástico para a câmera. Não se preocupe. Nós cobrimos você:
- Limpe e seque a área do skate antes de colocar o suporte.
- Remova o adesivo do suporte plano.
- Usando o suporte plano, fixe o suporte na parte inferior do skate.
- Cobrir o suporte com fita adesiva e esperar 24 horas para garantir que ele adere firmemente ao skate.
- Remova a fita.
- Prenda a câmera ao suporte.
- Usando mais fita, passe a fita ao redor do skate, sobre a câmera, prendendo ainda mais a câmera no lugar.
- Certifique-se de que a fita não bloqueie o visor da câmera.
Para comprar este tipo de montagem clique aqui.
Aqui está outro tipo de montagem de skate.
3. Montagem de prancha de surf
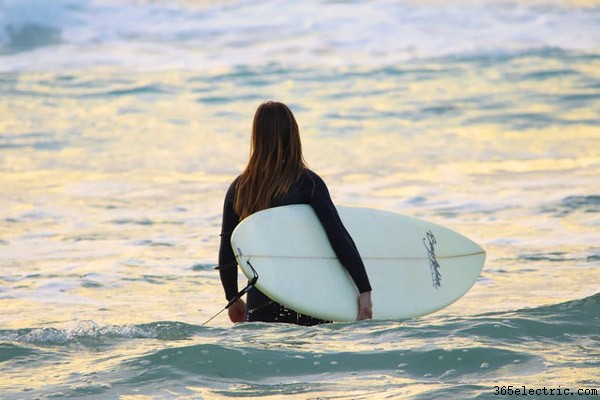
Para esta montagem você vai precisar de:
- Líquido à base de álcool
- Panos de limpeza
- Montagem plana
- Peça de amarração de montagem
- Corda de amarração
- Plugue de bloqueio
- Parafuso de aperto
Esta é uma montagem bastante simples. Tudo que você tem a fazer é:
- Remova qualquer cera da placa e limpe a área com um líquido à base de álcool.
- Seque bem a área.
- Remova o suporte do lado adesivo do suporte.
- Coloque o suporte no quadro. Certifique-se de que está reto e aplique alguma pressão.
- Remova o adesivo do suporte de montagem.
- Coloque a peça de amarração na curva do suporte principal. Aplique alguma pressão.
- Passe a corda de amarração pela peça de amarração e volte pelo laço. Aperte.
- Insira o suporte da sua câmera de ação.
- Insira o plugue de travamento no espaço dentro do suporte da câmera de ação.
- Passe a corda de amarração pela caixa da câmera de ação.
- Passe o parafuso de aperto manual pelo orifício do plugue de travamento.
- Deixe por 24 horas.
- Surf's Up!
Para comprar este tipo de montagem clique aqui.
4. Montagem de Gol de Futebol
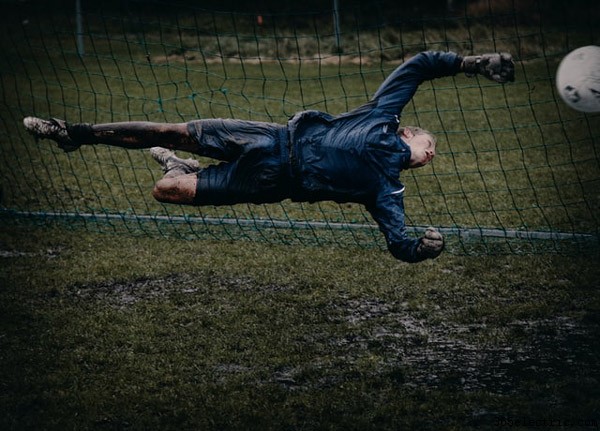
Você já viu um jogo de futebol profissional na televisão? Sabe aqueles gols em que eles mostram a bola entrando na rede e você tem uma ótima visão do fundo da rede? Bem, vamos mostrar como conseguir isso com sua câmera de ação. Para isso, você precisará de um suporte de cinta peitoral.
Estique a alça do suporte para o peito até a parte de trás da rede.
Certifique-se de esticar a alça o mais esticado que puder na rede. This will help ensure stability for the camera.
You are going to want to check the angle of your camera to make sure you get the best view of the entire net.
To buy this type of mount click here.
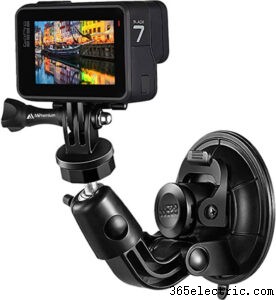
5. Car Mount
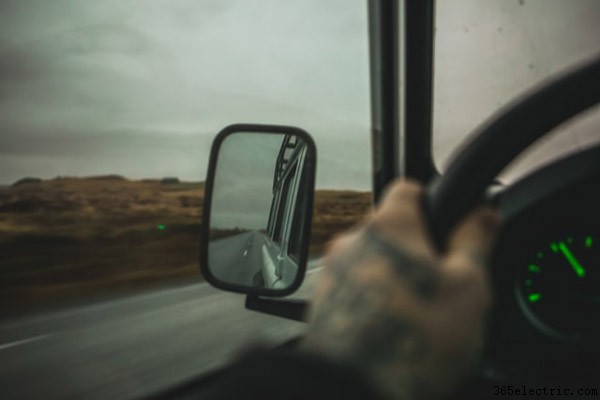
There are many different places to mount an action camera inside of your car. It really depends on what you want to pick up with your camera. For car mounting, we recommend using the suction cup mounting. You can also use a couple of extender bars to increase the angle of the camera. It’s stable and adheres well to the windshield or other areas of the car.
- As always, make sure the area where you will place the camera is clean and dry. An alcohol-based liquid and a clean rag will take care of this.
- To get the driver’s view on the camera, place the suction mount in the middle of the windshield below the rearview mirror.
- You may want to dampen the suction cup before placing it on the windshield, which will help the mount stick.
- To see where you’re going AND where you’ve been, place the suction mount on the passenger side window. Position it so that the camera will pick up both the sideview mirror as well as the view out of the passenger side seat.
- If you have a sunroof, try mounting the suction cup on the inside of the sunroof. With this, you can get a shot of the road as well as your dashboard. For this, you will also need some extender bars.
To buy this type of mount click here.
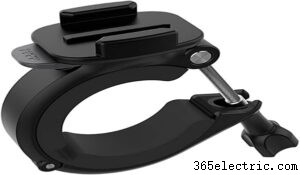
6. ATV/Boat Mount
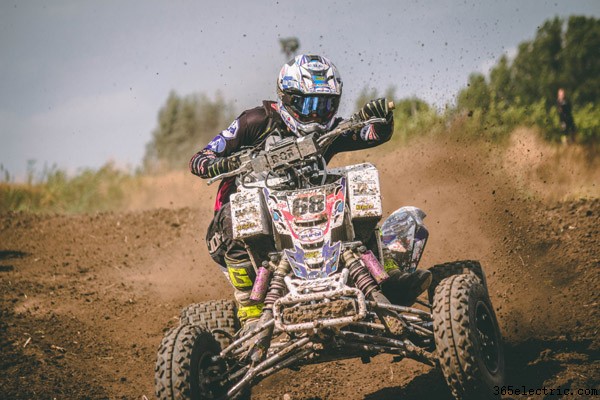
For a tires-eye view of the terrain, you can use a roll bar mount to put your camera directly on the lower part of an ATV grill or winch. The roll bar mount makes this very easy. To attach the roll bar mount, just follow these instructions:
- Unscrew both thumbnuts until the clamp is at a large enough diameter to fit the intended tubing.
- Remove bolt and thumbnut together from one open side.
- Place the clamp on your intended mounting location.
- Tighten both thumbnuts until clamp is secure.
- To mount the camera directly to the clamp, use one of the included pivot bars.
- Adjust your camera to your preferred angle.
- Tighten all mounting hardware so the camera is secure
There are many places you can place your roll bar mount besides an ATV. You can put it on dune buggy roll bars or boats, as well. Really, anywhere there is a round bar, and you want to take some video or photos, you can use the roll bar mount and an action camera to get the shot you need.
To buy this type of mount click here.
7. Wrist Mount
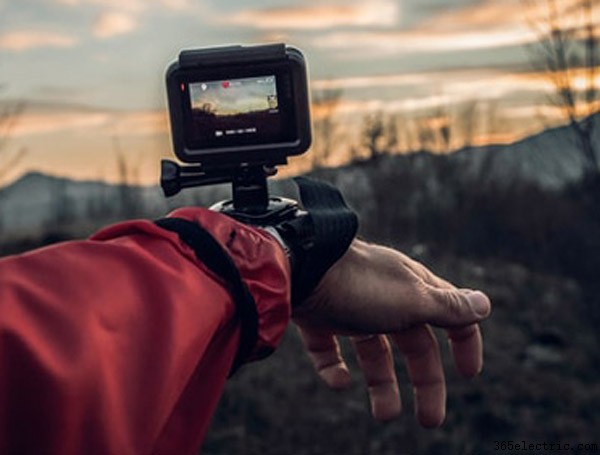
The wrist mount is a separate accessory for action cameras but you can use it to create some really great, hands-free shots. This is especially good for underwater activities such as scuba diving or snorkeling, as it is waterproof.
The strap on the wrist mount is adjustable so you can use it on different body parts besides the wrist. Use it on your arm or leg as well, if you want shots from that angle. It’s very adaptable, with a 360-degree rotation and tilt.
To attach the camera to the strap:
- Place camera in mount on strap.
- Use provided thumb screw to tighten camera onto mount.
To attach the strap to your hand:
- With the strap on your hand, adjust the strap on the thumb side first.
- These are velcro straps so all you have to do is pull and place to adjust the strap.
To attach the strap to your wrist:
- Take wrist strap and attach it by threading the strap through the rotating mount, hook side down.
- Place over your wrist and adjust your strap.
The wrist mount also comes equipped with an arm and leg strap. These can give you some different shots you wouldn’t ordinarily get.
To attach the strap to your arm or leg:
- Thread the arm and leg strap through the rotating mount.
- Wrap around your arm or leg and pull both straps until it tightens.
- Use the velcro to stabilize the straps.
The wrist strap is a versatile, hands-free way to take your favorite action shots.
To buy this type of mount click here.
8. Fishing Line Mount
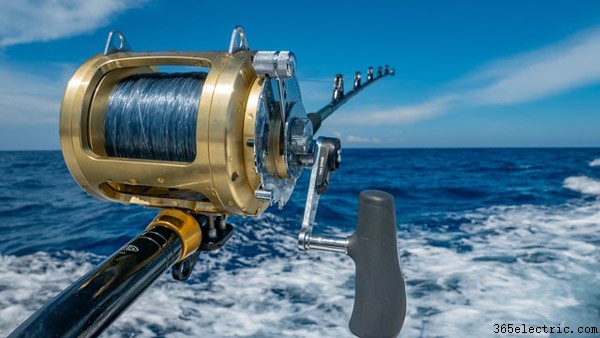
Want some cool underwater fishing video? We can help with that. For this, you will need some heavy-duty fishing line and a tool that allows you to string two action cameras together. One item you can use would be a Mule Mount and you can find those at the link below.
Use these DIY instructions to mount a camera to your fishing line:
- Take the floating back door off the action camera.
- Attach the camera to the mule mount using the thumb screws.
- Using the heavy-duty fishing line, run line through the Mule Mount.
- Put a weight on the other end of the line and Mule Mount.
- Add the fishing hook to the end of the line you ran through the Mule Mount.
- Go Fishing.
You’re going to want to be careful with this mount. Make sure everything is attached tightly. Do not go fishing in murky waters where you can’t see underwater. Do not go fishing where your line is liable to get tangled. With some consideration, you can take some great underwater video of fishing.
To buy this type of mount click here.
9. Dog Mount
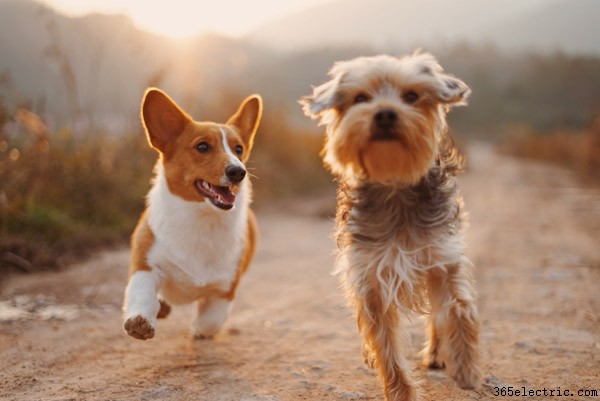
Do you wonder what your dog does when you’re not around? Does your dog get out of your yard and you want to see where he/she goes? Mount an action camera on your dog and find out what your pets do when they’re away from you.
For this mount, you can use an adjustable wrist mount:
- Thread the dog’s collar through the adjustable wrist mount straps.
- Tighten securely.
- Put collar on dog with camera facing on side of head.
- Make sure camera is away from dog’s ears.
With this mount, you should be able to follow your furry friend anywhere.
To buy this type of mount click here.
There is another new option for this now, its an actual dog mount! If you have the money for another mount, you can find it here.
10. Sword Mount
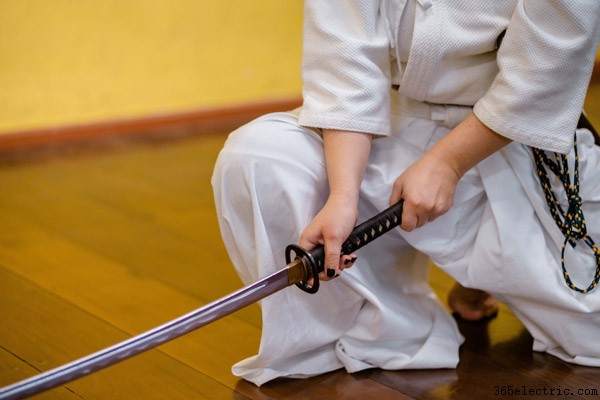
This is a really fun way to get some incredible footage or shots from the point of view of a sword. For this, you will need the wrist mount and an extender bar.
To attach the mount to the sword:
- Attach the camera to the extender bar.
- Attach the extender bar to the wrist mount.
- Using the wrist strap, wrap it around the hilt of the sword.
- Pull straps tightly to make sure the strap is secure.
- Fasten velcro.
This is for sword play, but you could feasibly use this on any type tool, such as:
- Axe
- Shovel
- Nerf Gun
- BB gun
- Bow
To buy this type of mount click here.
To get the extender bar click here.
Accessories You May Want
Your action camera probably came with only a couple of accessories. Standard action cameras usually only come with a mounting frame, buckle and a couple of mounts. You can absolutely use these for your camera in most situations. However, there are some other mounts on the market that can make your life easier:
Chest Strap Mount Head Strap Mount Handle Selfie Stick Floating Hand Grip Bike Handlebar Holder Rotating Adjustable Wrist Mount Removable Suction Cup Mount Roll Bar Mount You don’t necessarily have to have these different accessories, but it does make it easy to mount your action camera. We’ll go through these, so you know their use.
1.Chest Strap Mount

The chest strap mount is a harness strap belt that gives a steady recording at chest height. The belt is adjustable, and this is a one size fits most design. You can find this mount here.
2. Head Strap Mount
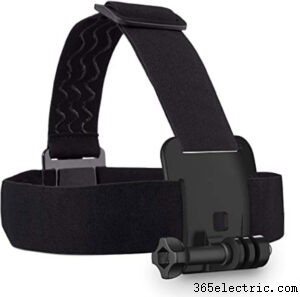
The head strap mount is a secure headband that wraps around your head for a steady shot or video. It keeps your camera in place and is good for sports like:
- Zip Lining
- Snorkeling
- Riding A Bike
Any sport where you need to use your hands would be acceptable for a head strap mount. You can find this mount here.
3. Handle Selfie Stick
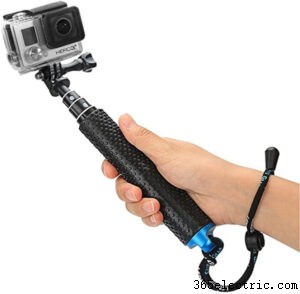
This stick is an extender pole that can extend up to 19 inches. It’s waterproof, so you could use it on a jet ski, and it works with all gopro mount cameras. You can find this mount here.
4. Floating Hand Grip
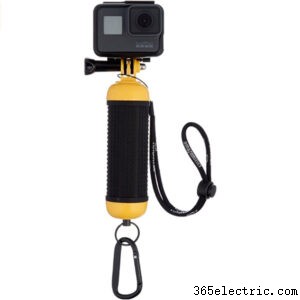
The floating hand grip is a great tool for underwater photography. Waterproof, it has a wrist strap design to keep the camera secure while you swim. You can find this mount here.
5. Bike Handlebar Holder
This nifty tool attaches to your bike’s handlebars. You place the camera on the mount and go for a ride. The camera does the rest. You can find this mount here.
6. Rotating Adjustable Wrist Mount
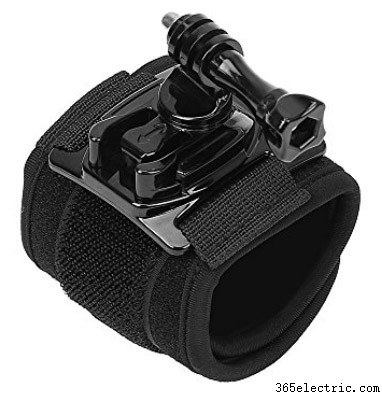
The wrist mount is a 360-degree rotating adjustable wrist mount. You can secure your camera flat against your wrist for easy convenience. It’s made for the wrist, but you can actually strap this to anything that will fit, including:
- Handlebars
- Arm
- Steering Wheel
You can find this mount here.
7. Removable Suction Cup Mount
With the suction cup mount, you can put your camera virtually anywhere suction can take hold. Isso inclui:
- Windshields
- Helmets
- Dashboards
It’s very convenient and easy to move. You can find this mount here.
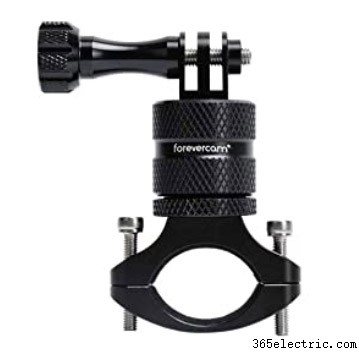
8. Roll Bar Mount
This mount fits around any bar from 1.4” to 2.5” so you can get some unusual perspective from your action video. It comes with full rotation for adjustability. Place it on a roll bar or any other bar to mount your camera in place. You can find it here.
Tips on Taking the Best Video
As much as we love our action camera, we don’t want video that is shaky or unwatchable. To combat that, we have some handy tips for using your action camera:
- Use a mount. This will stabilize the camera.
- Find a new angle. Don’t just go for the headshot. Strap your mount to your bumper, roll bar or anywhere else you can find for a new view.
- Don’t strap the camera to the top of the helmet. This will result in shaky video. Use the chin strap method instead.
- Use filters, like a red filter for underwater. This will help remove the blue-green colorcast underwater. Use neutral density filters in bright light. Experiment.
- Try out time-lapse shooting. Your action camera should have a time-lapse mode. This can create some unique shots to add to a video.
- Plan ahead. Think beforehand of what you want your video to look like and act accordingly.
We hope this handy guide on mounting an action camera was useful to you. For an article on shooting sports and fast action click the link.
Let us know in the comments if you have found any tricks for other types of mounts.
