Não importa o quão rápido nossos telefones sejam, sempre há espaço para torná-los um pouco mais rápidos. Felizmente, o Android permite que você faça exatamente isso. O processo é chamado de overclock e significa simplesmente forçar sua CPU a rodar um pouco mais rápido do que normalmente. Veja como fazer overclock no seu telefone Android e supercarregá-lo.
- Nossas 10 melhores dicas para acelerar seu telefone
- Como carregar a bateria do seu telefone Android mais rapidamente
Usuários hardcore de PC já devem estar familiarizados com overclocking. Os jogadores, especialmente, fazem overclock em seu hardware há anos, aumentando o desempenho de suas máquinas. A mesma possibilidade existe para o Android:você pode dizer à sua CPU para rodar mais rápido do que as configurações recomendadas pelo fabricante. O processo é surpreendentemente fácil e pode fornecer até 30% mais energia. Aqui está tudo o que você precisa saber:
- O que é um kernel?
- O que saber antes de começar
- Obtenha o kernel certo
- Usar software de overclock
- Como fazer overclock no seu Android, passo a passo
- Alterando a velocidade do clock da CPU
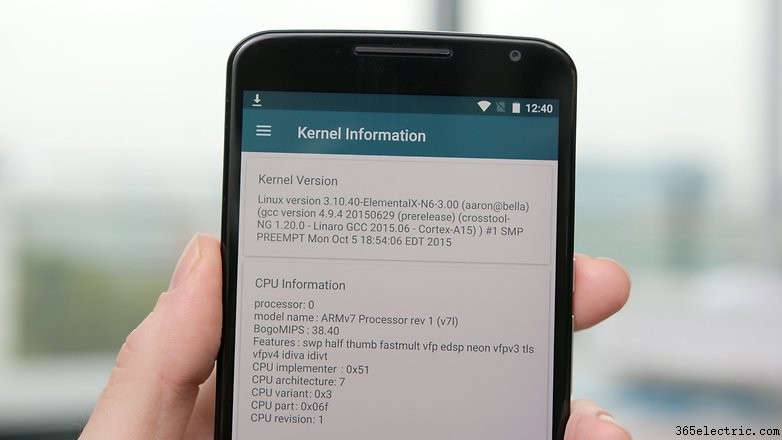
O que é um kernel?
O kernel é um programa de computador que é o núcleo do sistema operacional de um computador. Geralmente, é um dos primeiros programas carregados quando você inicia um dispositivo de computador, às vezes chamado de carregador de inicialização. O kernel executa tarefas como executar processos, gerenciar o disco rígido, lidar com interrupções e classificar o restante do processo de inicialização. Ele faz isso em uma parte protegida da memória, conhecida como espaço do kernel O Android usa o kernel do Linux, mas você pode alterar isso se fizer root no seu dispositivo.
Antes de começar:leia isto
Primeiro eu preciso dar-lhe o aviso padrão. O overclock da CPU do seu telefone vem com alguns riscos. Aumentar a velocidade do clock da sua CPU gera mais calor e consome mais energia. Não é provável que incendeie seu telefone ou acabe com a bateria, mas o excesso de produção de calor pode criar instabilidade e afetar a vida útil da bateria.
A chave é tomar o seu tempo. Não tente saltar para um aumento de 30% na velocidade do clock imediatamente. Vá devagar e avalie a estabilidade do sistema a cada aumento. Se o Android funcionar bem, o calor e a duração da bateria do seu telefone forem aceitáveis e não houver falhas ou comportamento estranho, você pode tentar aumentar ainda mais a velocidade do relógio. Se as coisas ficarem estranhas, volte para a última velocidade de clock estável.
Obtendo o kernel certo para overclock
Feliz com isso? Vamos prosseguir. A única coisa que você precisa para ajustar as configurações da CPU do seu telefone Android é um kernel que suporte overclock. Overclocking é um grampo da comunidade de modding, então não faltam bons kernels para escolher. Você só precisa obter o kernel certo para o seu modelo de telefone específico.
Primeiro, encontre o número do modelo do seu telefone. Vá para
Configurações> Sobre o telefone e dê uma olhada. Você também deve anotar a versão do Android que está executando. Seu telefone também precisará ser enraizado para fazer o overclock de sua CPU. Para mais informações sobre o que é root no Android, consulte nosso guia. Naturalmente, este processo não é coberto pela garantia, então prossiga por sua conta e risco. Você também precisará de uma recuperação personalizada instalada. Mais sobre isso abaixo.
Substituir o kernel e fazer overclock não leva tempo, mas vale a pena investir algum tempo para encontrar o kernel certo. Sites como o XDA Developers são um ótimo lugar para começar. Há quatro coisas que você procura em um kernel:que ele suporte overclocking, que seja compatível com o modelo do seu telefone, que funcione na sua versão atual do Android e que tenha uma boa reputação.
Quanto mais popular for um kernel, mais fácil será obter ajuda da comunidade se você precisar ou rastrear algumas configurações sugeridas (se você preferir aprender com os esforços de outros ao invés de descobrir você mesmo). Quanto mais feedback houver em um kernel, mais informada será a decisão que você poderá tomar.
Software de overclock para seu kernel
Alguns kernels vêm com software dedicado que é feito sob medida para ajudá-lo a tirar o máximo proveito do kernel. Isso pode envolver um simples controle deslizante de overclock, configurações do governador da CPU, opções de undervolting e muito mais. Se o kernel escolhido tiver um aplicativo complementar, use-o. Se isso não acontecer, pesquise na Play Store por um aplicativo genérico de overclocking ou gerenciador de CPU com uma boa classificação e comentários positivos.
Once you've got the kernel for your particular model of phone, and have ensured it works with your version of Android and supports overclocking, you're good to go. For this tutorial we're overclocking a rooted Nexus 6 running stock Android 6.0 Marshmallow using the ElementalX kernel.
Many custom ROM kernels already support overclocking however, so if you are using a custom ROM, read up on it to see if you even need to change your kernel.
How to overclock your Android phone
Your phone needs to be rooted in order to flash a custom kernel. You'll also need a custom recovery installed (because you can't flash kernels using stock recovery). If you need help with this, follow our guide on how to install a custom recovery. The guide at the link is for a Nexus 5 but the same process applies.
1. Make sure you have a backup of your data. You can do this through your custom recovery or with any number of apps or PC-based solutions. If you need help with this, follow our guide on how to back up everything on Android.
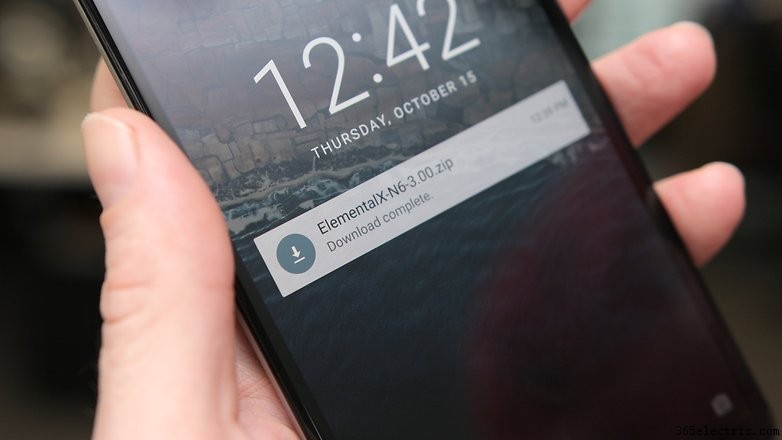 2.
2. Once you've chosen the kernel you want to use, download it (and any software it might have come with) onto your Android (you can leave it in the Downloads folder). You can also download the kernel to your computer and copy the zip file to the root directory of your phone if you prefer, but it's just as easy to just do it on your phone through recovery.
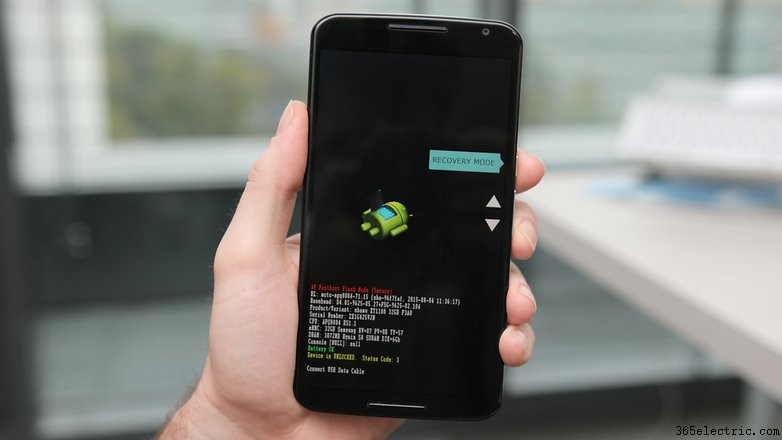 3.
3. Turn off your phone and enter fastboot. This is usually achieved by pressing Power and Volume Down but some manufacturers have a different button combination.
4. On the fastboot screen, use the volume buttons to highlight Recovery mode and press the power button to select it.
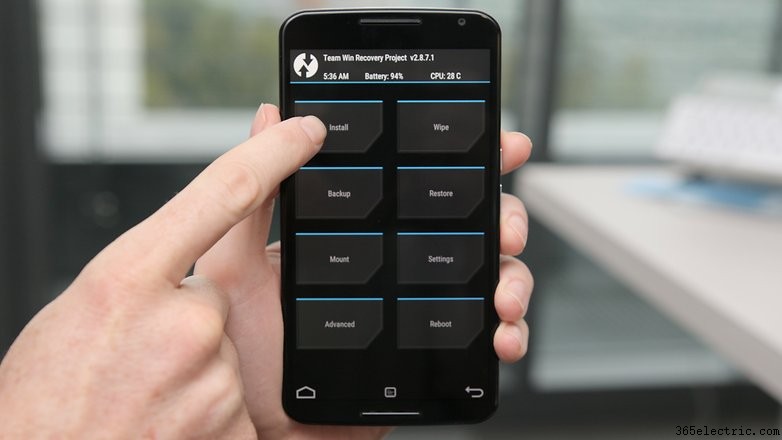 5.
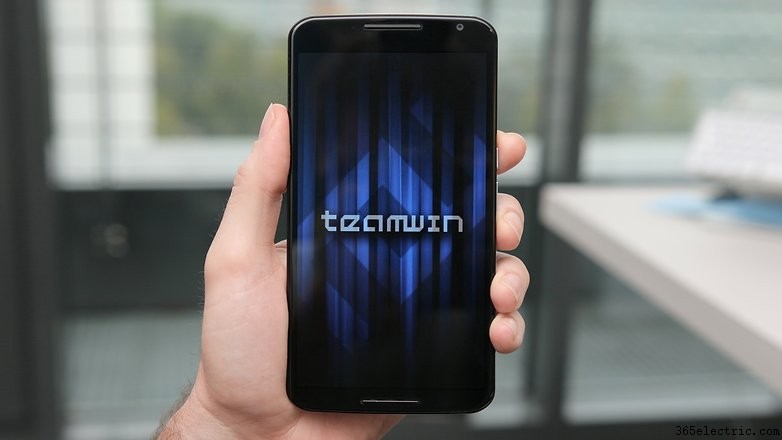
5. You will now enter your custom recovery. We're using TWRP.
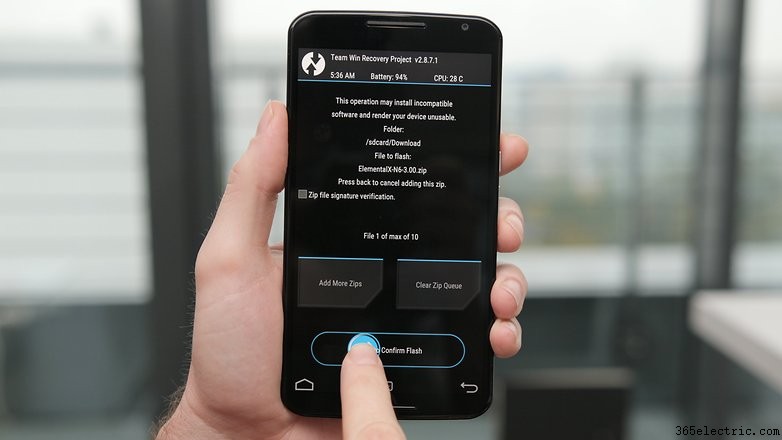
6. Tap the Install button (or 'Install zip' in CWM recovery) and navigate to the location where you saved the kernel zip file.
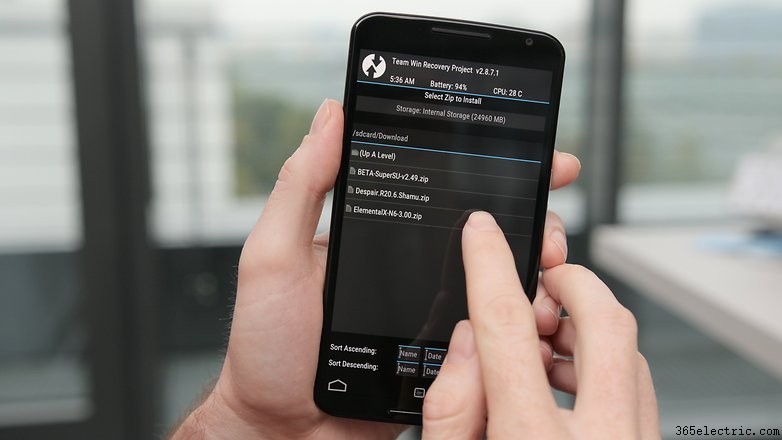 7.
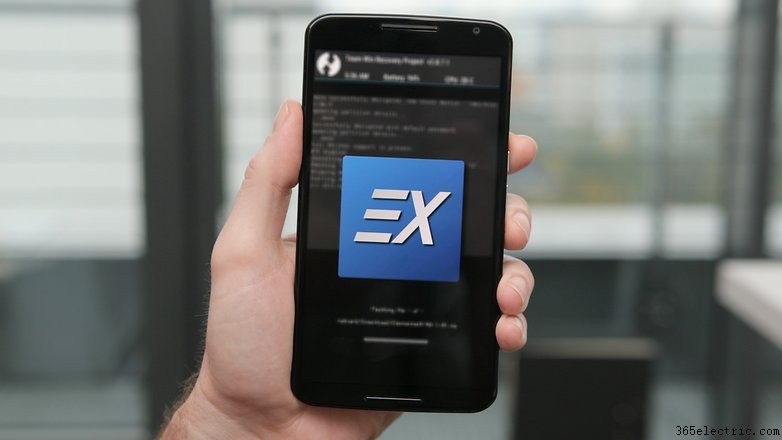
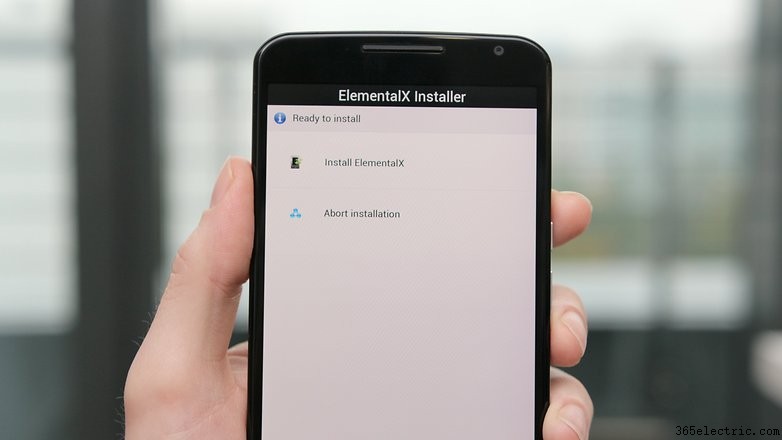
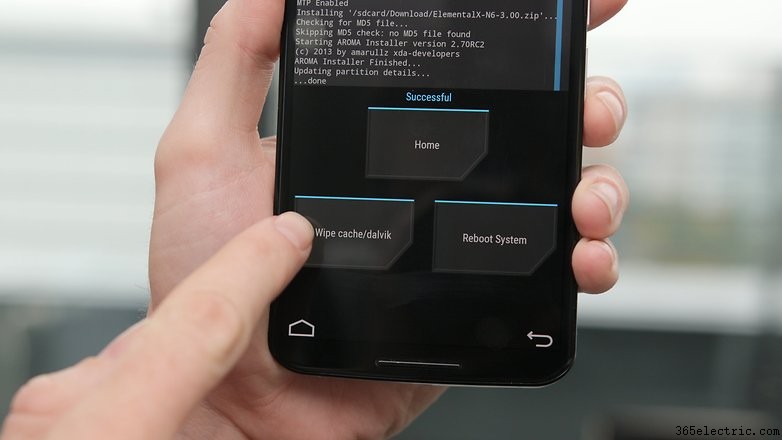
7. Flash the kernel zip file and wait for a success message. Some kernels (like Elemental X in our example) will run you through a series of screens like the Install Wizard on your computer.
Some kernels will allow you to set the CPU clock speed during installation. You can make changes then and there or later through the CPU manager app you installed. See below for instructions on the latter.
 8.
8. Wipe the cache once the kernel has been flashed successfully.
 9.
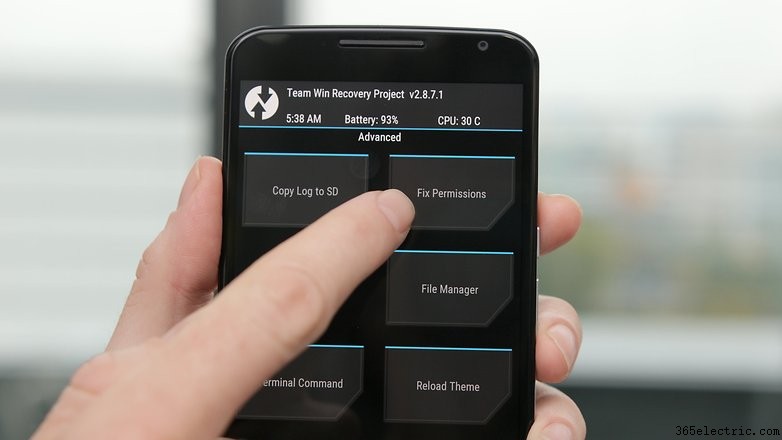
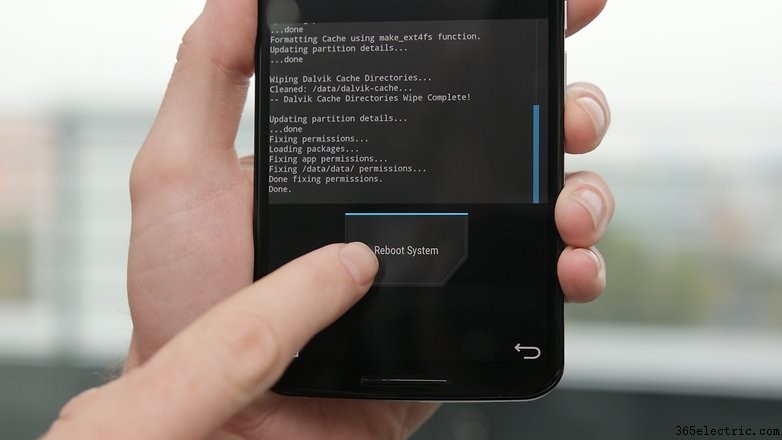
9. Go to the Advanced settings in recovery and tap 'Fix Permissions'.
 10.
10. Reboot your system.
Changing your CPU clock speed
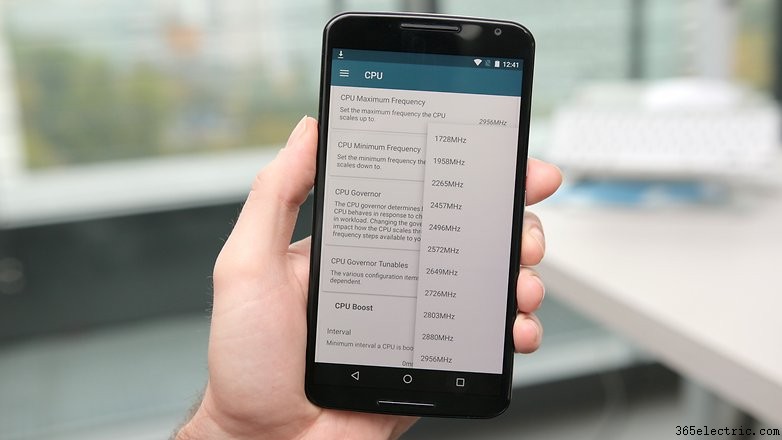
If you didn't change the CPU settings during installation of your custom kernel you can now launch your CPU manager or kernel app. If you haven't already installed compatible software for your kernel you'll need to find an app in the Play Store.
There are plenty that work well, but I'm using a free app called Kernel Adiutor. You'll need to grant your kernel app root permission and you might be required to install BusyBox as well (which will also require root privileges).
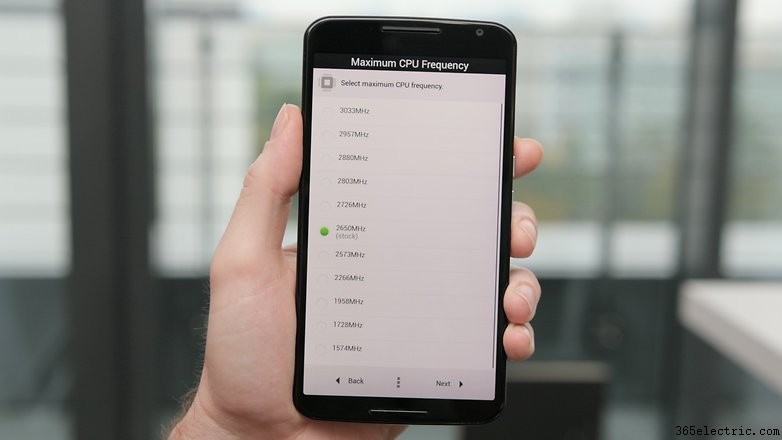
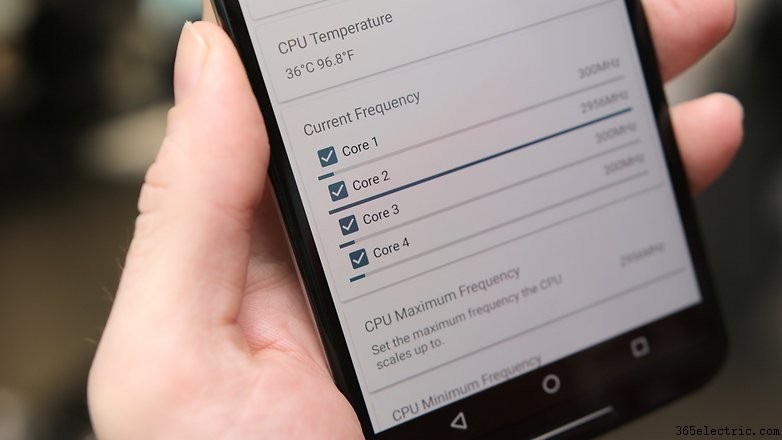
Look for the settings that control CPU clock speed. Depending on the app you're using, you can choose a max CPU speed from a drop down menu or use a slider. Remember, take it slowly and try each clock speed out for a while to see how it affects stability, battery life and heat. Start at around 10 percent more than your current clock speed and work your way upwards.
Don't be surprised if your CPU speed doesn't instantly jump up to that new setting. What you're doing when you overclock is changing the CPU's maximum speed, so it will be able to deliver higher performance when necessary.
While you can also change the minimum clock speed, that just puts unnecessary strain on your processor and battery. After all, there's no need to be maxing out your CPU just to read emails.
If you encounter any instability with your new settings just go back and drop your max clock speed a little and see how you go.
If you encounter any problems that seem out of the ordinary, hit the forums or the place you grabbed your kernel from and read through the entries to see if anyone else has already solved your problem. If not, ask for help from the community. If all else fails you can simply re-flash the original kernel your device came with.
Let us know how you got on, and how much better your overclocked Android is now.
