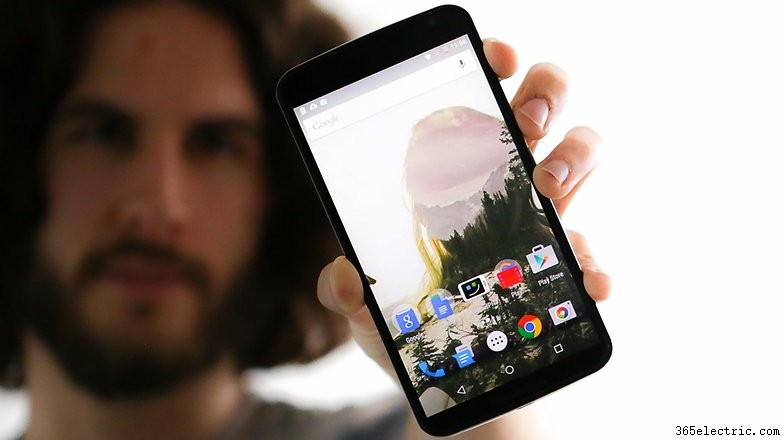
O Nexus 6 tem hectares de tela, mas isso não significa que não queremos um pouco mais. Então, hoje vou mostrar um pequeno truque legal para aumentar a tela do seu Nexus 6. É um procedimento muito simples e não requer ferramentas especiais ou dinheiro. Também é facilmente reversível. Então, vamos detonar e deixar a tela do Nexus 6 ainda mais espaçosa.
- Dicas do Nexus 6
- Notícias da atualização do Nexus 6 para Android
Obviamente, não estamos alterando fisicamente o tamanho da tela do seu telefone. Isso seria loucura. O que vamos fazer é mudar a resolução da tela para que você possa caber mais nela, dando a ilusão de uma tela maior.
A resolução nativa da tela de um telefone nem sempre é a mesma que a resolução da tela. No Nexus 6, a resolução nativa é de 493 dpi, mas é definida como 560 no sistema.
 Ir para a seção:
 - Método não raiz (usando ADB)
- Método raiz (edição build.prop)
- Método de trapaceiros super fácil
O que a alteração da densidade da tela faz?
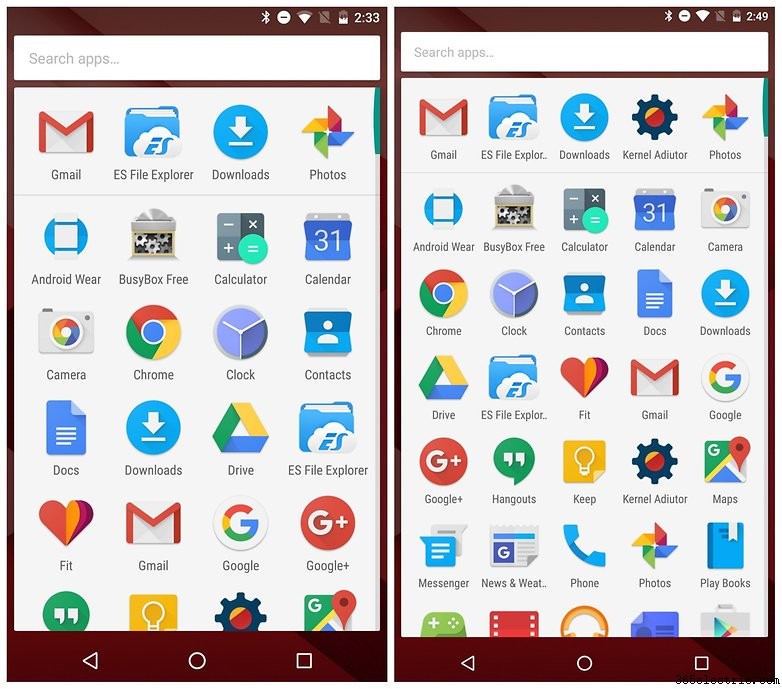
Alterar a densidade da tela faz algumas coisas:reduz um pouco o tamanho do texto e dos ícones, fazendo parecer que há muito mais espaço na tela. Ele também adiciona uma linha e uma coluna extras de ícones à gaveta de aplicativos, o que significa que você terá cinco aplicativos em vez de quatro e poderá ver sete linhas em vez das seis habituais.
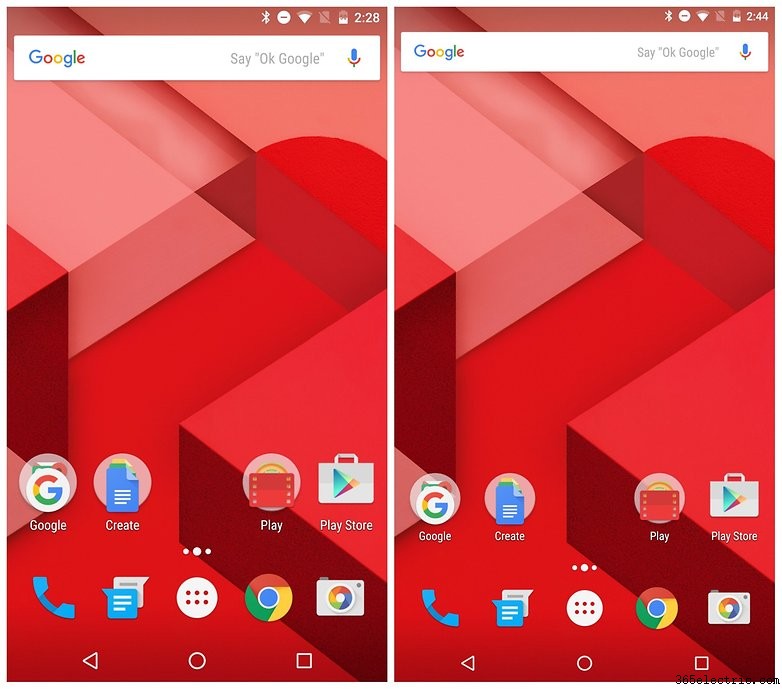
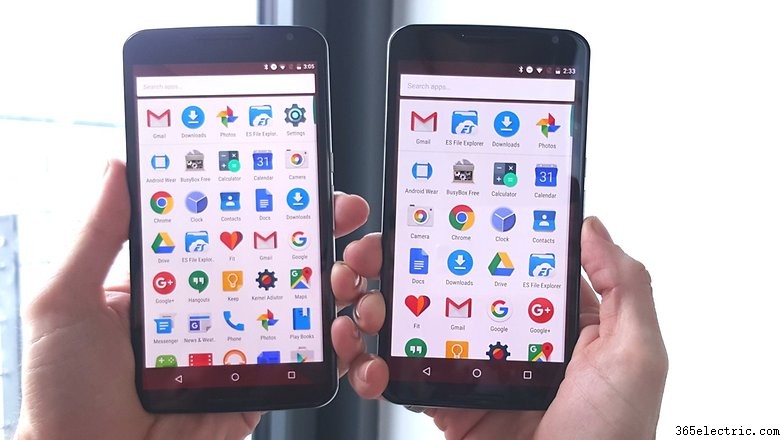
Se, como eu, você acha que tudo na tela do Nexus 6 é um pouco grande demais, diminuir a resolução da tela aperta as coisas, ao mesmo tempo em que oferece mais espaço para respirar. Basta dar uma olhada nas capturas de tela lado a lado abaixo. A melhor parte é que você pode alterar o dpi para o que quiser e continuar fazendo isso até encontrar o ponto ideal para você ou voltar para o que era a qualquer momento.
Como alterar a densidade de exibição do Nexus 6
Método 1:usando comandos ADB (sem necessidade de root) Se o seu Nexus 6 não estiver enraizado, você poderá alterar sua densidade em alguns minutos com comandos ADB. Para isso, você precisará do Android Debug Bridge instalado em seu computador. Como o nome indica, ele fornece uma ponte entre seu computador, onde você digita os comandos, e seu telefone, onde eles são executados.
1. No seu Nexus 6, ative a
depuração USB em
Opções do desenvolvedor . Para ativar as
opções do desenvolvedor , vá para
Configurações> Sobre o telefone e toque em
Número da compilação sete vezes. Em seguida, faça backup de uma etapa e você verá a
opção do desenvolvedor s na parte inferior de suas configurações cardápio. Acesse aqui e habilite a
depuração USB .
2. Baixe o ADB Tools em seu computador, caso ainda não o tenha.
3. Conecte o Nexus 6 ao computador com um cabo USB.
 4.
4. Abra uma janela do Windows Explorer no seu PC e abra a pasta ADB Tools.
5. Em algum espaço em branco na pasta, segure Shift e clique com o botão direito do mouse. Selecione
Abrir janela de comando aqui .
6. Make sure your Nexus 6 is being recognized by typing the following into the command window.
adb devices 7. You should see a number in the command window identifying your Nexus 6. If you don't you need to install the drivers for your Nexus 6. Try the Google USB Driver or Koush's Universal ADB Driver. Once you've got the drivers installed, repeat the ADB command and proceed once your Nexus 6 is recognized.
8. Type the following to set your Nexus 6 dpi to 493 (its native density). You can substitute any number you like – more on this later – but I like 493.
adb shell wm density 493 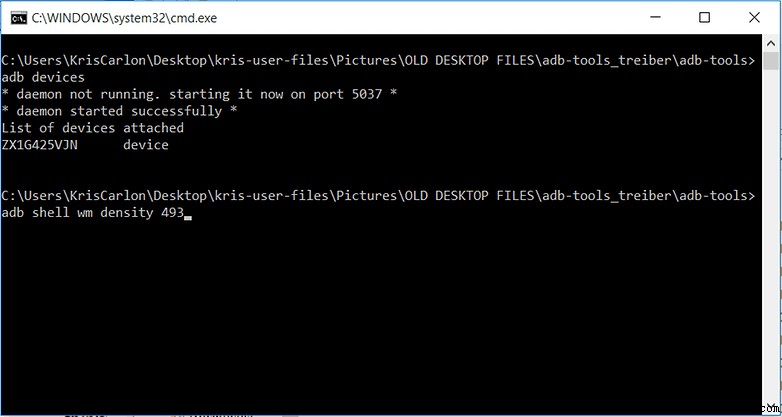 9.
9. Reboot your Nexus 6 to see the effect in action. Every change of dpi will require a reboot.
10. If the font size is a bit too small you can go to
Settings> Display> Font Size to change it. But you'll now have smaller icons on the home screen, more space around them and more visible app icons in the app drawer.
11. You might experience some graphical weirdness in some apps. This is normal, because you've tweaked the default settings. Finding a setting where you can live with a little weirdness or eliminate as much as possible is your goal, but this will depend on how much you want to change your screen and how many bugs you can live with.
12. If you want to change things back to default, just open the command window again and type.
adb shell wm density reset 13. Other recommended settings are 492 (even numbers are generally better), 480, 500 and 520, but again, fine tune as you need to. Just remember to restart after each change. The lower the number the smaller things are on screen and the more space you have around them.
 Method 2:editing the build.prop file (requires root)
 If your Nexus 6 is rooted, changing its screen density is even easier. Just install ES File Explorer and enable
Root explorer in the left-hand navigation pane. I prefer this method because I've not experienced any of the visual glitches that are occasionally reported using the ADB process above.
1. Launch ES File Explorer on your rooted Nexus 6.
2. Ensure
Root explorer is enabled in the navigation pane.
3. Navigate to /device/system
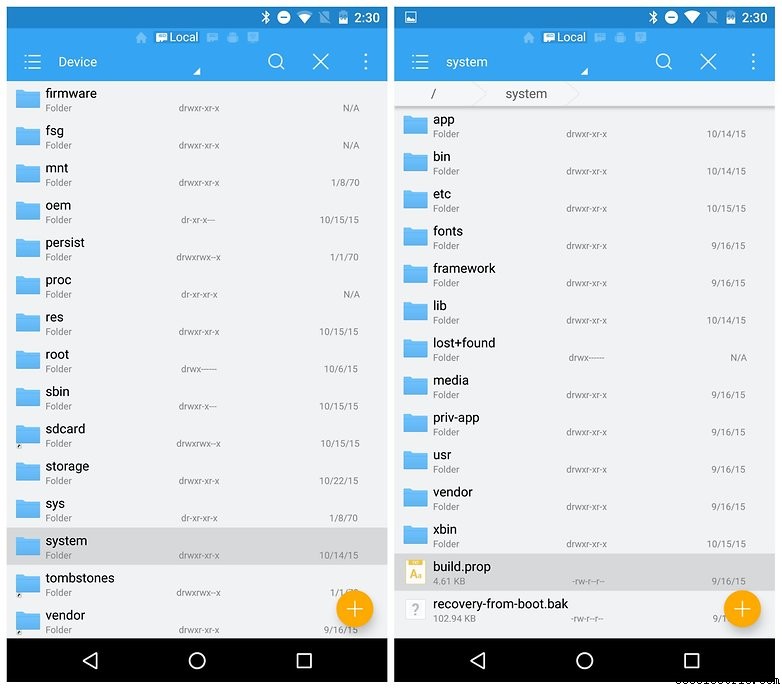 4.
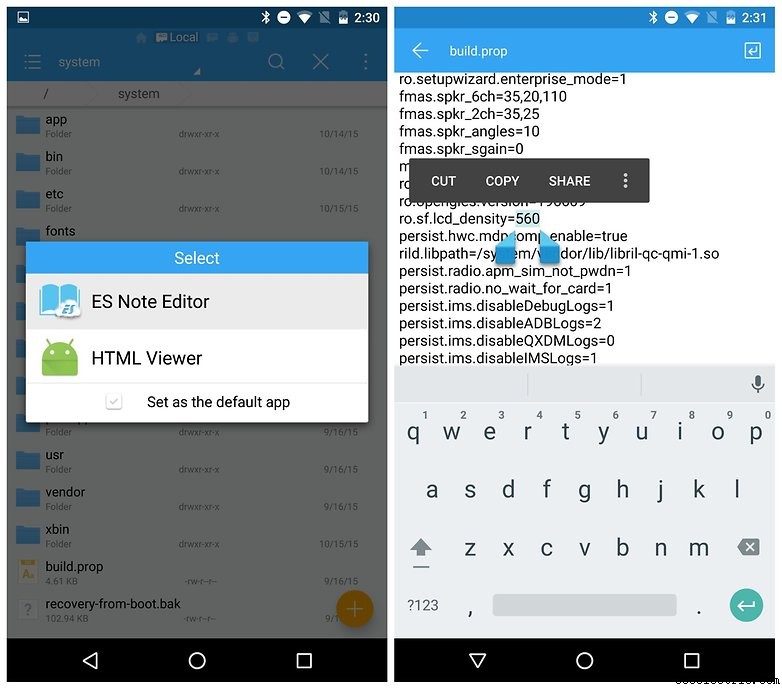
4. Scroll down, tap on build.prop and select ES Note Editor from the list to open the text file.
5. Tap the pencil icon to edit the file and scroll down until you see the following entry:ro.sf.lcd_density=560
 6.
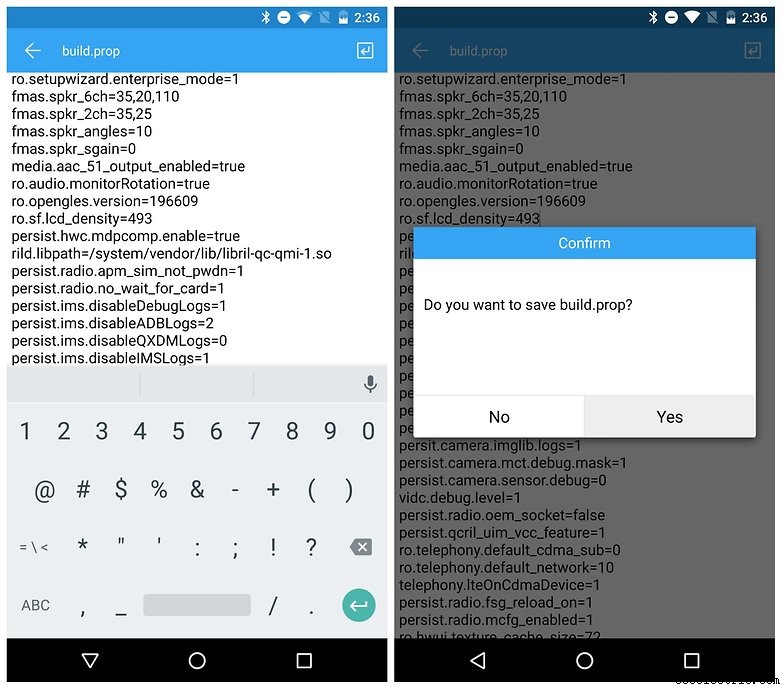
6. Change the 560 to 493 (or whatever density you prefer) and press the back arrow to exit. Confirm you want to save changes.
 7.
7. Reboot your Nexus 6 to see the change take effect.
8. Again, if you want to change things back, simply repeat the process above and put 560 back into the build.prop file. You can use this method to change to any other DPI setting you want to try out as well.
 Method 3:ADB and root terrify me
 There's an even easier way to achieve similar results and you don't need root, a PC or ADB skills to complete it.
Simply install an alternate Android launcher and change your settings to make app icons the size you want and to squeeze as many rows in the app drawer as you like. This method lets you theme your launcher, make custom actions, folders and so on. It's a great alternative and is just as easy to undo, even if its not a system-level change.
- How to install a custom launcher on Android
Enjoy that additional screen space and let us know about other Nexus 6 tricks you'd like to see.
