O . No centro de tudo, é basicamente uma versão maior dos smartphones Nexus do Google, mas ao mesmo tempo fundamentalmente diferente. Como tal, compilei uma lista de alguns recursos e dicas interessantes que você pode achar úteis para o Nexus 7.
Leia nossa análise do Nexus 7 (2013) para descobrir tudo o que você precisa saber sobre o dispositivo do Google.
Evite o desbloqueio facial
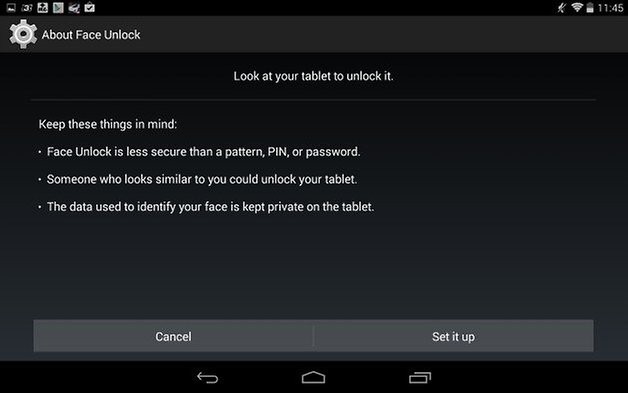
O Nexus 7 2013 oferece vários métodos de desbloqueio de tela para proteger os dados que ele mantém a bordo, de PIN a um padrão, senha e, por último, e o mais interessante, Desbloqueio facial. Embora este possa parecer o mais emocionante, eu ficaria longe dele. Por quê? Porque não apresenta o mais alto nível de segurança de todos os métodos, e depois de ler vários fóruns, pode ser facilmente hackeado.
O conceito é que você segure o dispositivo no nível do rosto e pisque, para que o sistema reconheça que você é um ser humano real e não apenas uma imagem. Se você estiver disposto a correr o risco, poderá configurá-lo facilmente acessando as configurações do seu dispositivo, depois Segurança e, finalmente, Bloqueio de tela. Lá você pode escolher Desbloqueio facial. Imediatamente, ele informará que esse método é menos seguro do que um padrão, PIN ou senha e que alguém com a mesma aparência pode desbloquear seu tablet - a tecnologia simplesmente não é avançada o suficiente. Muitos sites de tecnologia podem dizer para você usar isso, digamos que não!
- Muitos usuários descuidam da segurança do Android
Criptografe seus dados
Às vezes, não basta configurar um método de desbloqueio na tela de bloqueio. Embora muitos ladrões provavelmente só queiram ganhar dinheiro vendendo seu dispositivo, se eles colocarem as mãos nele, pode haver apenas um bandido conivente por aí que está querendo cometer roubo de identidade. É por isso que os usuários devem dar um passo adiante e criptografar os dados em seu dispositivo, que só podem ser acessados com um PIN. Vá para as configurações do seu Nexus 7 e toque em Segurança seguido de Criptografar tablet. Esteja ciente de que a criptografia do seu dispositivo levará mais de uma hora, portanto, é melhor ter uma bateria totalmente carregada e mantê-la conectada, pois se a criptografia for interrompida, isso poderá resultar em perda de dados.

Ativar a rotação automática da tela
Pode parecer um pouco contra-intuitivo, mas a rotação da tela não está habilitada por padrão no Nexus 7. Como tal, você fica preso a uma tela fixa quando obtém o dispositivo e pode parecer complicado para um dispositivo com um tela muito maior do que apenas o seu smartphone padrão.
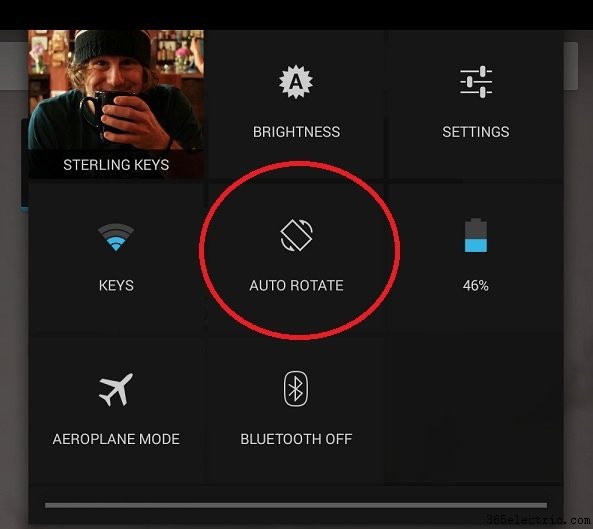
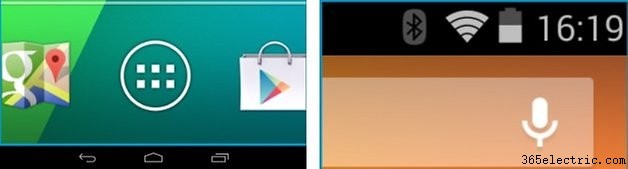
Existe uma maneira muito rápida de consertar isso e poder ajustar livremente sua tela para qualquer orientação que você queira segurar seu telefone, paisagem ou retrato. Basta deslizar para baixo no canto superior direito da tela para exibir suas
Configurações rápidas (isso pode ser uma dica por si só, pois muitos usuários nem sabem como acessar as Configurações rápidas!) e basta tocar no botão
Girar automaticamente square para habilitar ou desabilitar esse recurso. Voilá!
Ativar o zoom da tela
Há situações em que, quando você deseja obter um conteúdo específico de um site, como visualizar uma foto, deseja obter mais detalhes ou obter uma aparência ampliada. Bem, com o recurso de zoom de tela você pode ter uma “lupa imaginária” que paira em torno de sua tela.
Isso pode ser ativado indo para
Acesso Universal em suas configurações e escolhendo os
Gestos de ampliação opção. Quando ativado, toda vez que você faz um toque triplo na tela, você pode ampliá-la e, em seguida, usar um gesto de pinça para ampliar para ampliar ainda mais a tela. Para voltar a uma tela normal, basta tocar três vezes na tela novamente para voltar ao normal.
Precisa de mais dicas? Descubra como tornar seu Nexus 7 incrível novamente.
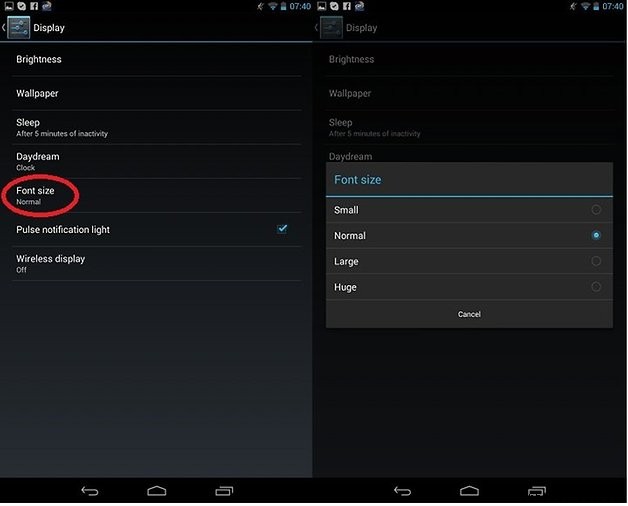
Texto maior
Não é muito intuitivo segurar o tablet muito perto do rosto, como é o caso da maioria dos smartphones. Since it makes more sense to hold this larger device further away from you for reading purposes, it is also common to find situations where the text size displayed is often too small to be read at a comfortable distance. You can increase the default text size through your settings to combat this annoyance and make it so default text, such as display by a web browser, is automatically enlarged.
To do so, head to your settings and go to
Display and
Font Size , where you can choose from four sizes for your default font. Similarly, you can get the same results by going to
Accessibility in your settings and and choosing the
Large Text opção.
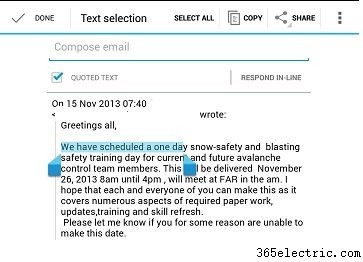
Copy and Paste
This may seem extremely trivial, but this is a very important feature when it comes to using tablets that can easily be overlooked just due to not knowing exactly how to do it. To select a portion of text that you want to use, just hold your finger over it for about two seconds. This will then highlight the text and a bunch of options will pop up at the top of your screen, such as copy, paste, cut, and more.
If you want to expand or constrict your highlighted portion of text, just use the two marking edges and drag them to the desired length that you want. It is hard to believe that there was a time on smartphones and tablets that this wasn’t even a standard feature.
- Do you feel your Google tablet is getting slow? Here are ways to speed up your Nexus 7.
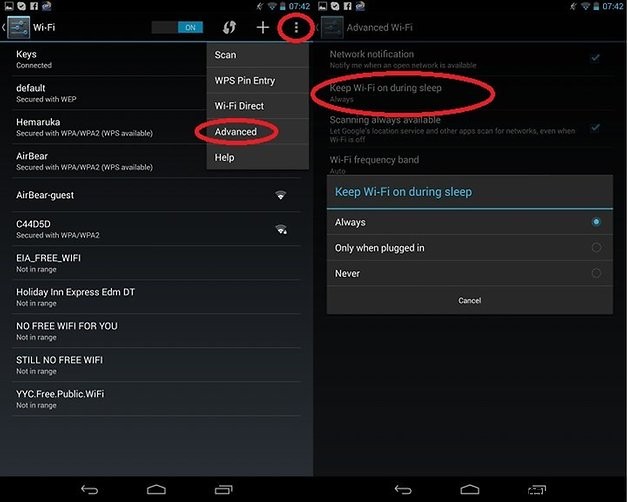
Disable WiFi during sleep mode
WiFi is a power hungry beast when it is being used, but did you know that by default that WiFi is still active, even when you’re not using your device or it is the middle of the night? Thankfully, your Nexus 7 has the option to disable using WiFi during these times that you can control.
If you head to your
WLAN settings and then tap in the top right corner and choose
Advanced , you’ll see a slew of options to choose from. By clicking on
Keep WiFi on during sleep , you can choose from either having it on all the time, only when the device is plugged in, or never.
Keep in mind, this will limit the connectivity of the device so if you rely on WiFi to get messages or push notifications, you won’t receive them again until you physically wake the device up.
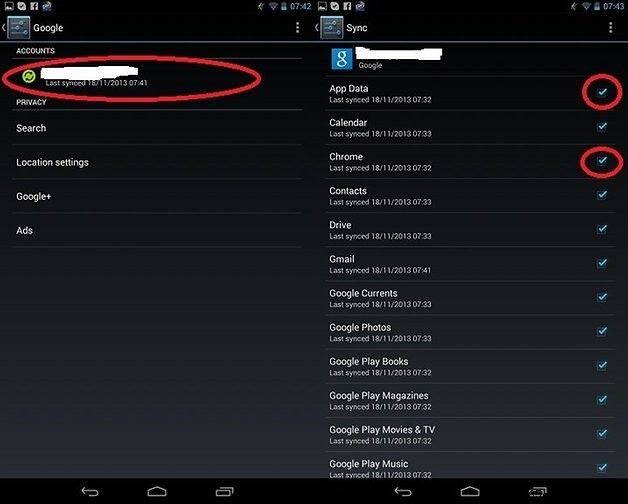
Disable auto sync on your accounts
Google automatically syncs all your Google accounts to your Nexus device, such as Google+, Gmail, and app data. This can be a bit cumbersome if you don’t necessarily want or need all that stuff on your device or just want to keep it separate, due to multiple accounts or whatnot.
In your settings, you can head down to the
Accounts area and click on whichever one you want to modify. In this case, we chose
Google . From there, you can then unclick all the data that you don’t want synced on this device automatically, whether it be Google Calendar items or even Google Photos.
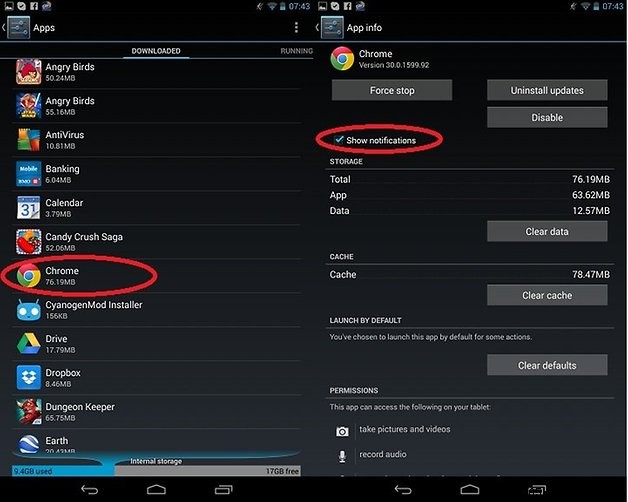
Disable app notifications
Do you have apps in which you constantly receive notifications from, but you really don’t want to see them anymore? If you head to the Apps portion of settings, you can select the offending app from the list of installed apps and then just uncheck the
Show Notifications option just at the top of the opened page. That’s all it takes to remove the ability for that app to continue sending you notifications.
So, those are some of our favorite little tid-bits for the Nexus 7. What are some of yours? Feel free to share them below in the comment section!
